
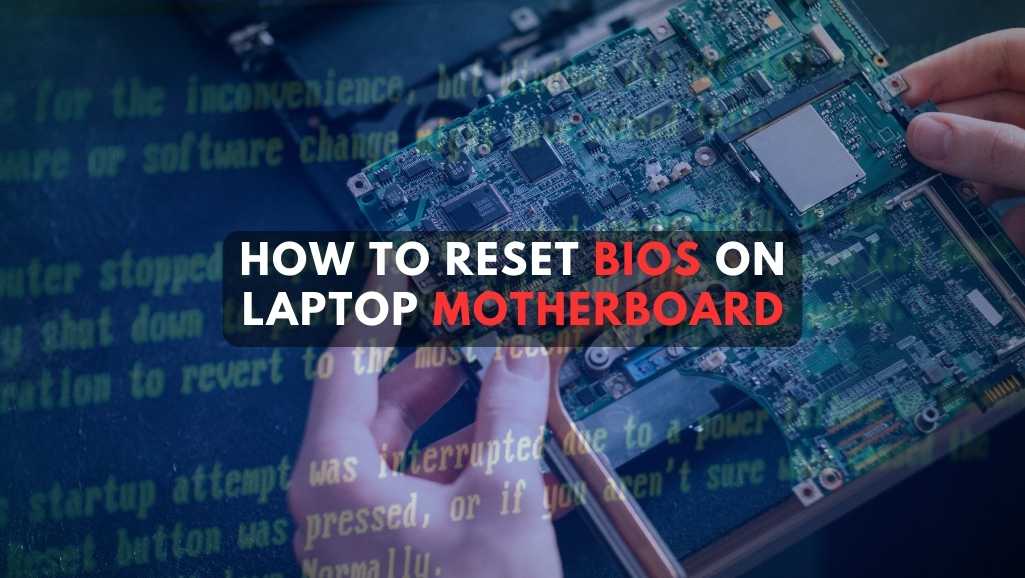
When it comes to maintaining the health and functionality of your laptop, understanding the role of the BIOS (Basic Input/Output System) is fundamental. Primarily, the BIOS serves as the critical bridge between your laptop’s hardware and its operating system. As such, knowing how to reset the BIOS on your laptop motherboard becomes a vital skill for troubleshooting and optimization.
In this comprehensive guide, we’ll walk you through each step of the reset process. We’ll cover everything from the basic preparations to the actual reset methods, and even delve into troubleshooting common issues that may arise. Whether you’re a seasoned techie or a novice, our goal is to equip you with the knowledge and confidence needed to successfully reset the BIOS on your laptop motherboard.
With clear, concise instructions and practical tips, you’ll learn not just the ‘how’ but also the ‘why’ behind each step of the BIOS reset process. So, let’s embark on this technical journey together and unlock the full potential of your laptop!
The laptop motherboard, often referred to as the mainboard or system board, is the central hub of your laptop. It’s a complex and crucial component that acts as the backbone, connecting and orchestrating the function of various hardware components. Understanding what a laptop motherboard is and its role is key to appreciating the intricacies of laptop maintenance, including tasks like how to reset the BIOS.
The Basic Input/Output System (BIOS) is an integral component of a laptop motherboard, acting as a catalyst in the boot-up process. When you power on your laptop, the BIOS is the first software to run. It checks and initializes all the key components, ensuring everything is in place for a smooth operation.
Accessing the BIOS Setup
1. What is Laptop Motherboard? The Heart of Your Computer
The laptop motherboard, often referred to as the mainboard or system board, is the central hub of your laptop. It’s a complex and crucial component that acts as the backbone, connecting and orchestrating the function of various hardware components. Understanding what a laptop motherboard is and its role is key to appreciating the intricacies of laptop maintenance, including tasks like how to reset the BIOS.
The Role of a Laptop Motherboard
- Central Platform: The motherboard is essentially a printed circuit board (PCB) that creates a platform for connecting all parts of the laptop. It houses the CPU (Central Processing Unit), RAM (Random Access Memory), hard drives, graphics cards, and more.
- Communication Facilitator: One of its primary functions is to facilitate communication between these components. It ensures that there is a harmonious exchange of data, allowing your laptop to function efficiently.
Components of a Laptop Motherboard
- Processor Socket: This is where the CPU is installed. It’s the brain of your laptop, handling most of the computational tasks.
- Memory Slots: These slots hold the RAM modules. RAM is crucial for multitasking and running complex programs.
- Expansion Slots: These are used for additional components like dedicated graphics cards, although in laptops, such additions are more limited than in desktops.
- BIOS Chip: This contains the BIOS (Basic Input/Output System), the software that starts your laptop and manages data flow between the OS and devices.
- Connectivity Interfaces: The motherboard also includes various ports for connectivity, including USB, HDMI, and Ethernet ports, among others.
Importance of the Laptop Motherboard
- System Stability and Performance: The quality and capabilities of a motherboard greatly influence the overall performance and stability of your laptop.
- Upgrade Limitations: The motherboard determines the upgrade capabilities of your laptop. It dictates the type and amount of RAM you can install, the processor upgrades you can make, and more.
2. Understanding BIOS in the Context of a Laptop Motherboard
The Basic Input/Output System (BIOS) is an integral component of a laptop motherboard, acting as a catalyst in the boot-up process. When you power on your laptop, the BIOS is the first software to run. It checks and initializes all the key components, ensuring everything is in place for a smooth operation.
BIOS: More Than Just Booting Up
However, the BIOS does much more than just boot your laptop. It manages data flow between your laptop’s operating system and attached devices like the hard disk, video adapter, keyboard, mouse, and printer. This functionality underscores its importance and why learning how to reset the BIOS on a laptop motherboard is crucial for maintaining your laptop’s health.Navigating BIOS Settings
Every laptop motherboard comes with a BIOS, equipped with a user interface. This interface allows you to customize settings according to your preferences and hardware specifications. You can alter boot sequences, manage memory settings, and adjust hardware configurations. For instance, if you add a new hard drive, you might need to visit the BIOS settings to ensure it’s recognized.BIOS and System Security
BIOS also plays a pivotal role in system security. It can set up passwords to prevent unauthorized access to your laptop. If you ever forget this password, knowing how to reset the BIOS on your laptop motherboard becomes indispensable.Upgrading BIOS Firmware
Occasionally, manufacturers release BIOS updates to fix bugs, add new features, or enhance existing ones. These updates can be crucial for the optimal performance of your laptop motherboard. Thus, understanding how to safely execute these updates is part of managing your laptop’s BIOS effectively.The Evolution of BIOS
It’s worth noting that modern laptops are gradually moving from traditional BIOS to UEFI (Unified Extensible Firmware Interface). UEFI offers more features, faster boot times, and supports larger hard drives. However, the fundamental principles of managing UEFI are similar to those of BIOS.The Link Between BIOS and Operating System
While the BIOS is independent of the operating system, it hands over control to it once the initial checks are complete. This handover is seamless but essential for your laptop’s functionality.Why Resetting the BIOS Matters
At times, the settings in the BIOS can go awry due to various reasons like incorrect configuration changes or hardware conflicts. Resetting the BIOS on your laptop motherboard restores it to factory settings, often resolving these issues. Therefore, understanding the reset process is a valuable skill for any laptop user. In conclusion, the BIOS is more than just a set of instructions on your laptop motherboard; it’s the foundation that ensures your laptop runs efficiently. By learning how to reset the BIOS on your laptop motherboard, you’re not just fixing immediate issues but also ensuring the long-term health and performance of your laptop. This knowledge empowers you to take control of your device’s functionality and maintain it at its best.4. How To Reset Bios On Laptop Motherboard
Resetting the BIOS on your laptop motherboard can resolve various issues and is a crucial troubleshooting step. There are several methods to accomplish this, each suited for different scenarios.Method 1: Through BIOS Setup Utility
Photo via vintaytime
- Starting the Process: To begin, restart your laptop. As it boots up, press the key that opens the BIOS menu. This key varies but is often F2, Del, F10, or Esc.
- Navigating the Menu: Once in the BIOS setup, use your keyboard to navigate. You won’t be able to use your mouse here.
- Locating the Reset Option: Look for an option labeled ‘Restore Defaults’, ‘Load Default’, or ‘Load Optimal Defaults’. This is typically found in the ‘Exit’ menu.
- Selecting the Reset Option: Using your keyboard, select the appropriate option to reset the BIOS.
- Confirmation: You’ll likely need to confirm your choice. Select ‘Yes’ to proceed.
- Saving Changes: Finally, save your changes and exit the BIOS. Your laptop will restart with the default BIOS settings.
Method 2: Using a Hardware Reset
Locating and Removing the CMOS Battery- Preparation: Before you start, ensure your laptop is off and disconnected from power. Remove the battery if possible.
- Accessing the Motherboard: Open the back panel of your laptop. You might need a screwdriver for this.
- Identifying the CMOS Battery: Look for a small, round battery on the motherboard.
- Removing the Battery: Carefully remove the battery. You may need to gently pry it out.
- Waiting Period: After removing the battery, wait for about 5 minutes. This waiting period allows the BIOS settings to reset.
- Reinserting the Battery: Place the battery back into its slot on the motherboard.
- Reassembling the Laptop: Put the back panel of your laptop back on and secure it.
Method 3: Using the Jumper Method
Locating and Adjusting the BIOS Jumper- Finding the Jumper: On some laptops, you’ll find a jumper specifically for resetting the BIOS. It’s usually near the CMOS battery.
- Adjusting the Jumper: The jumper has pins that can be covered with a small plastic clip. Move the clip to the reset position.
- Powering On: With the jumper in the reset position, power on your laptop briefly.
- Powering Off and Resetting the Jumper: Turn off your laptop and return the jumper to its original position.
Method 4: Manufacturer Specific Methods
Different laptop brands may have unique methods for resetting the BIOS.- Dell: For some Dell models, pressing a specific key combination (like Ctrl + Esc) at startup can reset the BIOS.
- HP: HP laptops might have a dedicated BIOS recovery tool, accessible through a key press at startup.
- Lenovo: Lenovo often uses the Novo button, a small button next to the power button, to access BIOS reset options.
Common Issues During BIOS Reset
- Laptop Fails to Boot: If your laptop doesn’t boot after a BIOS reset, try repeating the process or check for other underlying issues.
- Incorrect Time and Date: Resetting BIOS can revert time and date settings. Ensure you adjust these in the BIOS setup.
- Hardware Not Recognized: If hardware like your hard drive isn’t recognized, check the BIOS settings to ensure they are configured correctly.
5. Common Issues After Resetting BIOS on a Laptop Motherboard
Resetting the BIOS on your laptop motherboard can sometimes lead to unforeseen issues. Understanding how to troubleshoot these problems is as important as knowing how to reset the BIOS itself.1: Laptop Fails to Boot After BIOS Reset
- Double-Check the Process: If your laptop doesn’t boot after a BIOS reset, first ensure you’ve followed the correct reset procedure.
- Inspect Hardware Connections: Loose hardware components can cause boot issues. Open your laptop’s back panel and check if all components are properly seated.
- Clear CMOS Again: Try clearing the CMOS once more, either via the BIOS menu or by removing the CMOS battery for a few minutes.
2: Incorrect Date and Time Settings
- Access BIOS Settings: Restart your laptop and access the BIOS settings.
- Adjust Date and Time: Navigate to the date and time settings. Correct them manually.
3: Hardware Not Recognized
- Check BIOS Settings: After a BIOS reset, the settings revert to default, which might not be compatible with all your hardware. Access the BIOS settings and manually configure them to recognize your hardware.
- Update Drivers: Ensure that your laptop’s drivers are up to date, especially if you’ve recently added new hardware.
4: BIOS Password Issues
- Reset Using BIOS Setup: If you know your BIOS password, enter the BIOS setup and remove the password from the security settings.
- Hardware Reset for Forgotten Password: If you’ve forgotten the BIOS password, a hardware reset of the BIOS might be necessary. This can involve removing the CMOS battery or using a jumper on the motherboard.
5: Overheating or Performance Issues
- Check System Monitoring in BIOS: After resetting the BIOS, system monitoring settings revert to default. These settings might not be optimized for your specific usage, leading to overheating or performance issues.
- Adjust Fan Settings and Performance Options: Tweak these settings in the BIOS to better suit your laptop’s configuration and usage patterns.
6: Operating System Not Loading
- Check Boot Order: Ensure the boot order in BIOS is set correctly, with your primary hard drive or SSD as the first option.
- Look for System Repair Options: If the issue persists, you might need to use system repair options provided by your operating system.
7: Connectivity Problems
- Review BIOS Peripheral Settings: Issues like non-functioning USB ports can arise if peripheral settings in the BIOS are not configured correctly. Review and adjust these settings.
6. Post-Reset Steps for BIOS on a Laptop Motherboard
After successfully resetting the BIOS on your laptop motherboard, it’s essential to take a few additional steps. These ensure your laptop runs smoothly with its newly restored settings.1. Verifying the Success of the Reset
- Check BIOS Version: Initially, verify that the reset was successful. Access the BIOS upon startup and check the version and settings. They should reflect the default values.
- Inspect System Information: Ensure that the BIOS correctly recognizes all hardware components of your laptop. Pay special attention to the processor, RAM, and hard drives.
2. Configuring BIOS Settings
- Adjust Date and Time: One of the first things to do is to set the correct date and time in the BIOS. This step is crucial for system logs and file management.
- Set Boot Order: Configure the boot order according to your preference. Typically, you would set the hard drive or SSD containing the operating system as the primary boot device.
- Configure Hardware Settings: If your laptop has specific hardware, like a dedicated GPU, ensure these components are correctly configured in the BIOS.
3. Updating BIOS Firmware
- Check for Updates: Post-reset, check if there’s an available BIOS update. Manufacturers often release updates to improve performance and security.
- Follow Update Instructions Carefully: If you find an update, follow the manufacturer’s instructions carefully to update the BIOS firmware.
4. Monitoring System Performance
- Observe Boot Time and Stability: After the reset, monitor your laptop’s boot time and overall stability. Any significant changes can indicate the need for further adjustments in the BIOS.
- Check Peripheral Functionality: Ensure that all connected devices and peripherals function correctly. If not, you may need to tweak the relevant settings in the BIOS.
5. Creating a BIOS Backup
- Backup Current Settings: Once you have configured your BIOS settings, consider creating a backup. This backup can be invaluable if you need to reset the BIOS in the future.
7. Preventive Measures and Maintenance for Your Laptop Motherboard
Maintaining the health of your laptop’s motherboard is crucial for long-term performance. While knowing how to reset the BIOS on a laptop motherboard is essential, preventing issues before they arise is even more beneficial. Here are some key preventive measures and maintenance tips.Regular BIOS Updates
- Stay Updated: Regularly check for BIOS updates from your laptop manufacturer. These updates often contain important security patches and performance improvements.
- Update Safely: Always follow the manufacturer’s instructions for BIOS updates. Incorrect updating can lead to serious issues.
Managing BIOS Settings Wisely
- Avoid Unnecessary Changes: Only alter BIOS settings if you fully understand their implications. Unwarranted changes can lead to system instability.
- Record Changes: Keep a log of any changes you make. This record can be invaluable for troubleshooting future issues.
Keeping the Laptop Clean
- Regular Cleaning: Dust and debris can accumulate inside your laptop, potentially causing overheating and damage. Regularly clean the vents and, if comfortable, open the laptop to clean internal components.
- Use Appropriate Tools: Use tools like compressed air and soft brushes. Avoid liquids and harsh chemicals.
Ensuring Adequate Cooling
- Monitor Temperatures: Keep an eye on your laptop’s temperature. Overheating can lead to motherboard damage.
- Use Cooling Aids: Consider using a laptop cooling pad, especially if you use resource-intensive applications.
Handling the Laptop with Care
- Physical Handling: Be gentle when transporting your laptop. Sudden movements or drops can damage internal components, including the motherboard.
- Environment: Avoid using your laptop in extreme temperatures or humid environments. These conditions can adversely affect motherboard components.
Regular Hardware Checks
- Periodic Inspections: Occasionally check the condition of internal components like the RAM, SSD/HDD, and battery. Ensure they are securely attached and functioning properly.
- Professional Maintenance: If you’re not comfortable checking these yourself, consider periodic professional servicing.
Power Management
- Surge Protection: Use a surge protector to shield your laptop from electrical surges. Sudden power spikes can damage the motherboard.
- Battery Care: Properly manage your laptop’s battery. Avoid leaving it plugged in all the time, as this can reduce battery life and potentially affect the motherboard.
Conclusion: Mastering BIOS Reset on Your Laptop Motherboard
In conclusion, understanding how to reset the BIOS on your laptop motherboard is a crucial skill for any laptop owner. This guide has walked you through every step of the process, from preparation to post-reset procedures. We’ve covered not only the ‘how’ but also the ‘why’ behind each action, providing you with a comprehensive understanding of the BIOS reset process.Key Takeaways
- Empowerment through Knowledge: By learning the various methods of resetting the BIOS, you are now equipped to tackle common laptop issues independently.
- Troubleshooting Skills: We’ve also delved into troubleshooting common post-reset issues, enhancing your ability to diagnose and resolve problems effectively.
- Maintenance Insights: Additionally, the preventive measures and maintenance tips provided will help you maintain the health of your laptop motherboard, reducing the need for frequent resets.
The Bigger Picture
- Long-Term Benefits: This knowledge doesn’t just solve immediate problems. It contributes to the longevity and optimal performance of your laptop.
- Confidence in Tech Handling: Understanding your laptop’s BIOS builds confidence in handling and making the most out of your technology.