How To Check CPU-Motherboard Compatibility

When building or upgrading a computer, ensuring that the CPU and motherboard are compatible is crucial for the system’s performance and stability. This compatibility is not just about physical fit but also involves technical specifications and power requirements. By understanding how to check for CPU-motherboard compatibility, you can make informed decisions that lead to a successful and efficient computer build. This article provides a comprehensive guide on how to navigate this process, from identifying your components and understanding their compatibility, to using online tools and considering future upgrades.

Key Takeaways

  • Understanding the compatibility between your CPU and motherboard is essential for a successful computer build.
  • Identifying both your CPU and motherboard, including their socket types and form factors, is the first step in checking compatibility.
  • Technical compatibility involves considerations such as BIOS/UEFI firmware, power requirements, and RAM compatibility.
  • Online tools and resources, including manufacturer’s compatibility lists and third-party checkers, can greatly aid in verifying compatibility.
  • When planning upgrades, consider not only current compatibility but also future-proofing your build and compatibility with other components.

Understanding CPU-Motherboard Compatibility

Identify Your CPU

Picture of a hand holding a CPU (Central Processing Unit) extracted from a laptop, showcasing the delicate process of removing and replacing hardware components.

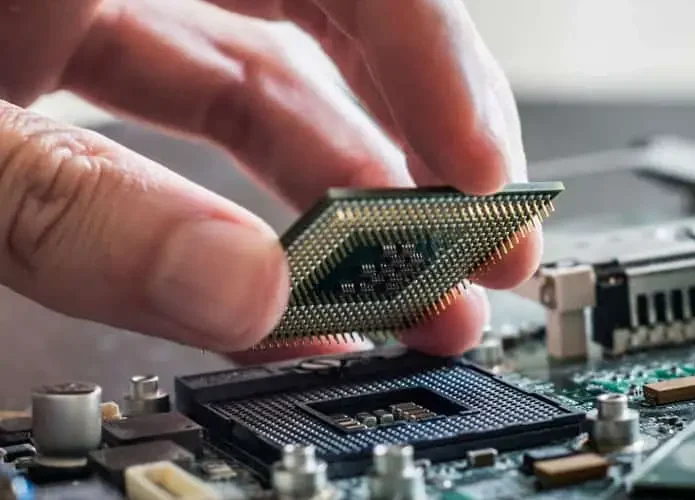
Close-up picture of a CPU (Central Processing Unit) installed in a laptop

Identifying your CPU is the first step in ensuring compatibility with a motherboard. The Central Processing Unit (CPU) is the brain of your computer, responsible for executing instructions and processing data. To identify your CPU, you can use the system information tool on your computer or check the original packaging if available.
Note: The exact method to access system information varies depending on your operating system.
Here’s a simple way to identify your CPU on different operating systems:
  • Windows: Press Win + Pause/Break to open System Properties.
  • macOS: Click on the Apple menu > About This Mac.
  • Linux: Use the command lscpu in the terminal.
Identifying the model and generation of your CPU is crucial as it determines the socket type and, consequently, the motherboards that will be compatible with your CPU.

Identify Your Motherboard

Mainboard

Motherboard Aorus Asus

Identifying your motherboard is crucial for ensuring compatibility with your CPU. The motherboard acts as the central hub for your computer’s components, interfacing with everything from your CPU to your RAM and storage devices. To identify your motherboard, check the documentation that came with your PC or motherboard. Alternatively, you can open your computer case and look for the model number printed directly on the motherboard. This number is usually located near the CPU socket or along one of the edges. Manufacturers often have unique naming conventions for their motherboards, which can include a series of letters and numbers. Understanding these can help you when searching for compatibility information online.
Remember, the exact model of your motherboard is key to finding compatible CPUs and other components.
Here is a simple list to guide you through the identification process:
  • Look for original packaging or documentation.
  • Inspect the motherboard for a model number.
  • Use system information tools to find the model number if you cannot access the motherboard physically.
  • Consult the manufacturer’s website for detailed information about your motherboard.

Understanding Socket Compatibility

Once you’ve identified your CPU and motherboard, the next crucial step is to ensure socket compatibility. The socket is essentially the physical and electrical interface between the motherboard and the CPU. Different CPUs require different socket types, which are not interchangeable.
It’s vital to match the CPU’s socket type with that of the motherboard to avoid any compatibility issues.
Here’s a quick overview of common socket types and their corresponding CPUs:
  • Intel CPUs typically use LGA 1151, LGA 1200, or LGA 1700 sockets.
  • AMD CPUs often require AM4, sTRX4, or AM5 sockets.
Understanding the specific socket type your CPU requires will greatly simplify the process of ensuring compatibility with your motherboard. This knowledge also aids in narrowing down your motherboard options, making the selection process more straightforward.

Checking Physical Compatibility

CPU Socket Types

Understanding the socket type of your CPU and motherboard is crucial for compatibility. The socket is essentially the physical interface through which the CPU communicates with the motherboard. Different CPU manufacturers, such as Intel and AMD, use distinct socket types that are not interchangeable. The key to ensuring compatibility is knowing the specific socket type your CPU requires. Here’s a brief overview of common socket types for both Intel and AMD processors:
  • Intel: LGA 1151, LGA 1200, LGA 1700
  • AMD: AM4, sTRX4, AM5
Remember, even within the same brand, different generations of CPUs may require different sockets.
When planning an upgrade or building a new PC, always verify the socket type of both the CPU and motherboard to ensure they match. Mismatched components can lead to installation issues or even damage to the hardware.

Form Factor Considerations

After ensuring the CPU and motherboard socket types match, it’s crucial to consider the form factor. The form factor determines the size and layout of the motherboard, which must fit within your computer case. Common form factors include ATX, Micro-ATX, and Mini-ITX, each offering different dimensions and expansion capabilities.
  • ATX: Standard size, suitable for most desktop cases, offers ample expansion slots.
  • Micro-ATX: Smaller than ATX, fits in many ATX cases, fewer expansion slots.
  • Mini-ITX: The smallest, designed for compact cases, very limited in expansion.
Note: Always verify the dimensions of your case to ensure compatibility with the motherboard’s form factor.
While the form factor primarily affects physical fit, it can also influence the thermal performance of your system. Smaller form factors may restrict airflow and cooling options, making it essential to plan your build accordingly. Ensuring compatibility between the CPU, motherboard, and case form factor is vital for a successful and efficient build.

Evaluating Technical Compatibility

BIOS/UEFI Firmware Compatibility

The BIOS/UEFI firmware is a crucial component that ensures your CPU and motherboard can communicate effectively. Before installing a new CPU, it’s essential to check if your motherboard’s firmware supports the specific model. Not all motherboards automatically support all CPUs, even if the socket type matches.
Ensure your motherboard’s firmware is up-to-date to avoid compatibility issues.
To check compatibility, visit the motherboard manufacturer’s website and look for a CPU support list. This list will detail which CPUs are supported and the minimum firmware version required. If your CPU is not listed or your firmware is outdated, you may need to update the BIOS/UEFI before proceeding.
  • Step 1: Identify your motherboard model.
  • Step 2: Visit the manufacturer’s website.
  • Step 3: Find the CPU support section.
  • Step 4: Check for your CPU model and required firmware version.
Updating the firmware can be a delicate process, and it’s recommended to follow the manufacturer’s instructions closely to avoid damaging your motherboard.

Power Requirements

Ensuring your CPU and motherboard have compatible power requirements is crucial for the stability and longevity of your system. Mismatched power specifications can lead to system instability or even hardware damage. When considering power requirements, it’s important to look at the TDP (Thermal Design Power) of the CPU and ensure the motherboard can support this power draw. Additionally, the power supply unit (PSU) must be capable of providing sufficient power to both the motherboard and CPU, along with other components.
Make sure your PSU has enough wattage to support all components and some headroom for future upgrades.
Here’s a quick checklist to help you evaluate power requirements:
  • Verify the CPU’s TDP and compare it with the motherboard’s supported TDP.
  • Check the PSU wattage and ensure it exceeds the total power consumption of your build.
  • Consider the power connectors available on the motherboard and ensure they match those required by the CPU.
  • Remember to account for other components, such as GPUs and storage devices, which also contribute to the total power draw.
Understanding and matching power requirements is a step towards building a stable and efficient PC setup.

RAM Compatibility

Ensuring your motherboard supports the type and speed of RAM you intend to use is crucial for system stability and performance. Motherboards specify the RAM type, such as DDR4, and maximum speed they support. This compatibility is vital because using incompatible RAM can lead to system instability or failure to boot. RAM types are not interchangeable. For example, a DDR4 slot cannot accommodate DDR3 memory sticks. It’s essential to check the motherboard’s specifications to ensure compatibility.
Make sure to also consider the maximum capacity of RAM supported by your motherboard. This ensures you won’t face limitations when planning future upgrades.
Here’s a quick reference table for common RAM types and their compatibility:
RAM Type Compatibility Note
DDR3 Not compatible with DDR4 slots
DDR4 The current standard for new builds
DDR5 Emerging standard, ensure motherboard support

Using Online Tools and Resources

Manufacturer’s Compatibility Lists

When embarking on the journey of building or upgrading a computer, one of the first steps should be to consult the manufacturer’s compatibility lists. These lists, often found on the manufacturer’s website, detail which CPUs are compatible with which motherboards, and vice versa. This is crucial for ensuring that the components you choose will work together seamlessly.
It’s important to remember that not all CPUs and motherboards are created equal. Compatibility is key to a successful build.
Manufacturers typically organize their compatibility lists by product model, making it easy to find the information you need. Here’s a simple example of what such a list might look like for a hypothetical motherboard:
  • Motherboard Model: XYZ123
    • Compatible CPUs:
      • Intel Core i7-9700K
      • Intel Core i5-9600K
      • AMD Ryzen 5 3600
By consulting these lists, you can avoid the common pitfall of purchasing incompatible components. Additionally, these lists are often updated to include new processors, ensuring that you have the most current information at your fingertips.

Third-Party Compatibility Checkers

Third-party compatibility checkers offer a convenient way to ensure your CPU and motherboard are compatible without the need to manually compare specifications. These tools often provide a user-friendly interface where you can select your components from a dropdown menu or enter their model numbers to check compatibility. Using these tools can significantly simplify the process of building or upgrading a PC. They can instantly tell you whether the components you’ve chosen will work together, saving you time and potentially costly mistakes.
Remember, while third-party tools are helpful, they should not be the sole basis for your compatibility checks. Always cross-reference the information with the manufacturer’s documentation.
Popular third-party checkers include PCPartPicker and BuildMyPC. These platforms not only check for CPU-motherboard compatibility but also for other components like RAM, GPUs, and power supplies, ensuring a comprehensive compatibility assessment.
  • PCPartPicker
  • BuildMyPC
While these tools are invaluable, it’s important to approach them with a critical eye. Not all checkers are updated in real-time, which means they might not reflect the very latest hardware releases or firmware updates.

Upgrading Considerations

Future-Proofing Your Build

When planning for the future, it’s crucial to consider how your current choices will affect your ability to upgrade. Choosing components that support upcoming standards can save you from needing a complete overhaul later. For example, opting for a motherboard with PCIe 4.0 or 5.0 support ensures compatibility with the latest GPUs and storage solutions.
While immediate compatibility is essential, thinking ahead can significantly reduce future costs and compatibility headaches.
Consider the following factors to future-proof your build:
  • CPU socket type that supports newer processors
  • Availability of BIOS updates for future CPU generations
  • Support for high-speed RAM
  • Expansion slots for additional GPUs or storage
By focusing on these areas, you can ensure that your system remains versatile and adaptable to future technology trends and requirements. This approach not only extends the lifespan of your build but also maximizes its performance potential over time.

Compatibility with Other Components

When upgrading or building a new PC, considering the compatibility of the CPU with other components is crucial. This ensures a balanced system where all parts work harmoniously together. For instance, a high-performance CPU might require a more powerful graphics card to prevent bottlenecks.
Note: Always check the compatibility of the CPU with the GPU, storage devices, and power supply to avoid performance issues.
Graphics cards, in particular, need careful consideration. The CPU and GPU should be matched in terms of performance to avoid bottlenecks. Here’s a simple list to help you evaluate compatibility with other key components:
  • Graphics Card: Ensure it matches the CPU’s performance to avoid bottlenecks.
  • Storage Devices: SSDs and HDDs should be compatible with the motherboard’s interface.
  • Power Supply: The PSU should have enough wattage to support all components, including the CPU.
  • RAM: Ensure the motherboard supports the type and speed of RAM you plan to use.
Remember, a well-matched system not only performs better but also ensures longevity and stability of the components. It’s essential to do thorough research or consult with experts to achieve the best compatibility across all parts of your build.

Troubleshooting Compatibility Issues

Common Compatibility Problems

One of the most frequent issues when pairing CPUs with motherboards is socket incompatibility. This occurs when the CPU’s pins or contacts do not match the motherboard’s socket layout, preventing a physical connection. Another common problem involves the BIOS/UEFI firmware not being up-to-date, which can lead to the motherboard failing to recognize the CPU. This is particularly true for newer CPUs on older motherboards.
Ensure your motherboard’s firmware is updated to the latest version to avoid compatibility issues.
  • Incorrect power supply connections
  • Inadequate cooling solutions
  • RAM slots not matching the CPU’s memory requirements
These issues can often be resolved by consulting the motherboard’s manual or seeking advice from the manufacturer’s support team.

How to Resolve Compatibility Issues

Resolving compatibility issues between your CPU and motherboard can often seem daunting, but with the right approach, it can be straightforward. First, identify the specific issue you’re facing, whether it’s a physical mismatch, power insufficiency, or a BIOS/UEFI firmware incompatibility.
  • Verify the CPU and motherboard socket types match.
  • Ensure the BIOS/UEFI firmware is updated to the latest version that supports your CPU.
  • Check that the power supply unit (PSU) provides adequate power for both the CPU and motherboard.
  • Confirm RAM compatibility, including type, speed, and maximum capacity.
If you’re unable to resolve the issue after these steps, consider consulting with the hardware manufacturer or a professional technician for further assistance.
In some cases, resolving compatibility issues may require replacing one or more components. While this can be frustrating, it’s important to remember that ensuring compatibility is crucial for system stability and performance. Patience and thoroughness in troubleshooting can save time and resources in the long run.

Conclusion

Ensuring CPU-motherboard compatibility is crucial for building a functional and efficient computer system. By understanding the importance of socket compatibility, checking the chipset support, verifying the form factor, and considering future upgrades, you can make informed decisions when selecting your components. Remember, a compatible CPU and motherboard are the foundation of any good PC build, so take the time to research and verify their compatibility to avoid any potential issues down the line.

Frequently Asked Questions

How do I identify my CPU and motherboard?

To identify your CPU, you can check the system information on your computer or use a system information tool. For the motherboard, you can look at the physical board for a model number, consult your computer’s manual, or use a system information software to get detailed information.

What is socket compatibility and why is it important?

Socket compatibility refers to the physical and electrical interface between the CPU and motherboard. It’s crucial because it determines whether a CPU can physically fit and function correctly on a motherboard. Different CPUs require different socket types, so compatibility is key for a successful build.

What are the main considerations for physical compatibility between a CPU and motherboard?

The main considerations for physical compatibility include the CPU socket type, which must match between the CPU and motherboard, and the form factor of the motherboard, which affects the size and layout of the components on the board.

How can I check BIOS/UEFI firmware compatibility with my CPU?

To check BIOS/UEFI firmware compatibility, you can visit the motherboard manufacturer’s website and look for a list of supported CPUs for your motherboard model. This list will also include the minimum firmware version needed for each CPU.

What online tools can help me check CPU-motherboard compatibility?

Online tools like the manufacturer’s compatibility lists, available on their websites, and third-party compatibility checkers can help you determine if your CPU and motherboard are compatible. These tools often require you to input your components’ model numbers for a compatibility assessment.

What should I do if I encounter compatibility issues after assembling my PC?

If you encounter compatibility issues, first verify that all components are correctly installed and seated. Check the motherboard’s manual and the CPU’s specifications for any compatibility notes. If issues persist, consult online forums, the manufacturer’s support, or consider seeking professional help to diagnose and resolve the issue.

Update and Maintain Your PC with Volta PC Upgrade & Repair

Keep your PC in top condition with Volta PC Upgrade & Repair. Whether you need an upgrade for better performance or a thorough cleaning to keep your system running smoothly, their team has you covered. Specializing in both hardware upgrades and software updates, Volta PC Upgrade & Repair ensures your computer stays up-to-date and efficient. Trust them for reliable and comprehensive PC maintenance services.

Contact Volta PC Upgrade & Repair Today!

  • Address:
    • Tai Seng Branch: 8 Burn Road #01-04, Trivex, Singapore 369977
    • Jurong Branch: Blk 132 #01-279C, Jurong Gateway Road, Singapore 6001324
  • ContactWhatsapp us | Call 69500453 | Telegram us
X