
How To Partition Hard Disk Without Formatting: Ultimate Laptop Repair
Have you ever considered partitioning your hard disk? It’s a clever way to organize your files and improve your computer’s performance. Moreover, it can make
Have you ever considered partitioning your hard disk? It’s a clever way to organize your files and improve your computer’s performance. Moreover, it can make your system more efficient and your data more manageable.
Understandably, the thought of messing with hard disk partitions can be daunting. After all, nobody wants to risk losing their precious data. Fortunately, there’s a safe way to do it without formatting.
Throughout this guide, you’ll learn the what, why, and how of disk partitioning. We’ll cover everything from basic concepts to advanced techniques. And we’ll do it all in a conversational tone, with easy-to-follow instructions.
Table of Content:
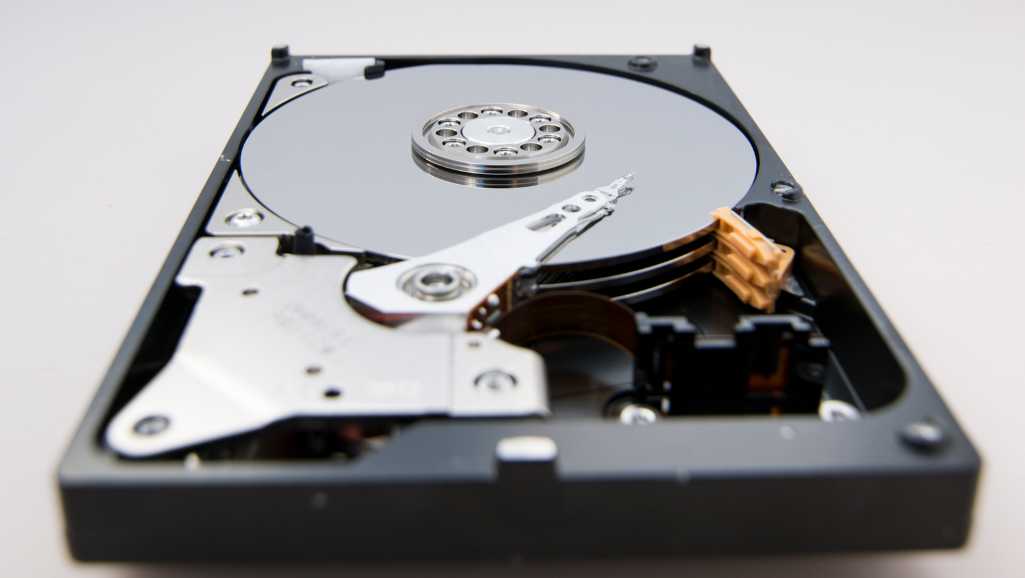
Disk partitioning is a process that divides a hard disk into separate sections, known as partitions. These partitions function as distinct units. Each one appears to your operating system as a unique drive, even though they reside on the same physical hard disk. This method organizes your data efficiently and can enhance your computer’s performance.
Formatting a disk is often mistaken as a requirement for partitioning. However, this is not the case. You can partition a hard drive without formatting, which preserves your data. Let’s delve into why this approach is beneficial.
Firstly, the most obvious reason is data preservation. Formatting wipes your data, which is not ideal if you have important files. Partitioning without formatting allows you to keep your data intact during the process.
Secondly, it saves time. Formatting a large drive can be time-consuming. By avoiding this step, you can partition your hard disk much quicker.
Thirdly, organizing your files becomes simpler. With separate partitions, you can allocate space for different types of data. For example, one for your operating system and another for personal files.
Fourthly, partitioning without formatting can boost your system’s performance. It helps in managing files more effectively and may speed up your computer’s search algorithm when looking for data.
Partitioning without formatting involves resizing existing partitions to create new ones from the unallocated space. This way, you maintain your data and gain additional partitions for better organization and efficiency.
Both Windows and Mac have built-in tools for this task. For instance, Windows features the Disk Management tool. Mac users have Disk Utility. These programs let you adjust partition sizes without formatting.
Additionally, you can use third-party software. These tools often provide more flexibility. They come with user-friendly interfaces and additional features. This can make the process even more accessible.
In essence, disk partitioning without formatting is a smart move. It’s about keeping your data safe while organizing it better. Moreover, it’s a time-efficient approach that can even enhance your computer’s performance. Always remember to back up your data before starting, just to be extra safe.
Remember, the goal is to make your hard disk work for you in the most efficient way possible. Partition wisely, and your computer will thank you for it!
Before you dive into partitioning, you must check your hard disk’s compatibility. Luckily, this is a straightforward process. Firstly, ensure your disk’s file system supports partitioning without formatting. Most modern hard disks use the NTFS file system on Windows, which is suitable for this process.
Moreover, assess the health of your hard disk. Healthy disks are crucial for partitioning without data loss. Windows users can check disk health using the CHKDSK command. Similarly, Mac users have the Disk Utility app for this purpose. These tools scan for errors and fix them before you partition.
Furthermore, adequate space is essential. Your hard disk must have enough free space to create a new partition. Without this space, partitioning is not possible. Use your operating system’s tools to check the available disk space.
Transitioning to the next point, you need the right tools. As mentioned earlier, Windows offers Disk Management, and Mac provides Disk Utility. These tools give you insights into your disk’s layout. They show existing partitions and the unallocated space available.
Besides, third-party software can be helpful. Some tools offer more detailed information about your disk. They may even suggest the best ways to partition, based on your disk’s status.
To wrap up, telling if your disk can be partitioned without formatting is simple. Check the file system, ensure disk health, and confirm there’s enough space. Then, choose the appropriate tool to get the job done. With these checks complete, you’re ready to partition your hard disk safely and efficiently. Keep your data intact and make the most of your hard disk’s potential!
Embarking on disk partitioning requires preparation. It’s like mapping a journey before setting out. Here’s how to get started.
Firstly, back up your data. It’s a non-negotiable step. Use an external drive or cloud storage for your backup. This way, you ensure all your important files are safe.
Secondly, ensure your system meets the necessary requirements. Your computer must have the latest updates installed. These updates often include essential drivers that facilitate partitioning.
Moreover, clean up your hard disk. Delete unnecessary files and uninstall unused programs. This step will free up space, making partitioning smoother.
Next, consider defragmenting your hard drive, especially if it’s an HDD. Defragmentation consolidates fragmented files and frees up contiguous space on your disk. It’s a key step for older drives.
Furthermore, gather the right tools. For Windows, you’ll use Disk Management. Mac users will turn to Disk Utility. Familiarize yourself with these tools beforehand.
Additionally, plan your partition sizes. Think about how you’ll use each partition. Allocate enough space for your operating system, applications, and personal files.
Finally, disable your antivirus software temporarily. This software can interfere with the partitioning process. Remember to enable it again once you’re done.
In conclusion, these preliminary steps are crucial for a smooth partitioning process. They protect your data and prepare your system. Follow these steps, and you’ll be ready to partition your hard disk without any hitches. It’s all about ensuring a safe and efficient experience. Now, let’s partition that drive!
Starting the process of shrinking a partition is quite straightforward. Let’s go through the steps one by one.
Firstly, access Disk Management. You can find this tool by right-clicking on ‘This PC’ on your desktop. Then choose ‘Manage’ and navigate to ‘Storage’ > ‘Disk Management’.
Once there, locate the partition you plan to shrink. Ensure it has sufficient free space. Right-click on it and select ‘Shrink Volume’.
A dialog box will appear, showing the size before shrink and the available space. Here, enter the amount of space you wish to free up. Remember, it’s measured in megabytes.
After entering the desired amount, click ‘Shrink’. The process will start. It may take some time, depending on the size of the partition.
Following the shrink operation, you’ll see unallocated space. This space will appear as a black bar in Disk Management. It’s now ready for new partitions.
Moreover, there are a few tips to ensure a smooth process. Firstly, don’t use the computer for other tasks while shrinking the volume. Secondly, if the shrink option is greyed out, check for file system errors. Running CHKDSK can often resolve this issue.
Furthermore, avoid interrupting the shrinking process. An interruption can cause data loss. Therefore, ensure your computer is plugged into a power source if it’s a laptop.
In conclusion, shrinking an existing partition is not complex. Follow these steps, and you’ll have unallocated space in no time. With this space, you can create new partitions to organize your files better. Now you’re set for the next step: creating a new partition!
Once you’ve shrunk a partition and have unallocated space, the next step is exciting. You’re ready to create a new partition from this space. And yes, you can do this without any formatting involved.
Firstly, go back to Disk Management. Here, you’ll see the unallocated space you just created. It’s time to put it to good use.
Right-click on the unallocated space. Select ‘New Simple Volume’ from the context menu. This will launch the New Simple Volume Wizard.
The wizard will prompt you to specify the volume size. Ensure this matches the unallocated space. Alternatively, you can create multiple smaller partitions.
Next, you’ll assign a drive letter or path. This action makes the new partition accessible in Windows Explorer.
Yes, we mentioned no formatting, but stay with us! This is a quick format, not a full one. It won’t affect your existing data. You’ll need to format the new partition to use it, choosing a file system like NTFS or FAT32.
Finally, finish the wizard. Review your choices and click ‘Finish’. Voilà! Your new partition is ready to use.
Now, you have a new partition, just like that. It will appear in Windows Explorer as a new drive. You can start using it immediately to organize your files.
In conclusion, creating a new partition from unallocated space is simple. It’s also safe, as it doesn’t involve formatting existing data. Follow these steps, and you’ll enhance your storage organization in no time.
Creating a new partition can revolutionize how you manage data. It’s an efficient way to categorize and segregate different types of files. With your new partition ready, organizing your digital life just got easier!
Adjusting partition sizes is a flexible way to manage your disk space. You can do it without losing any precious data.
Firstly, open Disk Management. It’s the control center for your partitions. Here, you’ll see a graphical representation of your disk space.
Then, right-click on the partition you want to resize. Choose ‘Extend Volume’ or ‘Shrink Volume,’ depending on your need.
A wizard will guide you through the process. You’ll specify how much space to add or remove. Be sure to leave enough space for the system to function properly.
Moving partitions is also a key task. It allows you to allocate space where it’s needed most.
For more flexibility, consider third-party tools. They offer advanced features for moving partitions. Always choose reputable software to avoid data loss.
Each tool comes with a set of instructions. Follow them carefully. Take your time to understand each step before proceeding.
Significantly, these processes do not require formatting. Therefore, your data remains untouched. It’s a major advantage of using these methods.
Before you apply any changes, double-check all settings. Ensure you’re not taking away too much space from a partition. This can cause system issues.
After reviewing, apply the changes. Your system may need to restart. Afterward, you’ll see the new partition sizes reflected in Disk Management.
In conclusion, resizing and moving partitions can be hassle-free. You keep all your files intact during the process. Just approach the task methodically. Careful planning and execution ensure a smooth transition to a more efficient disk space arrangement. Now, you’re set to enjoy your newly organized hard drive space!
Partitioning your C drive can seem daunting, but it’s entirely possible without formatting. This approach keeps your operating system and files safe.
Firstly, understand that partitioning the C drive comes with risks. It contains your operating system and crucial files. Therefore, a backup is essential before you proceed.
Moreover, create a full system backup. Use an external drive or cloud service for this. That way, you’re prepared for any scenario.
Disk Management in Windows allows you to resize your C drive carefully.
Firstly, access Disk Management. You can search for it in the Start menu or use the ‘diskmgmt.msc’ command.
Then, right-click on the C drive and select ‘Shrink Volume’. This process will create unallocated space without deleting data.
A dialog will pop up. Here, decide how much you want to shrink the C drive by. Plan according to your needs.
With the unallocated space ready, you’re set to create a new partition.
Right-click on the unallocated space. Choose ‘New Simple Volume’ and follow the wizard’s steps.
Again, this is a quick format for the new volume, not the existing data. Choose a file system like NTFS and complete the wizard.
After partitioning, ensure your system is stable.
Firstly, restart your computer. This will help apply the changes effectively.
Then, keep an eye on system performance. Ensure everything runs smoothly after the partitioning.
In conclusion, partitioning your C drive without formatting is a practical way to organize your space. Just proceed with caution, and always keep a backup. Follow these steps, and your system should remain secure and operational. Now, you can enjoy the benefits of an additional partition without any data loss.
Partitioning a hard disk on a Mac can be straightforward and secure, without the need to format. Let’s walk through the steps.
Firstly, open Disk Utility. You can find it quickly by using Spotlight search. Once open, select your hard disk from the sidebar.
Before proceeding, check your disk’s format. It should be ‘APFS’ or ‘Mac OS Extended (Journaled)’. These formats are compatible with non-destructive partitioning.
As always, back up your important files. Time Machine or a cloud service can handle this. It ensures your files are safe.
Additionally, ensure there’s enough free space. You can’t create a new partition without this. Free up space if necessary.
Select the drive in Disk Utility. Then click the ‘Partition’ button. This won’t erase your existing data if done correctly.
The pie chart layout allows you to adjust partition sizes. Simply drag the dividers to resize.
After setting the size, click ‘Apply’. Disk Utility will process the changes. It creates the new partition without any data loss.
Once complete, you’ll see the new partition in Disk Utility. It will also appear on your desktop.
Finally, test the new partition. Try saving a file to it. If it works, you’re all set!
In conclusion, partitioning a hard disk on Mac without formatting is a safe process. Follow these steps carefully, and you’ll have a new partition ready to use in no time. With your data intact, you can start using your new partition right away. Enjoy your newly organized storage space!
For power users, advanced partitioning techniques can unlock new levels of disk management. Let’s explore these sophisticated methods.
Dynamic disks offer a powerful alternative to basic partitions. They allow for volumes that span across multiple disks. This feature is ideal for users who need flexible storage solutions.
Firstly, convert your basic disk to a dynamic one. This is done through Disk Management in Windows. Then, you can create a spanned volume. This volume combines space from multiple drives into one large partition.
Moreover, striped volumes can speed up disk access. They spread data across two or more disks. However, remember that if one disk fails, you lose the data on all disks in the stripe.
For those who prefer command-line tools, DiskPart is a go-to. It offers granular control over partitions. You can create, delete, and resize partitions directly from the command prompt.
Additionally, DiskPart supports scripting. You can automate complex partitioning tasks. This method is efficient and time-saving for repetitive tasks.
Linux users have GParted, a powerful graphical partition editor. It allows for detailed disk management. You can resize, copy, and move partitions without data loss.
Furthermore, GParted supports various file systems. You can create custom partitioning schemes. This flexibility is perfect for dual-booting systems or setting up dedicated partitions for specific tasks.
Advanced users can also work with virtual hard disks. Windows allows you to create and manage VHDs. These disks can be resized and moved easily, just like physical disks.
In conclusion, advanced partitioning techniques offer robust solutions for power users. They enhance flexibility and control over storage management. With these methods, you can tailor your disk space to fit complex requirements. Dive into these advanced practices and take your partitioning skills to the next level!
Even the most seasoned users can encounter partitioning issues. However, with the right approach, you can troubleshoot effectively.
Firstly, if you encounter this error, check the disk space. Insufficient space is often the culprit. Additionally, ensure there are not already the maximum number of partitions that your disk can support.
If partitioning options are greyed out, don’t panic. Firstly, run Disk Management as an administrator. This can often resolve the issue. Also, check that the disk is not in use by another process.
Partitioning can fail, but the situation is often fixable.
Run a disk check to look for errors. The CHKDSK command in Windows is useful for this. On Mac, you can use the First Aid option in Disk Utility.
Moreover, verify that the file system is compatible with the partitioning tool. Some tools may not support all file systems.
Sometimes, partitions can become lost or invisible.
Thankfully, recovery tools can help. They scan your disk for lost partitions. Once found, these tools can often restore them.
Also, check system log files. They can provide clues about what went wrong. This insight can guide your recovery efforts.
In conclusion, common partitioning problems are usually solvable with a bit of know-how. By following these troubleshooting tips, you can overcome most issues you’ll encounter. Always remember to back up your data before partitioning, just to be on the safe side. With these solutions in hand, you’ll be prepared to handle any partitioning challenge that comes your way.
If you’re in Singapore and facing hard disk issues, you’re in luck. The city is home to several reliable service providers that can help get your disk back in shape.
One standout option is Volta PC Upgrade & Repair. They are known for their expertise in handling a variety of computer issues, including hard disk services. Whether you need partitioning assistance, data recovery, or a simple health check for your disk, Volta PC Upgrade & Repair has the skills to assist.
Here’s why you might consider Volta PC Upgrade & Repair for your hard disk service needs:
Expert Technicians: They employ skilled technicians who understand the intricacies of hard disk management.
Comprehensive Diagnostics: Volta offers thorough diagnostics to pinpoint the exact issues with your hard disk.
Efficient Service: They are known for their quick turnaround time, so you won’t be without your device for long.
Customer-Centric Approach: Volta PC Upgrade & Repair prioritizes customer satisfaction and offers personalized services.
Volta PC Upgrade & Repair is conveniently located in the heart of Singapore. You can reach out to them via their website or phone to schedule a service or to get a consultation. Don’t let hard disk troubles slow you down when you have expert services just around the corner.
le fix.
Address:
Tai Seng Branch: 8 Burn Road #01-04, Trivex, Singapore 369977
Jurong Branch: Blk 132 #01-279C, Jurong Gateway Road, Singapore 6001324
Have you ever considered partitioning your hard disk? It’s a clever way to organize your files and improve your computer’s performance. Moreover, it can make
How To Fix Hard Drive On Dell Laptop. If you’ve ever encountered the dreaded “Disk Read Error” message or found yourself stuck in an endless
A solid-state drive (SSD) used to be prohibitively expensive, but nowadays they are much more affordable due to technological improvements. In this rather comprehensive guide
|
*We are OPEN on 3 May 2025 (Polling Day). CLOSED ON 1 May 2025 (Labour Day) |