How To Fix Hard Drive On Dell Laptop.
If you’ve ever encountered the dreaded “Disk Read Error” message or found yourself stuck in an endless boot loop, you know how frustrating hard drive problems can be. But don’t worry; you’re not alone, and more importantly, there are solutions.
In this guide, we’ll walk you through a series of steps designed to identify, diagnose, and fix the most common hard drive issues that plague Dell laptop users. From basic preliminary checks to advanced troubleshooting techniques, we’ve got you covered. We’ll even delve into when it’s time to seek professional help and where to find it, especially if you’re based in Singapore.
So, whether you’re a tech-savvy individual looking to solve the problem yourself or someone seeking guidance on when to consult experts, this guide is your one-stop resource. Let’s dive in and get that hard drive back in working order!
Identifying the Problem
So, you’ve got a Dell laptop, and something seems off with the hard drive. Don’t panic! First, let’s identify the issue. According to Dell’s official support pages, there are common symptoms to look out for.
Symptoms of Hard Drive Issues
Firstly, let’s talk about error messages. You might see messages like “Hard Drive not Detected” or “No Boot Device Found.” These are red flags. Additionally, you might encounter “No Boot Partition Found” or “Data Error Reading Drive.” These messages often indicate hard drive issues.
Moreover, listen for unusual noises. A clicking, grinding, or whining noise coming from the hard drive is a bad sign. These noises can signify mechanical issues or even data corruption.
The Booting Process
Now, let’s focus on the booting process. If your computer stops at a blank or black screen with a blinking cursor, take note. This is another symptom. Furthermore, if the computer doesn’t boot into the operating system, you’ve got a problem. You might also see operating system-related error messages like “Missing Operating System.”
RAID and External Drive Errors
Interestingly, you might also get RAID-related error messages. These are more complex but still point to hard drive issues. Similarly, if you’re having trouble with an external USB hard drive, don’t ignore it. It could be related to your main hard drive.
In summary, identifying the problem is the first crucial step in fixing your Dell laptop’s hard drive. Look out for error messages, listen for strange noises, and pay attention during the booting process. Also, consider running Dell’s diagnostic tests for a more definitive answer. Remember, the sooner you identify the problem, the easier it will be to fix it.
Preliminary Checks
Alright, so you’ve identified some symptoms that point to a hard drive issue. What’s next? Before diving into complex solutions, let’s start with some basic checks. According to Dell’s official guidelines, preliminary checks can often resolve minor issues.
1. Performing a Hard Reset
First off, let’s try a hard reset. Turn off your computer. Hold the power button for 10 seconds. Next, disconnect the AC adapter or power cable. If your Dell laptop has a removable battery, take it out. For non-removable batteries, you can reset the Real Time Clock (RTC) as an alternative.
Moreover, disconnect all external devices. This includes USB drives, printers, and even SD cards. Hold the power button again, but this time for 15 to 20 seconds. This drains any residual power. Finally, reconnect the power cable and battery, and turn on the computer. If the issue persists, let’s move on.
2. Disconnecting External Devices
Interestingly, external devices can sometimes cause booting issues. Unplug all external storage devices, docking stations, and other hardware. Then, restart your computer. If the issue disappears, the external device was the culprit. In that case, you’ll need to contact the device manufacturer for further support.
3. Checking for Software Conflicts
Sometimes, software can interfere with hard drive performance. Boot your computer in Safe Mode to check for conflicts. If the issue doesn’t occur in Safe Mode, a software conflict is likely. You’ll need to identify and remove the problematic software.
4. Updating System Time and Date
Incorrect system time and date settings can also cause issues. Make sure your system’s time and date are accurate. If they’re off, correct them and restart your computer.
5. Inspecting Physical Connections
Additionally, check for loose or disconnected cables. A loose SATA or power cable can cause hard drive issues. Make sure everything is snug and secure.
6. Running a Quick Diagnostic Test
Dell recommends running a quick hardware diagnostic test. To do this, turn on your computer and tap the F12 key until you see the One Time Boot Menu. Select ‘Diagnostics’ and follow the on-screen instructions. If the test passes, your hardware is fine. If it fails, note down the error and validation codes for further action.
7. Checking for Updates
Lastly, ensure all your drivers and BIOS are up to date. Outdated software can cause a myriad of issues, including hard drive problems. Dell provides tools to help you update these easily.
In summary, preliminary checks are a crucial first step in resolving hard drive issues on your Dell laptop. They’re simple, quick, and can often save you a lot of time and effort. If these steps don’t resolve the issue, it’s time to dive deeper into diagnostics and potential fixes.
How To Fix Hard Drive On Dell Laptop: Diagnostic Tests
So, you’ve tried the preliminary checks, but the issue persists. What now? Well, it’s time to roll up your sleeves and dive into diagnostic tests. According to Dell’s official support pages (source 1, source 2), diagnostics can help pinpoint the problem.
1. Integrated Diagnostics
Firstly, let’s talk about integrated diagnostics. Turn on your computer and tap the F12 key multiple times. You’ll see the One Time Boot Menu. From there, select ‘Diagnostics’ and press Enter. Follow the on-screen instructions to complete the test. If the test passes, your hardware is likely fine. However, if it fails, note down the error and validation codes. You’ll need these for further action.
2. Online Diagnostics
Next, let’s explore online diagnostics. If your computer can boot into Windows and access the internet, this is for you. Head over to Dell.com/support. Identify your Dell computer and click ‘Download & Install SupportAssist.’ Follow the on-screen instructions to install the software. Once installed, go to the Diagnostics tab and click ‘Run Quick Test.’
3. Understanding Diagnostic Results
Now, understanding the results is crucial. If the tests pass, the issue likely lies with the operating system or installed software. On the other hand, if the tests fail, contact Dell Technical Support. Provide them with the error and validation codes for repair options in your region.
4. Preboot Diagnostic Test
Moreover, if your computer can’t boot into Windows, you can run a preboot diagnostic test. Turn on your computer and tap the F2 key several times. You’ll see the One Time Boot Menu. Select ‘Diagnostics’ and press Enter. Follow the on-screen instructions. If the test passes, your hardware is fine. If it fails, note down the Service Tag, error code, and validation code.
5. SupportAssist App
Interestingly, if SupportAssist is not installed on your Dell computer, you’ll be prompted to download and install it. This app is essential for running online diagnostics. So, make sure to install it if prompted.
6. Additional Diagnostic Tools
Lastly, Dell offers additional diagnostic tools. These tools can help you identify issues that standard diagnostics might miss. They’re available on Dell’s website and are worth exploring.
How To Fix Hard Drive On Dell Laptop
So, you’ve run the diagnostics, and you’re still facing issues. What’s next? Time to dive into troubleshooting and fixes.
1. Updating BIOS and Drivers
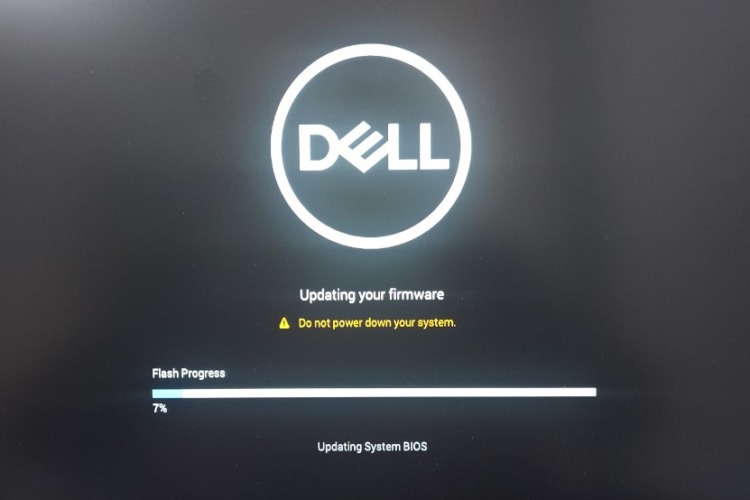
Photo via Dell
First off, let’s understand why these updates are important. The BIOS is the first software your computer runs when powered on. It controls the hardware in your system and allows it to communicate with the operating system. Drivers, on the other hand, are software components that enable your operating system to interact with hardware like your hard drive, keyboard, and mouse. Outdated BIOS or drivers can lead to compatibility issues, reduced performance, or even system crashes.
How to Update BIOS
- Visit Dell’s Support Website: Open your web browser and go to Dell.com/support.
- Identify Your System: You’ll see an option to identify your Dell computer. You can either let Dell auto-detect your system or enter your Service Tag manually.
- Navigate to BIOS Updates: Once your system is identified, look for the BIOS update in the list of available updates.
- Download and Install: Click on the download link for the latest BIOS update. Once downloaded, open the executable file and follow the on-screen instructions to update your BIOS.
- Restart: After the update is complete, you’ll need to restart your computer for the changes to take effect.
How to Update Drivers
- Visit Dell’s Support Website: Just like with the BIOS, head over to Dell.com/support.
- Identify Your System: Use Dell’s auto-detect feature or enter your Service Tag.
- Navigate to Driver Updates: Go to the ‘Drivers & Downloads’ section.
- Choose Necessary Drivers: You’ll see a list of drivers that are either recommended or urgent. Choose the ones relevant to your hard drive or other components.
- Download and Install: Click on the download link, and once downloaded, open the executable file. Follow the on-screen instructions to install the driver.
- Restart: Some driver updates may require a system restart. Make sure to save your work before doing so.
Post-Update Actions
After successfully updating your BIOS and drivers, it’s good practice to restart your computer. This ensures that all the new changes are correctly implemented.
By keeping your BIOS and drivers up to date, you’re ensuring that your hardware and operating system can work together in harmony, reducing the risk of hard drive issues and improving your laptop’s overall performance.
2. Manual Checks

Photo via AOMEI Backupper
Sometimes, hard drive issues can be as simple as a loose connection. Over time, SATA (Serial ATA) or power cables can become dislodged due to movement, bumps, or even temperature changes. This can lead to data transfer issues, booting problems, or even complete hard drive failure.
Safety First
Before you start, make sure to turn off your laptop and disconnect it from any power source. If your laptop has a removable battery, take it out as well. This ensures that you’re working in a safe environment.
Tools You’ll Need
You’ll need a screwdriver that fits the screws on your laptop’s back panel. Some Dell laptops may require specialized screwdrivers, so make sure you have the right tools before you begin.
Steps for Manual Checks
- Open the Laptop: Use the screwdriver to remove the screws securing the back panel of your laptop. Carefully lift the panel to expose the internal components.
- Locate the Hard Drive: The hard drive is usually located in a specific compartment, often marked. If you’re unsure, refer to your laptop’s manual.
- Check the SATA and Power Cables: These are the cables that connect your hard drive to the motherboard and power supply. Make sure they are securely plugged in.
- Reconnect if Necessary: If you find any loose cables, unplug them and then plug them back in to ensure a snug fit. Make sure the connectors click into place.
- Visual Inspection: While you’re at it, look for any signs of physical damage like burns or bent pins, as these could also cause hard drive issues.
- Close the Laptop: Once you’re satisfied, carefully replace the back panel and secure it with the screws.
Post-Check Actions
After completing the manual checks, turn on your laptop and observe its behavior. If the hard drive issues were due to a loose connection, they should now be resolved.
By performing these manual checks, you’re taking a proactive step in resolving hard drive issues that could otherwise lead to more severe problems down the line.
3. Advanced Solutions
Photo via Windows Report
First off, if you’ve tried all the basic troubleshooting steps and the problem still persists, it’s time to consider advanced solutions. These methods aim to tackle the root cause of the issue, whether it’s a corrupted operating system or disk errors.
Reinstalling the Operating System
- Backup Your Data: Before you do anything, make sure to backup all your important files. You can use an external hard drive or cloud storage for this.
- Create a Bootable USB Drive: Download the ISO file of your preferred operating system (usually Windows for most users). Use software like Rufus to create a bootable USB drive.
- Boot from USB: Restart your computer and boot from the USB drive. You may need to change the boot order in the BIOS settings to do this.
- Follow On-Screen Instructions: Once booted from the USB, you’ll see an installation wizard. Follow the on-screen instructions to reinstall the operating system.
- Complete the Installation: After the installation is complete, you’ll need to reinstall your drivers and software.
Disk Partitioning
- Open Disk Management: Right-click on the Start button and choose ‘Disk Management’ to open the utility.
- Identify the Drive: Locate your hard drive in the list. It’s usually labeled as ‘Disk 0’ or ‘Disk 1’.
- Create a New Partition: Right-click on the unallocated space and choose ‘New Simple Volume’. Follow the wizard to create a new partition.
- Resize Existing Partitions: If you already have partitions but need to resize them, right-click on the partition and choose ‘Extend Volume’ or ‘Shrink Volume’ as needed.
- Format the Partition: After creating or resizing, you may need to format the partition. Right-click on it and choose ‘Format’. Make sure to choose the correct file system (usually NTFS for Windows).
Post-Solution Actions
After implementing these advanced solutions, it’s crucial to monitor your system closely. Check for any signs of hard drive issues and run diagnostics to ensure everything is working as it should.
By taking these advanced steps, you’re going beyond surface-level fixes to tackle the root cause of your hard drive issues. This can provide a more permanent solution and help you avoid future problems.
4. RAID Configuration
Photo via Dell
Incorrect settings can lead to a variety of issues, including degraded performance and even data loss. If you’re receiving RAID-related error messages, it’s a sign that something is off with your RAID setup.
Types of RAID Configurations
Before diving into the reconfiguration, you should know the type of RAID setup you have. Common types include RAID 0 (Striping), RAID 1 (Mirroring), and RAID 5 (Striping with Parity). Each has its own set of requirements and benefits.
Dell’s Guidelines for RAID Configuration
Dell provides detailed guidelines on how to configure RAID settings for their systems. These guidelines are usually available in the user manual or on Dell’s official support website. Make sure to follow these instructions carefully to avoid any mistakes that could lead to data loss.
Steps for Reconfiguring RAID
- Backup Data: Always backup your data before making any changes to your RAID configuration.
- Access RAID Utility: During boot-up, you’ll need to access the RAID utility. This is usually done by pressing a specific key like Ctrl + I.
- Identify the Issue: Look for any error messages or issues highlighted in the RAID utility.
- Reconfigure Settings: Follow Dell’s guidelines to reconfigure your RAID settings. This may involve changing the RAID type or repairing a degraded array.
- Save and Exit: Once you’ve made the necessary changes, save your settings and exit the RAID utility.
Post-Configuration Actions
After reconfiguring your RAID settings, it’s essential to monitor your system closely. Run diagnostics to ensure that the RAID array is functioning correctly. Check for any signs of data loss or degraded performance.
By carefully reconfiguring your RAID settings according to Dell’s guidelines, you can resolve many of the issues related to RAID errors. This can help you maintain optimal performance and data integrity in your system.
5. Blue Screen Errors
Blue screen computer memory error code displayed on a screen. Image credit: Quora
They usually indicate a severe issue that can lead to data loss, system instability, or even hardware failure if not addressed promptly.
Common Causes
Some common causes of blue screen errors include:
- Outdated or incompatible drivers
- Hardware conflicts
- Corrupted system files
- Overheating components
- Malware or viruses
Dell’s Guide on Troubleshooting Blue Screen Errors
Dell provides comprehensive guidelines on how to troubleshoot blue screen errors. These guides are usually available on Dell’s official support website and offer step by step instructions on identifying and resolving the issue.
Steps for Troubleshooting
- Note the Error Code: When a blue screen error occurs, an error code is usually displayed. Note this down as it can help in diagnosing the issue.
- Restart in Safe Mode: Reboot your computer in Safe Mode to see if the issue persists. Safe Mode loads only essential drivers, making it easier to identify the problem.
- Check for Updates: Make sure your system and drivers are up to date. Outdated software can often cause blue screen errors.
- Run Diagnostics: Use Dell’s built-in diagnostic tools to check for hardware issues. This can help you identify if the problem is hardware-related.
- Consult Dell’s Guide: Follow the troubleshooting steps provided in Dell’s guide for blue screen errors. This usually involves a series of checks and potential fixes.
Post-Troubleshooting Actions
After you’ve followed the troubleshooting steps, monitor your system closely. If the blue screen errors continue, it may be time to seek professional help. Persistent blue screen errors can indicate a more severe underlying issue that may require specialized attention.
By taking immediate action and following Dell’s guidelines, you can often resolve blue screen errors before they lead to more severe problems. This can save you both time and the potential loss of important data.
6. External Drive Troubles
Furthermore, if you’re having issues with an external USB hard drive, don’t ignore it.
Common Symptoms
Some common signs that your external drive may be the issue include:
- Slow data transfer rates
- Inability to read or write data
- Frequent disconnections
- Error messages related to the drive
Steps for Troubleshooting
- Unplug the Drive: The first step in troubleshooting is to unplug the external drive from your computer.
- Restart Your Computer: After unplugging the drive, restart your computer to see if the issue persists.
- Plug the Drive into Another Port: Sometimes, the issue could be with the USB port itself. Try plugging the drive into a different port to see if the problem continues.
- Test on Another Computer: If possible, plug the external drive into another computer. If the issue persists on the second computer, the drive is likely the culprit.
- Check for Updates: Make sure the drivers for your external drive are up to date. Visit the manufacturer’s website to download the latest drivers.
- Run Diagnostics: Some external drives come with their own diagnostic tools. Use these to check for any issues with the drive itself.
Contacting the Device Manufacturer
If after all these steps the issue still persists, it’s time to contact the device manufacturer. They can provide further support, which may include firmware updates, specialized troubleshooting steps, or even a replacement if the drive is under warranty.
Post-Troubleshooting Actions
After contacting the manufacturer and following their guidelines, continue to monitor the drive closely. If the issue reoccurs, it may be time to consider replacing the drive to prevent any future problems.
By taking immediate action when you notice issues with an external USB hard drive, you can prevent more significant problems and protect your data. This is crucial for both personal and professional use, where data integrity is often of the utmost importance.
7. Software Conflicts
Lastly, software conflicts can also cause hard drive issues. Two or more software programs may interfere with each other’s operations, leading to a range of issues, including hard drive problems.
Common Indicators
Some common signs of software conflicts include:
- Frequent system crashes or hangs
- Error messages related to file access or permissions
- Slow or unresponsive behavior when using specific software
Booting in Safe Mode
Screenshot illustrating the steps to enter Safe Mode. Image credit: GCFGlobal
- Why Safe Mode: Safe Mode is a diagnostic mode for Windows that starts your computer with a minimal set of drivers and services. This makes it easier to identify and resolve conflicts.
- How to Boot: Restart your computer and press the F8 key (or the appropriate key for your system) before the Windows logo appears. Choose ‘Safe Mode’ from the Advanced Boot Options menu.
Steps for Troubleshooting
- Identify Recent Changes: Think about any software you’ve recently installed or updated. These are the most likely culprits.
- Uninstall Software: While in Safe Mode, go to ‘Control Panel’ > ‘Programs and Features’ and uninstall any recently installed or updated software.
- Check for Updates: Sometimes, the conflict may be resolved by updating the software to the latest version. Visit the software’s official website to check for updates.
- Consult Logs: Check system logs for any error messages that could provide clues about the conflict. You can view these logs using the Windows Event Viewer.
Restart in Normal Mode
After uninstalling the conflicting software, restart your computer in normal mode. Monitor the system closely to see if the issue has been resolved.
Post-Troubleshooting Actions
If the issue is resolved, you may want to consider alternative software that performs the same function but doesn’t conflict with your system. If the problem persists, it may be time to seek professional help.
By identifying and resolving software conflicts, you can improve system stability and performance, reducing the risk of hard drive issues and other problems. This proactive approach can save you time and effort in the long run.
FAQs on How To Fix Hard Drive On Dell Laptop
How do I fix my hard drive failure on my laptop?
Fixing hard drive failure on your laptop involves a series of steps, from preliminary checks like ensuring cables are connected properly, to running diagnostic tests and even reinstalling the operating system. If basic troubleshooting doesn’t work, consult a professional repair service.
How do I restore my Dell hard drive?
To restore your Dell hard drive, you can use the built-in Windows recovery options or Dell’s own recovery partition. Backup all important data first, then restart your laptop and follow the on-screen instructions to initiate the recovery process. This will restore your system to its factory settings.
Can hard drive failure be repaired?
Yes, hard drive failure can often be repaired, depending on the severity of the issue. Simple problems like loose connections or software conflicts can be easily fixed. However, mechanical failures or severe data corruption may require professional repair or even a hard drive replacement.
When to Seek Professional Help To Fix Hard Drive On Dell Laptop
Okay, you’ve tried everything from preliminary checks to advanced troubleshooting. But what if the problem still persists? Let’s explore those scenarios.
1. Repeated Diagnostic Failures
Firstly, if your Dell’s integrated or online diagnostics repeatedly fail, it’s a red flag. You’ve noted down the error and validation codes, but the issue remains unresolved. In such cases, professional help is advisable.
2. Data Recovery
Next, consider data recovery. If you’re facing severe data loss or corruption, DIY methods may not suffice. Specialized software or hardware might be necessary. Therefore, consult a professional for data recovery services.
3. Mechanical Failures
Now, let’s talk about mechanical failures. If you hear grinding or clicking noises from the hard drive, it’s a serious issue. These noises often indicate mechanical failure, which requires immediate professional attention.
4. RAID Errors
Moreover, if you’re dealing with RAID-related errors, professional help is often necessary. RAID configurations can be complex. Incorrect settings can lead to data loss. So, it’s best to consult experts in this area.
5. Blue Screen Errors
Additionally, persistent blue screen errors are a cause for concern. These errors usually indicate a severe issue that needs immediate attention. Dell has a guide on how to troubleshoot these, but if the problem persists, seek professional help.
6. External Drive Issues
Furthermore, if you’re having persistent issues with an external USB hard drive, professional help may be required. Especially if the drive contains important data that you can’t afford to lose.
7. Software Conflicts
Lastly, if you’ve tried booting in Safe Mode and uninstalling problematic software but the issue persists, it might be time for professional help. Software conflicts can sometimes be complex and require specialized knowledge to resolve.
Where to Fix Hard Drive On Dell Laptop in Singapore: Volta PC Upgrade & Repair
For those based in Singapore, we highly recommend VOLTA PC Upgrade and Repair.
With a stellar reputation for quality laptop repair service and customer satisfaction, VOLTA has a team of certified technicians who specialize in Dell hard drive repair and replace. They offer a comprehensive range of services, from diagnostic tests to hardware replacements, ensuring that your Dell laptop will be back in optimal condition.
So, if you’re at your wit’s end trying to fix your hard drive, don’t hesitate to reach out to VOLTA PC Upgrade and Repair.