How To Enable Laptop Keyboard Typing Sounds On Windows 10/ 11

The tactile feedback from a physical keyboard is something many users find satisfying. However, when using a laptop, you might miss the clickety-clack of the keys. Fortunately, Windows 10 and Windows 11 offer features that allow you to enable keyboard typing sounds, providing an audible click with each keystroke. This article will guide you through the steps to turn on typing sounds and troubleshoot common keyboard issues. Additionally, we’ll cover how to use the on-screen keyboard and operate your computer without a mouse, as well as how to disable Sticky Keys.

Key Takeaways

  • Windows 10 and 11 provide options to enable keyboard typing sounds, enhancing the typing experience for users who enjoy auditory feedback.
  • Troubleshooting steps for keyboard issues in both Windows 10 and 11 often involve updating drivers and restoring default settings.
  • The on-screen keyboard and Mouse Keys features in Windows 10 and 11 assist users with mobility or hardware limitations, ensuring accessibility.
  • Sticky Keys, a feature designed to aid users with certain disabilities, can be easily disabled in the Settings menu if it interferes with normal typing.
  • Customization options for keyboard sounds, on-screen keyboard preferences, and Mouse Keys settings allow users to tailor their experience to their needs.

Enabling Keyboard Typing Sounds in Windows 10

Accessing Sound Settings

Source: Lifewire

To enable keyboard typing sounds on Windows 10, you’ll first need to access the sound settings. Right-click the Volume button on the taskbar and select ‘Sounds’ from the menu to open the Sound dialog box. Alternatively, you can enter the sound settings by searching for ‘Sounds’ in the Start menu search bar.
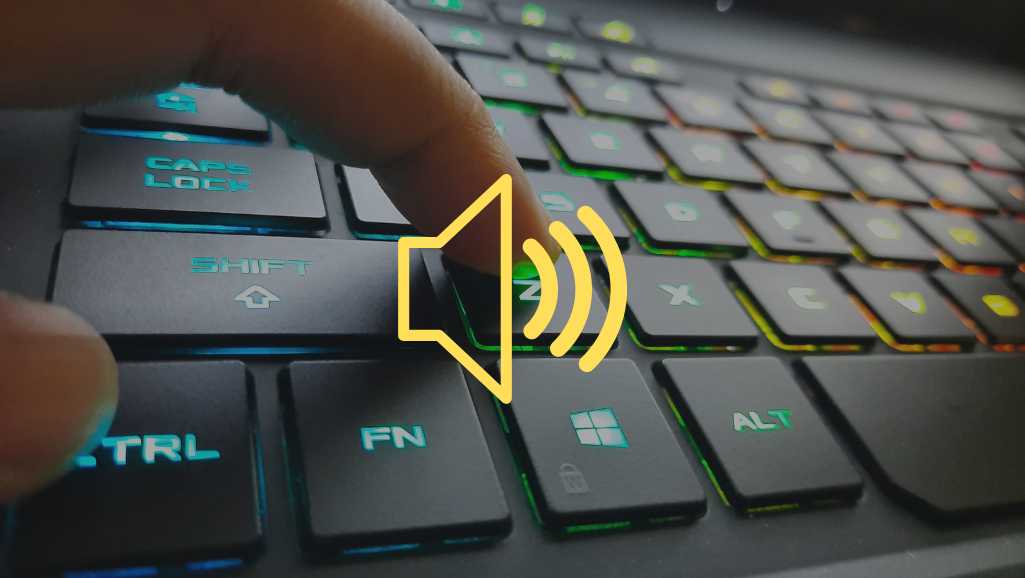
Once in the Sound settings, you’ll find various options to customize your audio experience, including the ability to select a typing sound scheme.
Here are the steps to access the sound settings in Windows 10:
  1. Right-click the Volume icon on the taskbar.
  2. Choose ‘Sounds’ from the context menu.
  3. Alternatively, use the search function: Type ‘Sounds’ in the Start menu search and select it from the results.

Selecting a Typing Sound Scheme

After accessing the sound settings, the next step is to select a typing sound scheme that suits your preferences. Windows 10 offers a variety of sound schemes that include different keyboard typing sounds, such as the classic typewriter or the more modern mechanical keyboard sounds. Selecting the right sound scheme can enhance your typing experience and even provide a nostalgic feel with sounds like the buckling spring keyboard. To choose a sound scheme, navigate to the ‘Advanced sound settings‘ and explore the available options. Here, you can preview each sound by clicking on them before making a decision. For those who desire a more personalized touch, applications like Mechvibes allow you to create and edit custom sound packs. This can be particularly useful for users who want to customize the audio feedback for each keystroke to match specific sounds they enjoy or find motivating.
Remember, the volume of the typing sounds can also be adjusted to ensure they are not disruptive in quiet environments or office settings. It’s important to find a balance that allows you to enjoy the auditory feedback without disturbing others.

Adjusting Sound Volume for Keyboard Feedback

Once you’ve selected a typing sound scheme, you may want to adjust the volume to ensure it’s neither too loud nor too soft. Adjusting the sound volume for keyboard feedback can be done easily through the volume mixer or system settings. Here’s how:
  1. Right-click on the speaker icon in the taskbar.
  2. Select ‘Open Volume mixer‘ from the context menu.
  3. Locate the slider for the keyboard feedback sound and adjust it to your preference.
Remember, the goal is to find a balance that is audible without being disruptive, especially in shared environments. If you’re using third-party applications like Mechvibes, they often have their own volume controls within the app settings.
It’s important to test the sound levels in different scenarios, such as in a quiet room or when there’s background noise, to ensure the typing sounds remain pleasant and not overwhelming.

Enabling Keyboard Typing Sounds in Windows 11

To enable keyboard typing sounds on Windows 11, you’ll first need to navigate to the Sound settings. Begin by right-clicking on the speaker icon located in the bottom right corner of your taskbar. From the context menu, select ‘Sound settings’. This will open the Sound section within the Windows Settings app.
In the Sound settings, you can adjust various audio preferences, including the output device and volume levels. It’s also where you’ll find options to customize system sounds.
Once in the Sound settings, you may need to click on ‘More sound settings‘ to access the full range of audio customization options. Here, you can select different sound schemes that include typing sounds.

Choosing a Sound Profile for Typing

After navigating to the sound options in Windows 11, you can enhance your typing experience by selecting a sound profile that suits your preferences. Choose from a variety of sound profiles, such as mechanical keyboard sounds or classic typewriter sounds, to make your typing more audible and satisfying. Mechvibes is one such application that offers this functionality, allowing you to create, edit, and share customized sound packs. To select a sound profile:
  • Access the sound settings in your control panel.
  • Browse through the available sound schemes.
  • Select the sound profile that you prefer for your keyboard typing feedback.
Remember, the right sound profile can make typing more enjoyable, especially if you’re working in a quiet environment or late at night. Adjust the sound to a level that is comfortable for you and those around you.

Customizing Sound Levels for Typing Feedback

Once you’ve selected a typing sound scheme that suits your preferences, the next step is to adjust the sound volume to ensure it’s neither too loud nor too soft. Adjusting the volume of keyboard typing sounds can help you achieve a comfortable balance between auditory feedback and ambient noise levels. To change the volume, you can use the volume mixer in Windows or employ keyboard shortcuts for quick adjustments.
  • Open the Sound settings by right-clicking the speaker icon in the taskbar.
  • Navigate to the Volume mixer or App volume and device preferences.
  • Locate the application responsible for keyboard sounds and adjust its volume slider.
Alternatively, you can use keyboard shortcuts to change the volume. Press the “Volume Up” or “Volume Down” keys on your keyboard to increase or decrease the volume. Some keyboards also have a “Volume Mute” key to quickly silence all sounds. Remember, the goal is to find a level that is audible without being disruptive.

Troubleshooting Keyboard Issues in Windows 10

Updating System Drivers and Software

Keeping your system drivers and software up to date is crucial for ensuring that your keyboard functions properly. Regularly check for updates to your BIOS, Windows packages, and drivers. You can update your drivers through the Device Manager by following these steps:
  1. Press the Windows Key + R to open the run box.
  2. Type devmgmt.msc and press Enter to open Device Manager.
  3. Locate and expand the ‘Keyboards’ section.
  4. Right-click on your keyboard driver and select ‘Update driver’.
  5. Choose to search automatically for updated driver software.
If you encounter a keyboard driver issue after an update, it’s recommended to revisit the Device Manager to reinstall or rollback the driver.
In some cases, third-party antivirus software can interfere with driver updates. If problems persist, consider temporarily uninstalling any antivirus software. Remember to also check for BIOS updates using tools like EZ Flash or through your laptop’s support software, such as MyASUS.

Checking Keyboard Hardware Functionality

When troubleshooting keyboard issues, it’s crucial to check for any physical damage to the keyboard. Look for signs such as missing keys, sticking keys, or any visible wear and tear that might affect its functionality. If you discover damage, consider repairing or replacing the keyboard.
Keeping your system and software up to date is also essential. Regular updates can resolve many issues that cause erratic keyboard behavior. Navigate to your settings to check for and install any available updates.
Additionally, ensure that your keyboard settings and configurations are correct. Misconfigured settings can lead to unexpected keyboard behavior. Review your system’s keyboard options to verify that everything is set up properly. If you suspect driver issues, updating or reinstalling keyboard drivers can often rectify the problem. Use the device manager or visit the manufacturer’s website to find the latest drivers for your keyboard model. Remember, outdated or corrupted drivers can lead to erratic typing or non-responsiveness. Lastly, if you’re experiencing persistent issues and none of the above steps work, a system restart can sometimes resolve temporary glitches. If the problem persists, seeking professional help or contacting the manufacturer for support may be necessary.

Restoring Default Keyboard Settings

If you’re experiencing issues with your keyboard, restoring the default settings can often resolve these problems. To reset your Windows keyboard keys to normal, go to Settings > Time & Language > Language. Click on ‘Keyboard’ under the preferred language and select the option to reset to default settings.
Restoring your keyboard to its default settings can help fix issues that arise from misconfigured options or settings within your operating system or keyboard software.
For a more comprehensive solution, consider running a system restore to revert your computer to a previous state where the keyboard was functioning correctly. This can undo any recent software changes that may have caused the keyboard issues. However, remember that this process may take some trial and error to find the right restore point. Lastly, if you’re still facing issues, use the built-in keyboard troubleshooter in Windows:
  1. Type and search for [Troubleshoot settings] in the Windows search bar, then click [Open].
  2. In the troubleshoot window, select [Other troubleshooters].
  3. Click [Run] on the Keyboard item.
  4. Follow the on-screen prompts to detect and resolve problems.

Troubleshooting Keyboard Issues in Windows 11

Ensuring Up-to-Date Drivers and BIOS

Keeping your laptop’s drivers and BIOS up to date is crucial for ensuring that all hardware, including the keyboard, functions correctly. Regular updates can resolve compatibility issues, enhance performance, and provide new features or security patches. To update your drivers and BIOS, follow these steps:
  • Navigate to the manufacturer’s website or use a dedicated software utility like MyASUS to find the latest updates for your specific laptop model.
  • For BIOS updates, follow the manufacturer’s instructions carefully to avoid any system issues. This often involves using a utility such as EZ Flash.
  • Access the Device Manager in Windows, expand the ‘Keyboards’ section, right-click on your keyboard device, and select ‘Update driver’. Choose ‘Search automatically for updated driver software’.
If you encounter problems after updating, it may be necessary to reinstall the driver in the Device Manager. This can often rectify persistent issues. Remember, an outdated BIOS can lead to system instability, so it’s important to keep it current.
It’s advisable to set your laptop to update automatically, which can alleviate the need to manually track updates and ensure you’re always running the latest versions.

Diagnosing Keyboard Malfunctions

When your keyboard starts acting up, it’s essential to check for physical damage first. Look for signs like missing keys or keys that stick, which could indicate that repairs or replacements are necessary. If the keyboard appears intact, the issue might be software-related. Misconfigured settings or outdated drivers can lead to erratic keyboard behavior. To diagnose these issues, access your computer’s control panel or use any keyboard software provided by the manufacturer. An online keyboard test can also be a quick way to check your keyboard’s functionality.
If you’re experiencing unexplained typing or other keyboard errors, a system restart can sometimes resolve these glitches.
Lastly, consider the possibility of a virus or malware infection. These malicious programs can take control of your keyboard and cause unexpected typing. Running a thorough antivirus scan is a crucial step in diagnosing and resolving such problems.

Resetting Keyboard Configuration to Default

When troubleshooting keyboard issues, resetting the keyboard configuration to its default settings can often resolve problems caused by misconfigurations. Restoring your system to a previous restore point is one method to revert settings back to a time when your keyboard was functioning correctly. If you have created a restore point or if there is an automatic one available, this can be an effective solution.
To reset your keyboard configuration to default, you can also uninstall and reinstall the keyboard drivers. This process will replace any outdated or corrupted drivers that might be causing issues.
Follow these steps to reset your keyboard drivers:
  1. Open Device Manager.
  2. Locate and expand the ‘Keyboards’ section.
  3. Right-click on your keyboard driver and select ‘Uninstall device’.
  4. Restart your computer to allow Windows to reinstall the driver automatically.
If the problem persists after these steps, consider running a system restore or using the Online Keyboard Test to check your configuration quickly.

Using the On-Screen Keyboard in Windows 10

Source: Youtube

Activating the On-Screen Keyboard Feature

The on-screen keyboard in Windows 10 is a versatile tool that allows users to type without a physical keyboard. Activating it is straightforward and can be done in a few simple steps. First, right-click on the Start menu and select ‘Settings’. Navigate to ‘Accessibility’ and then to ‘Keyboard’ under the Interaction section. Here, you will find the option to turn on the on-screen keyboard. Alternatively, you can quickly toggle the on-screen keyboard by using the keyboard shortcut Win + Ctrl + O. This is especially useful if you need to switch between using the on-screen keyboard and a physical one frequently.
Remember, the on-screen keyboard also includes options to enable a numeric keypad, making it easier to enter numbers and perform calculations. To access these options, click on ‘Options’ within the on-screen keyboard and check the ‘Turn on numeric key pad’ box.

Customizing On-Screen Keyboard Settings

Customizing the on-screen keyboard in Windows 10 allows users to enhance their typing experience to suit their preferences. To change the touch keyboard color and size, navigate to the touch keyboard settings. Here, you can adjust the key opacity to make the keyboard more or less transparent, tailoring the visual aspect of your typing interface. To further personalize your on-screen keyboard, follow these steps:
  • Right-click on the Start menu and select Settings.
  • Click on Accessibility, then find and click on Keyboard under the Interaction section.
  • Scroll to the On-screen keyboard option and toggle it on.
Remember, you can also quickly access the on-screen keyboard using the Win + Ctrl + O shortcut. This flexibility ensures that you can enable or disable the keyboard with ease, depending on your current needs.
Customization not only alters the keyboard’s appearance but can also improve accessibility. Adjusting settings such as the keyboard layout and adding languages can provide a more comfortable typing experience for users with different needs.

Utilizing Keyboard Shortcuts to Toggle On-Screen Keyboard

The convenience of the On-Screen Keyboard (OSK) in Windows 10 can be enhanced by learning the keyboard shortcuts that allow for quick toggling of this feature. To activate or deactivate the OSK, simply press the Ctrl + Win + O keys together. This shortcut is a swift alternative to navigating through the settings menu. For those who frequently switch between using the OSK and a physical keyboard, memorizing this shortcut can significantly streamline your workflow. Below is a step-by-step guide to using the shortcut:
  • Press the Win key to open the Start menu.
  • While holding down the Win key, press the Ctrl key.
  • With both the Win and Ctrl keys held down, press the O key.
  • The On-Screen Keyboard should now appear or disappear, depending on its previous state.
Remember, this shortcut is particularly useful when physical keyboard issues arise, or when you need to enter text without a keyboard at hand.

Using the On-Screen Keyboard in Windows 11

Enabling the On-Screen Keyboard

The on-screen keyboard in Windows provides an alternative input method for users who may need it due to hardware issues or personal preference. Enabling the on-screen keyboard is a straightforward process that can be accomplished through the Accessibility settings. To activate the on-screen keyboard, follow these steps:
  • Right-click on the Start menu and select Settings.
  • Navigate to Accessibility and click on Keyboard within the Interaction section.
  • Scroll down to find the On-screen keyboard option and toggle the switch to turn it on.
Alternatively, you can quickly enable or disable the on-screen keyboard using the keyboard shortcut Win + Ctrl + O.
The on-screen keyboard also offers additional features such as a numeric keypad, which can be enabled through the keyboard’s options. This can be particularly useful for entering numerical data or using the keyboard as a mouse substitute.

Personalizing On-Screen Keyboard Preferences

Customizing the On-Screen Keyboard to suit your preferences can enhance your overall experience with Windows 11. You can adjust settings such as the keyboard layout, key sounds, and transparency to make typing more comfortable and efficient. To begin personalizing your On-Screen Keyboard, follow these steps:
  • Right-click on the Start menu and select Settings.
  • Navigate to Accessibility and click on Keyboard in the Interaction section.
  • Scroll down to find the On-screen keyboard option and turn it on.
Adjusting the key repeat delay can be crucial if you experience multiple characters appearing when pressing a key once. Access this setting through the Control Panel under Keyboard options.
Remember, you can also toggle the On-Screen Keyboard on and off quickly using the Win + Ctrl + O keyboard shortcut. This can be particularly useful if you frequently switch between using a physical keyboard and the On-Screen Keyboard.

Shortcut Keys for Quick Access to On-Screen Keyboard

For those who need to quickly access the on-screen keyboard in Windows 11, there’s a simple keyboard shortcut that can be a lifesaver. Simply press the Windows + Ctrl + O keys and the on-screen keyboard will appear, ready for use. This shortcut is especially useful if you’re experiencing issues with your physical keyboard or if you prefer the accessibility features of the on-screen keyboard. In addition to the primary shortcut, Windows 11 offers various ways to enable the on-screen keyboard for different scenarios:
  • Access it through the Quick Settings panel by clicking on the Accessibility button.
  • Enable it from the Settings app by navigating to Accessibility > Keyboard, and toggling the On-screen keyboard option.
  • Use voice commands to open the on-screen keyboard if you have Speech Recognition configured.
Remember, the on-screen keyboard can also be a great tool when you’re using a device in tablet mode or simply prefer a touch interface.

Operating Windows 10 Without a Mouse

Setting Up Mouse Keys

To enable Mouse Keys in Windows 10, navigate to the Ease of Access Center through the Control Panel. Here, you’ll find the option to ‘Set up Mouse Keys’ which allows you to use the numeric keypad to control the mouse cursor on your screen. Ensure the ‘Turn on Mouse Keys’ checkbox is selected before applying the changes.
For a more direct approach, you can also access this feature via the Settings app by going to Ease of Access > Mouse, and toggling on ‘Use numeric keypad to move mouse around the screen’.
The numeric keypad can then be used to move the cursor and perform mouse clicks. The keys 2, 4, 6, and 8 are used for directional movement, while key 5 acts as a left-click by default. Customization options are available to change these settings to suit your preferences:
  • 2 and 8: Move cursor up and down
  • 4 and 6: Move cursor left and right
  • 137, and 9: Move cursor diagonally
  • 5: Left-click (customizable)
  • – (Minus key): Set right-click to key 5
Adjusting the cursor speed and acceleration can further enhance the Mouse Keys experience, allowing for precise control and navigation without the use of a traditional mouse. Once you’ve enabled the Mouse Keys feature, your numeric keypad transforms into a mouse controller. The Num Lock key toggles between numeric entry and mouse control modes. Ensure Num Lock is off to navigate with the keypad. Here’s how to move the cursor using the numeric keypad:
  • 8: Move up
  • 2: Move down
  • 4: Move left
  • 6: Move right
  • 7, 9, 1, 3: Move diagonally
For clicking actions:
  • 5: Left-click (customizable)
  • – (Minus key): Set right-click for key 5
Remember, when Mouse Keys is active, the numeric keypad can’t be used for entering numbers. Use the number row above the letter keys for numerical input.

Adjusting Mouse Keys Settings for Ease of Use

To enhance your experience with Mouse Keys in Windows 10, it’s important to adjust the settings for optimal use. Navigate to the Ease of Access settings to find a variety of options that can make Mouse Keys more user-friendly. Here, you can adjust the pointer speed, set the acceleration, and determine how long the numeric keys must be pressed before the mouse starts to move. For those who prefer a visual guide, resources like the iSunshare video on setting up Mouse Keys can be invaluable. Remember, the goal is to tailor Mouse Keys to your personal needs, ensuring a seamless integration into your daily workflow.
By fine-tuning these settings, users can achieve a balance between responsiveness and control, making navigation without a mouse not just possible, but also efficient and comfortable.

Operating Windows 11 Without a Mouse

Enabling Mouse Keys in Accessibility Settings

To enable Mouse Keys in Windows 11, navigate to the Accessibility settings. This feature allows you to use the numeric keypad to control the mouse cursor, providing an alternative input method for those who may have difficulty using a traditional mouse. To activate Mouse Keys, go to Settings > Accessibility > Mouse and toggle on the Use numeric keypad to move mouse around the screen option. Once enabled, you can adjust the pointer speed and other settings to suit your preferences.
Remember to click Apply or OK after making changes to ensure that your new settings are saved and take effect immediately.

Using Numeric Keypad for Mouse Control

Once Mouse Keys is enabled, the numeric keypad can serve as an alternative to the mouse, allowing you to move the cursor and execute clicks. Remember that when Mouse Keys is active, the numeric keypad cannot be used to enter numbers; instead, you’ll need to use the number row above the letter keys on your keyboard. To effectively use the numeric keypad for mouse control, familiarize yourself with the key assignments:
  • 824, and 6 move the cursor up, down, left, and right respectively.
  • 791, and 3 move the cursor diagonally.
  • 5 acts as a left mouse click.
  • Adding the Ctrl key to movement keys accelerates the cursor.
  • Pressing 0 initiates a click-and-drag, and . (dot) releases the drag.
To toggle Mouse Keys on and off, you can use the Alt + Left Shift + Num Lock keyboard shortcut. This is particularly useful if you need to switch between using the numeric keypad for mouse control and for numerical input.
Adjusting the cursor speed and acceleration can be done through the Ease of Access settings, ensuring that the mouse cursor behaves according to your preferences. It’s important to note that if the ‘Only use mouse keys when Num Lock is on’ option is selected, you must ensure that Num Lock is active to use the keypad for mouse control.

Fine-Tuning Mouse Keys Options for Better Control

To achieve the best control with Mouse Keys, it’s essential to fine-tune the settings to match your personal preferences and needs. Adjusting the pointer speed is a crucial step, as it determines how quickly the cursor moves across the screen when you use the numeric keypad. You can also set the acceleration, which affects how the cursor speed increases as you hold down a key. For those who require more precision, tweaking the delay before repeat and the repeat rate can be beneficial. This allows for more deliberate movements and can help prevent accidental cursor jumps. Remember, these settings are found within the Ease of Access Center, under the Mouse Keys setup.
By carefully configuring Mouse Keys, users can enhance their overall computer experience, especially when a mouse is not an option.
Here’s a quick guide to accessing the Mouse Keys settings:
  1. Open the Control Panel.
  2. Navigate to All Control Panel Items.
  3. Go to Ease of Access Center.
  4. Select ‘Set up Mouse Keys’.
Once you’re in the Mouse Keys setup, you can start fine-tuning the options to find the perfect balance for your usage.

Disabling Sticky Keys in Windows 10

Turning Off Sticky Keys via Settings

Disabling Sticky Keys in Windows 10 is a straightforward process that can be completed in just a few steps. Press the Windows key + I to open the Settings application. Navigate to the ‘Ease of Access’ category, where you will find the keyboard settings. To turn off Sticky Keys, follow these steps:
  1. Within the ‘Ease of Access’ settings, click on ‘Keyboard’.
  2. Look for the ‘Sticky Keys’ option.
  3. Toggle the switch to ‘Off’ to disable Sticky Keys.
Remember, if you need to re-enable Sticky Keys or adjust additional settings, you can return to this menu at any time.
Once Sticky Keys is disabled, you should no longer experience the modifier keys (such as Shift, Ctrl, Alt, and Windows) sticking after being pressed. If you find yourself needing to reconfigure these settings, the process is just as simple to reverse.

Using Search Function to Disable Sticky Keys

Disabling Sticky Keys in Windows 10 can be done swiftly using the search function. Simply press the Windows key, type ‘Sticky Keys’, and select the ‘Turn on easy access keys‘ option from the search results. Here, you can toggle off Sticky Keys by unchecking the corresponding box and clicking OK.
This method is particularly useful for users who prefer quick access to settings without navigating through multiple menus.
Additionally, the search function provides a convenient shortcut to the Sticky Keys settings for future adjustments. If you need to revisit the settings to modify other options, you can easily do so by clicking on the Sticky Keys shortcut in the search results.

Understanding the Impact of Sticky Keys on Typing

Sticky Keys is a feature designed to assist users who have difficulty pressing multiple keys at once. When enabled, it allows the activation of shortcut commands by pressing keys in sequence rather than simultaneously. However, for users who are accustomed to traditional keyboard use, Sticky Keys might disrupt the usual typing flow. For instance, an experienced typist may find their typing speed slightly reduced as they adjust to the Sticky Keys behavior. This is because the feature can change the response of modifier keys like Shift, Ctrl, and Alt, which are often used in quick succession during regular typing.
While Sticky Keys can be beneficial for accessibility, it’s important to consider how it might affect your typing efficiency and whether the trade-offs are suitable for your needs.
To better understand the impact, here’s a comparison of typing with and without Sticky Keys:
  • Without Sticky Keys: Pressing modifier keys simultaneously with other keys for shortcuts.
  • With Sticky Keys: Pressing modifier keys and other keys in sequence for shortcuts.
  • Adjustment Period: Time required for experienced typists to adapt to the new keypress sequences.
Disabling Sticky Keys is straightforward and can be done through the settings menu or via a shortcut in the search bar, ensuring that users can easily switch between modes depending on their current task or preference.

Disabling Sticky Keys in Windows 11

Deactivating Sticky Keys Through Settings

To turn off Sticky Keys on your Windows 11 device, begin by opening the Start menu, typing Settings, and pressing Enter. Navigate to the Accessibility section, scroll down, and select Keyboard. Here, you will find the toggle switch for Sticky Keys. Simply turn it off to deactivate the feature.
After disabling Sticky Keys, you might want to adjust additional settings related to this feature. Click on Sticky Keys or the arrow next to the toggle to access these options.
The settings available for Sticky Keys include:
  • Enabling or disabling the right Shift key shortcut.
  • Showing the Sticky Keys icon on the taskbar.
  • Locking shortcut keys when pressed twice in a row.
  • Automatically turning off Sticky Keys when two keys are pressed simultaneously.
Remember, if you need to revisit these settings or toggle off additional features, you can quickly access the Sticky Keys menu again through the search bar by typing Sticky Keys.

Shortcut Command to Toggle Sticky Keys

In Windows 11, you can quickly enable or disable Sticky Keys using a keyboard shortcut. Simply press the right Shift key five times in succession to toggle the feature on or off. This shortcut is a convenient way to access Sticky Keys without navigating through settings menus. To ensure this shortcut is active, follow these steps:
  1. Press the Windows key + I to open Settings.
  2. Navigate to Accessibility and then to Keyboard.
  3. Look for the ‘Use Sticky Keys’ option.
  4. Confirm that the ‘Allow the shortcut key to start Sticky Keys’ checkbox is selected.
Remember, if you press two keys simultaneously, Sticky Keys will automatically turn off, preventing unintended activation during regular typing tasks.

Configuring Sticky Keys Options for Personal Preference

Once you’ve enabled Sticky Keys on your Windows 10 or 11 system, personalizing the feature to suit your typing habits can enhance your overall experience. Adjusting the Sticky Keys settings is straightforward and allows you to tailor its behavior to your needs. To begin, access the Sticky Keys configuration by entering Settings > Ease of Access > Keyboard > Sticky Keys in Windows 10, or by searching for ‘Sticky Keys’ in the Windows 11 search bar. Here, you’ll find several options to customize:
  • Keyboard shortcut for Sticky Keys: Decide whether to use the right Shift key to activate or deactivate Sticky Keys.
  • Show the Sticky Keys icon on the taskbar: Toggle the visibility of the Sticky Keys icon for easy access.
  • Lock shortcut keys when pressed twice in a row: Enable keys like Windows, Shift, Alt, and Ctrl to lock when pressed consecutively.
  • Turn off Sticky Keys when two keys are pressed at the same time: This option prevents accidental activation of Sticky Keys during rapid typing.
Remember, configuring Sticky Keys to your preference not only aids in preventing unwanted interruptions but also ensures a smoother typing experience. Make sure to test different settings to find the combination that works best for you.

Conclusion

Enabling keyboard typing sounds on your Windows 10 or Windows 11 laptop can enhance your typing experience by providing auditory feedback. Throughout this article, we’ve explored various methods to activate this feature, as well as troubleshooting tips for common keyboard issues. Whether you’re using the on-screen keyboard, adjusting accessibility settings, or updating system drivers, the steps provided should help you achieve the desired typing sound effects. Remember that the exact navigation paths may differ slightly between Windows 10 and Windows 11, so be sure to follow the instructions that correspond to your operating system. With these tools at your disposal, you can customize your typing experience to suit your preferences and work more efficiently.

Frequently Asked Questions

How can I enable keyboard typing sounds on my Windows 10 laptop?

To enable keyboard typing sounds on Windows 10, go to Control Panel > Hardware and Sound > Change system sounds, and select a typing sound scheme under the ‘Program Events’ section.

Can I adjust the volume of keyboard typing sounds in Windows 11?

Yes, you can adjust the volume by navigating to Settings > Accessibility > Keyboard, and using the volume slider to customize the sound level.

What should I do if some keys on my Windows 10 keyboard are not working?

If some keys are not working on Windows 10, try updating BIOS, Windows packages, and drivers to the latest versions. You can also check hardware functionality and restore default keyboard settings.

How do I troubleshoot keyboard issues on Windows 11?

For keyboard issues on Windows 11, ensure that your drivers and BIOS are up to date. You can also diagnose hardware malfunctions and reset keyboard configurations to default settings.

Is there an on-screen keyboard available in Windows 10?

Yes, Windows 10 provides an on-screen keyboard. You can activate it by going to Settings > Ease of Access > Keyboard and toggling on the ‘On-Screen Keyboard’ option.

How can I use my Windows 11 computer without a mouse?

In Windows 11, you can use the numeric keypad as a mouse by enabling Mouse Keys in Settings > Accessibility > Mouse, and turning on the Mouse keys option.

How do I disable Sticky Keys in Windows 10?

To disable Sticky Keys in Windows 10, go to Settings > Ease of Access > Keyboard and turn off the ‘Sticky Keys’ toggle switch.

What are the steps to turn off Sticky Keys on Windows 11?

To turn off Sticky Keys on Windows 11, open Settings > Accessibility > Keyboard, and flip the toggle to disable the feature.

Laptop Keyboard Acting Up? Get Back to Typing Smoothly with Volta PC Upgrade & Repair!

Whether you’re battling sticky keys, missing letters, or a complete keyboard meltdown, a faulty keyboard ruins your productivity and your mood. Don’t let it! Volta PC Upgrade & Repair is your local expert for Windows and MacBook keyboard solutions.

We fix it all:

  • Spilled liquids and crumbs wreaking havoc
  • Individual key replacements
  • Full keyboard swaps for severe damage
  • Software glitches causing typing trouble
  • Mac and Windows expertise for seamless repairs

Why choose Volta PC Upgrade & Repair?

  • We’ll diagnose the issue quickly to save you time and money.
  • Our technicians use high-quality parts for lasting results.
  • We provide affordable pricing and upfront quotes.

Don’t struggle with a malfunctioning keyboard. Let Volta PC Upgrade & Repair for laptop keyboard repair service. Contact us today for a free estimate!

  • Address:
    • Tai Seng Branch: 8 Burn Road #01-04, Trivex, Singapore 369977
    • Jurong Branch: Blk 132 #01-279C, Jurong Gateway Road, Singapore 6001324
  • ContactWhatsapp us | Call 69500453 | Telegram us

LAPTOP KEYBOARD REPAIR SERVICES IN SINGAPORE

X