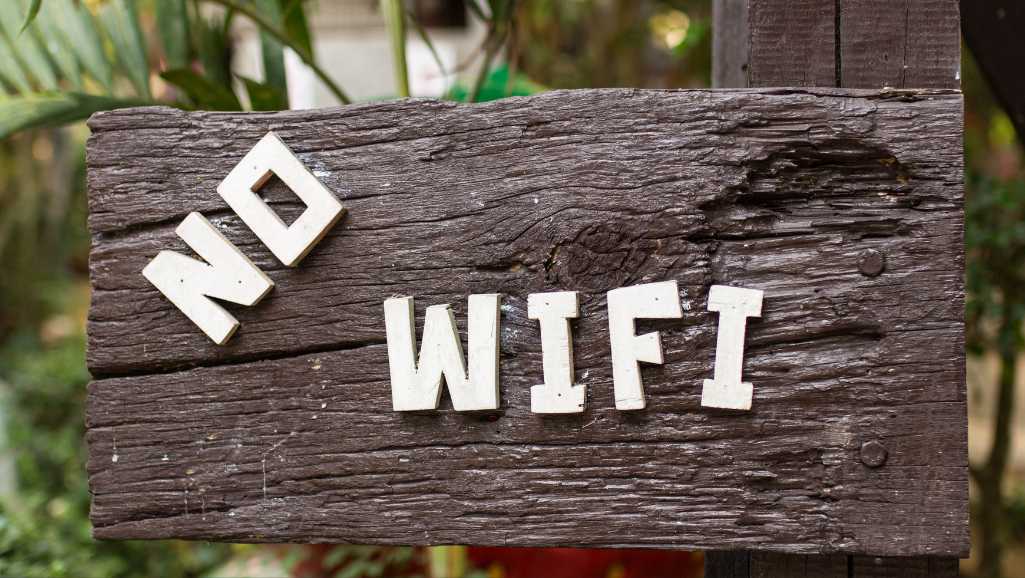
When Your MacBook Cannot Connect To Wifi: Ultimate Macbook Repair
You’re all set to work, stream, or browse, but your MacBook cannot connect to WiFi. It’s a situation that can throw off your entire day, but you’re not alone. WiFi connectivity issues are a common hurdle for MacBook users. Fortunately, most of these problems have solutions. In this all-inclusive guide, we’ll take you through various troubleshooting methods, advanced fixes, and even guide you on when it’s time to seek professional help. Let’s dive in and resolve your MacBook WiFi issues for good!
Why Your MacBook Cannot Connect To WiFi
Experiencing WiFi issues on your MacBook can be incredibly frustrating. There are several reasons why your device might struggle to establish a stable connection. Here are some common culprits:
- Outdated macOS: Running an older version of macOS can lead to compatibility issues with newer WiFi networks.
- Router Problems: Sometimes, the issue isn’t with your MacBook but with the router itself, which might be outdated or malfunctioning.
- Network Overload: Too many devices connected to the same network can cause bandwidth issues, affecting your MacBook’s ability to connect.
- Interference: Other electronic devices or even physical barriers like walls can interfere with your WiFi signal.
- Incorrect Settings: Mistakenly altered network settings can prevent a successful connection.
- Hardware Issues: In rare cases, the WiFi card in your MacBook might be faulty, leading to persistent connectivity problems.
- Software Conflicts: Third-party software or applications can sometimes interfere with your MacBook’s WiFi capabilities.
- IP Address Conflicts: Sometimes, multiple devices on the same network might be assigned the same IP address, causing connection issues.
Understanding the root cause of your MacBook’s WiFi issues is the first step in resolving them. Stay tuned for our comprehensive guide on how to tackle each of these problems effectively.
How to Fix MacBook Cannot Connect To WiFi: Start with the Basics Troubleshooting
Before diving into complex solutions, let’s start with the basics. Sometimes, the simplest actions can resolve your MacBook’s WiFi connectivity issues. So, let’s jump right in.
-
Turn WiFi On and Off
- First things first, make sure your WiFi is turned on. You can do this from the WiFi status icon in the menu bar.
- Solution: Toggle the WiFi off and then back on. This simple action often resolves minor connectivity issues.
-
Check Network Range
- Secondly, ensure you’re within range of the WiFi network. The typical range is around 150 feet.
- Solution: Move closer to the router if you’re out of range.
-
Select the Correct Network
- Are you connected to the right network? Sometimes, your MacBook might connect to a different network automatically.
- Solution: Manually select the network you want to connect to from the WiFi menu.
-
Enter the Correct Password
- Incorrect passwords are a common issue. Double-check to ensure you’ve entered the right one.
- Solution: Re-enter the password if you suspect it might be wrong.
-
Restart Your MacBook
- A simple restart can do wonders. It helps your MacBook renew its IP address.
- Solution: Go ahead and restart your MacBook to see if it solves the issue.
-
Check Date and Time Settings
- Incorrect date and time settings can cause problems. Make sure they are set correctly.
- Solution: Navigate to your MacBook’s settings to correct the date and time.
-
Restart Your Router
- Sometimes, the issue might be with the router itself.
- Solution: Unplug the router, wait a few minutes, and plug it back in.
-
Check for External Interferences
- Other devices can interfere with your connection.
- Solution: Make sure no other devices are causing the issue.
-
Check Cables and External Devices
- Loose cables can also be a problem.
- Solution: Ensure all cables are properly connected.
How to Fix MacBook Cannot Connect To WiFi: Advanced Troubleshooting Steps
1. Updating macOS
So, you’ve tried the basics, but your MacBook still won’t connect to WiFi. What’s next? Well, updating your macOS could be the solution you’re looking for. Let’s explore how and why this step can be crucial.
Why Update macOS?
Firstly, Apple frequently releases software updates. These updates often include fixes for connectivity issues. Therefore, keeping your macOS up-to-date is essential for optimal performance.
How to Check for macOS Updates
- Navigate to Apple Menu
- Click on the Apple logo in the top-left corner of your screen.
- Solution: Choose “System Preferences” from the dropdown menu.

- Go to Software Update
- In the System Preferences window, find and click on “Software Update.”
- Solution: Your MacBook will automatically check for updates.
- Download and Install
- If an update is available, you’ll see an “Update Now” button.
- Solution: Click it to download and install the update.
- Restart Your MacBook
- After the update, your MacBook will prompt you to restart.
- Solution: Go ahead and restart to complete the update process.
What If You Can’t Connect to Update?
Sometimes, you might find it challenging to update macOS because you can’t connect to WiFi. In such cases, try connecting to a different network. Once connected, follow the update steps mentioned above.
Potential Risks
However, be cautious. Sometimes, new updates can introduce new issues. For instance, some M1 and M2 Mac users have reported WiFi connectivity issues after updating their macOS. Therefore, it’s a good idea to read the update notes and user feedback before proceeding.
2. Contacting Your Service Provider
So, you’ve tried every trick in the book, but your MacBook still won’t connect to WiFi. Now, it’s time to consider contacting your service provider. Let’s delve into when and how to take this step.
When to Contact Your Service Provider
- Persistent Issues Across Multiple Networks
- If your MacBook struggles to connect to multiple WiFi networks, it’s a red flag.
- Solution: This could indicate a hardware issue that your service provider needs to address.
- After Exhausting All Troubleshooting Steps
- You’ve restarted your MacBook, updated macOS, and even reset network settings.
- Solution: If the issue persists, it’s time to make that call.
- Network-Specific Problems
- Sometimes, the issue might be with the network itself.
- Solution: If other devices can connect but your MacBook can’t, your service provider can help.
How to Contact Your Service Provider
- Locate Contact Information
- Usually, you’ll find the customer service number on your bill or the provider’s website.
- Solution: Keep this information handy for quick access.
- Be Prepared with Details
- Before you call, gather all relevant information.
- Solution: Know your account number, the nature of the issue, and steps you’ve already taken.
- Schedule a Technician, if Necessary
- Sometimes, the issue might require a home visit.
- Solution: Your service provider can schedule a technician to resolve the issue.
What to Expect
- Initial Troubleshooting
- The customer service rep will likely suggest basic troubleshooting steps.
- Solution: Politely inform them you’ve already tried these methods.
- Advanced Support
- They may escalate the issue to a higher level of support.
- Solution: Follow their advanced troubleshooting steps carefully.
- Technician Visit
- In some cases, they might schedule a technician for an in-person visit.
- Solution: Make sure to be available at the scheduled time.
3. Restarting Your Router
So, you’ve tried the basics and even updated your macOS, but you’re still facing WiFi issues. What’s next? Well, restarting your router might just be the solution you need. Let’s delve into how to do this effectively.
Why Restart Your Router?
Firstly, routers can sometimes fail to establish a stable connection. A simple restart often clears out minor issues and refreshes the router’s settings.
How to Properly Restart Your Router
- Unplug the Router
- Locate the power cable connected to your router.
- Solution: Unplug the router from the power source.
- Wait for a Few Minutes
- Patience is key here. Wait for about 2-5 minutes.
- Solution: This allows the router to fully shut down and clear its cache.
- Plug It Back In
- After waiting, it’s time to plug the router back in.
- Solution: Reconnect the power cable to the router.
- Wait for Router to Fully Restart
- The router will take a few minutes to fully restart.
- Solution: Wait until all the lights on the router are stable.
- Reconnect Your MacBook
- Now, try connecting your MacBook to the WiFi network.
- Solution: If successful, you’ve resolved the issue.
Advanced Router Settings
However, if the issue persists, you might want to delve into advanced router settings. For instance, you could change the WiFi channel if you suspect interference from other networks.
What If Restarting Doesn’t Work?
Sometimes, a simple restart won’t cut it. In such cases, you may need to reset your router to factory settings. But be cautious; this will erase all your custom settings.
4. Changing Router Channels
Alright, so you’ve tried almost everything, but your MacBook still refuses to connect to WiFi. What’s left? Changing your router’s channel could be the game-changer you need. Let’s dive into this advanced troubleshooting step.
Why Change Router Channels?
Firstly, WiFi channels can get crowded, especially in densely populated areas. This congestion can lead to connectivity issues. Therefore, switching to a less crowded channel can improve your WiFi performance.
How to Change Router Channels
- Access Router Settings
- Open a web browser and enter your router’s IP address.
- Solution: Log in using your router’s username and password.
- Navigate to Wireless Settings
- Once logged in, find the wireless settings section.
- Solution: This is where you’ll find options to change the channel.
- Select a New Channel
- Channels usually range from 1 to 11 for 2.4GHz and 36 to 165 for 5GHz.
- Solution: Choose a channel that is less crowded.
- Save and Apply Changes
- After selecting a new channel, save the settings.
- Solution: Your router will likely restart to apply the new settings.
- Test the Connection
- Once the router restarts, reconnect your MacBook.
- Solution: Check if the WiFi connectivity has improved.
What to Consider When Choosing a Channel
However, not all channels are created equal. Some might be crowded, while others are less so. Use a WiFi analyzer tool to identify the best channel for your network.
Risks and Precautions
Be cautious when changing router settings. Incorrect configurations can disrupt your network. Always back up your current settings before making changes.
5. Renewing DHCP Lease
You’ve restarted your router, changed channels, and even updated your macOS. Yet, your MacBook still won’t connect to WiFi. Frustrating, right? Well, renewing your DHCP lease might be the next step to consider. Let’s explore how to do it.
Why Renew DHCP Lease?
Firstly, what is DHCP? It stands for Dynamic Host Configuration Protocol. It’s what assigns your MacBook an IP address. Sometimes, renewing this IP address can resolve connectivity issues. Especially in crowded networks or when the DHCP lease time is short.
How to Renew DHCP Lease
- Navigate to System Settings
- Click the Apple menu and go to System Settings.
- Solution: Then click on Network in the sidebar.
- Select Your Network
- You’ll see a list of network services on the right.
- Solution: Click the one that needs a renewed IP address.
- Go to TCP/IP Settings
- Next, click on the “Details” button.
- Solution: Then click on TCP/IP.
- Click Renew
- You’ll see an option to “Renew DHCP Lease.”
- Solution: Click it and then click OK.
What Happens Next?
After renewing the DHCP lease, your MacBook will request a new IP address. This can often resolve minor connectivity issues. However, if the problem persists, you may need to contact your service provider.
Risks and Precautions
Be cautious. Renewing a DHCP lease will disconnect you temporarily from the network. Make sure you’re not in the middle of something important online.
6. Changing DNS Settings
Still struggling with WiFi connectivity on your MacBook? Don’t worry; there’s another advanced step you can try—changing your DNS settings. Let’s dive into how to do this effectively.
Why Change DNS Settings?
Firstly, DNS stands for Domain Name System. It translates website names into IP addresses. Sometimes, the default DNS servers provided by your ISP aren’t the fastest or most reliable. Changing them can improve your browsing speed and resolve connectivity issues.
How to Change DNS Settings
- Access System Preferences
- Click the Apple menu and select System Preferences.
- Solution: Then click on Network to open network settings.
- Choose Your Network
- A list of network services will appear on the right.
- Solution: Click on the network you’re connected to, like “Wi-Fi” or “Ethernet.”
- Navigate to DNS Settings
- After selecting your network, click on “Advanced.”
- Solution: Then click on the “DNS” tab.
- Modify DNS Servers
- You’ll see a list labeled “DNS Servers.”
- Solution: Click the “+” button below the list and enter a new DNS address.
- Save and Apply
- After entering the new DNS addresses, click “OK.”
- Solution: Finally, click “Apply” to save the changes.
What to Consider When Changing DNS
However, not all DNS servers are equally fast or secure. You can use Google’s DNS (8.8.8.8 and 8.8.4.4) or OpenDNS as alternatives. Some people even use DNS benchmarking tools to find the fastest servers.
Risks and Precautions
Be cautious when changing DNS settings. Incorrect configurations can disrupt your network. Always note down your current settings before making any changes.
7. Forgetting and Reconnecting to the Network
You’ve tried almost every trick in the book, but your MacBook still won’t connect to WiFi. What now? Well, sometimes, the solution is as simple as forgetting and reconnecting to the network. Let’s explore this often-overlooked step.
Why Forget and Reconnect?
Firstly, why would you want to forget a network? Sometimes, your MacBook stores incorrect settings or credentials for a network. Forgetting the network can clear these settings, allowing for a fresh connection.
How to Forget and Reconnect to a Network
- Click the Wi-Fi Icon
- Locate the Wi-Fi icon in the menu bar at the top right corner of your screen.
- Solution: Click it to reveal a drop-down menu.
- Open Network Preferences
- From the drop-down menu, select “Open Network Preferences.”
- Solution: This will open the Network Preferences window.
- Select Wi-Fi
- In the Network Preferences window, you’ll see a list on the left.
- Solution: Click on “Wi-Fi” to access its settings.
- Go to Advanced Settings
- You’ll find an “Advanced” button at the bottom right.
- Solution: Click it to reveal more options.
- Choose the Network to Forget
- A list of previously connected networks will appear.
- Solution: Select the network you want to forget.
- Remove the Network
- Below the list, you’ll see a “-” (minus) button.
- Solution: Click it to remove the selected network.
- Confirm the Action
- A confirmation prompt will appear.
- Solution: Click “OK” to forget the network.
- Reconnect to the Network
- Click the Wi-Fi icon in the menu bar again.
- Solution: Select the network you want to reconnect to.
- Enter Password
- If the network is password-protected, a prompt will appear.
- Solution: Enter the password to reconnect.
8. Using Diagnostic Tools
So, you’ve tried all the advanced troubleshooting steps, but your MacBook’s WiFi issues persist. What’s next? Well, it’s time to bring out the big guns—diagnostic tools. Let’s dive into how to use these tools effectively.
Why Use Diagnostic Tools?
Firstly, diagnostic tools can provide valuable insights into your network’s performance. They can identify issues that standard troubleshooting steps might miss.
How to Use Diagnostic Tools
- Open Network Utility
- Navigate to “Applications” > “Utilities” > “Network Utility.”
- Solution: This opens the Network Utility tool.
- Check the Info Tab
- In the Network Utility window, click on the “Info” tab.
- Solution: This tab provides information about your network interface.
- Select Network Interface
- From the drop-down menu, select your WiFi connection.
- Solution: Usually, it’s labeled as “Wi-Fi” or “AirPort.”
- Assess Signal Strength and Quality
- The tool will display signal strength and quality.
- Solution: Ensure the signal is strong and stable.
- Perform a WiFi Scan
- Click the “Scan” button.
- Solution: This will list nearby networks and their signal strengths.
- Use the Ping Tool
- Switch to the “Ping” tab in Network Utility.
- Solution: Enter an IP address (e.g., “8.8.8.8” for Google’s DNS) and click “Ping.”
- Reset Network Settings
- If issues persist, go to “System Preferences” > “Network.”
- Solution: Select your WiFi, click the gear icon, and choose “Make Service Inactive.” Reactivate it afterward.
What to Do If Issues Persist
However, if these steps don’t resolve your WiFi issues, you may need to consult a professional. Contacting Apple Support or a technician can provide further assistance.
9. Additional Tips
You’ve tried the basics, advanced troubleshooting, and even diagnostic tools. Yet, your MacBook’s WiFi still isn’t cooperating. Don’t lose hope! Here are some additional tips that could make all the difference.
Run Wireless Diagnostics
Firstly, modern versions of macOS have a built-in diagnostic tool. To access it, hold down the Option key and click the Wi-Fi icon in the menu bar. Then, select “Open Wireless Diagnostics.” This tool can identify major issues and offer valuable insights.
Update Your Software
Secondly, always keep your macOS and other software up-to-date. Sometimes, new updates can fix existing WiFi problems. If a recent update caused the issue, rolling it back might be a solution.
Change Preferred Order of Services
Another tip is to prioritize your WiFi network. Go to System Preferences > Network and click on the gear-shaped icon. Choose “Set Service Order” and make sure “Wi-Fi” is at the top.
Check TCP/IP Settings
If you’re still facing issues, check your TCP/IP settings. Navigate to System Preferences > Network > Advanced > TCP/IP. If something seems off, click “Renew DHCP Lease.”
Remove All Accessories
Lastly, some accessories can interfere with your WiFi signal. Especially for newer Macs with USB-C ports. Unplug all accessories and reboot your Wi-Fi to check if this resolves the issue.
FAQs on Macbook Cannot Connect To Wifi
Why won’t my Mac connect to my Wi-Fi?
There could be several reasons why your Mac won’t connect to Wi-Fi, ranging from outdated macOS and router issues to network overload and hardware malfunctions. Identifying the root cause is the first step to resolving the issue.
How do I force my MacBook to connect to Wi-Fi?
To force your MacBook to connect to Wi-Fi, you can try the following steps:
- Turn off Wi-Fi and then turn it back on.
- Forget the network and reconnect by entering the password.
- Restart your MacBook and try connecting again.
How do I reset my Wi-Fi on my MacBook?
To reset Wi-Fi settings on your MacBook:
- Go to System Preferences > Network.
- Select Wi-Fi and click on the “Advanced” button.
- Under the Wi-Fi tab, remove the network you’re having issues with.
- Click “OK” and then “Apply.”
- Reconnect to the network.
How do I reset my Wi-Fi hardware on my MacBook Pro?
Resetting Wi-Fi hardware on a MacBook Pro usually involves resetting the System Management Controller (SMC). To do this:
- Shut down your MacBook Pro.
- Unplug the power adapter.
- Hold down the Shift, Control, Option, and Power keys for 10 seconds.
- Release the keys and plug the power adapter back in.
- Turn on your MacBook Pro.
How do I reset my Mac Internet Recovery?
To reset Mac Internet Recovery:
- Restart your Mac.
- Hold down Command + Option + R keys during the boot-up process.
- Release the keys when you see the Apple logo.
- Follow the on-screen instructions to reinstall macOS.
How do I reset my laptop Wi-Fi connection?
To reset your laptop’s Wi-Fi connection:
- Turn off Wi-Fi from the menu bar or system tray.
- Wait for a few seconds.
- Turn Wi-Fi back on and reconnect to the network.
When to Consult Experts for Macbook Cannot Connect To Wifi
You’ve tried every trick, followed all the steps, and even used diagnostic tools. Still, your MacBook won’t connect to WiFi. At this point, it might be time to seek professional help. Let’s explore when and where to turn for expert assistance.
Signs You Need Professional Help
- Persistent Issues: Firstly, if you’ve tried all the troubleshooting steps and nothing works, it’s a sign.
- Hardware Malfunctions: Secondly, if you suspect the issue is hardware-related, don’t attempt to fix it yourself.
- Network Complexity: Thirdly, if your network setup is complex, a professional can better diagnose the issue.
- Time-Sensitive Tasks: Lastly, if you need an immediate fix due to work or other commitments, don’t hesitate to seek help.
Why Choose VOLTA PC Upgrade & Repair?
However, not all repair services are created equal. We recommend VOLTA PC Upgrade & Repair for Macbook repair service in Singapore:
- Expertise: They specialize in PC upgrades and repairs, including MacBooks.
- Quick Service: They offer fast and reliable service to get you back online.
- Customer Reviews: Their customer satisfaction ratings are high, making them a trusted choice.
VOLTA PC Upgrade & Repair is a reliable option for sorting out stubborn WiFi issues on your MacBook. So, don’t waste any more time; get the expert help you need.
Address:
- Tai Seng Branch: 8 Burn Road #01-04, Trivex, Singapore 369977
- Jurong Branch: Blk 132 #01-279C, Jurong Gateway Road, Singapore 600132