Quieting The Whir: How To Fix Laptop Fan Noise
Are you tired of the constant whirring noise from your laptop fan? Whether you’re a gamer, a professional, or a student, a noisy laptop fan can disrupt your focus and productivity. But don’t worry, there’s a solution. In this comprehensive guide, we’ll explore how to fix laptop fan noise, ensuring a quieter and more efficient laptop experience. We’ll delve into understanding the causes of laptop fan noise, diagnosing the problem, and implementing common solutions. We’ll also discuss when it’s best to seek professional laptop repair help. So, whether you’re using a gaming laptop or a regular one, this guide has got you covered.
Understanding Laptop Fan Noise
To fix laptop fan noise, it’s crucial to understand why it happens. Laptop fans are designed to keep the internal components cool. They work by circulating air to dissipate heat. When your laptop is working hard, or the environment is hot, the fans kick into high gear. This is normal. However, when the noise becomes distracting or unusually loud, it’s a sign that something is amiss.
Gaming laptops, known for their high-performance components, often generate more heat. This can lead to louder fan noise. Similarly, if you’re using your laptop on soft furnishings, the vents can get covered, causing the laptop to heat up and the fans to work harder. Activities like playing 3D games, using WebGL, or rendering video can also cause heat buildup, leading to noisy fans.
If your fans sound normal but are running constantly, the fan unit itself is unlikely to be the issue. Instead, it could be a sign of regular overheating. In such cases, you might need to look into laptop repair options.
Now, let’s delve deeper into the common reasons for laptop fan noise:
- Heat Buildup: Laptops, especially gaming laptops, can generate a lot of heat. When the internal components get too hot, the fans work harder, creating more noise.
- Blocked Vents: If the vents on your laptop are blocked, this can cause the laptop to overheat, forcing the fans to work harder and create more noise.
- Dust Buildup: Dust can accumulate on the fan blades and inside the laptop, causing the fans to work harder and create more noise.
- Software Issues: Sometimes, certain software or processes can put a high load on the CPU, causing it to heat up and the fans to create more noise.
- Hardware Problems: If the fan itself is damaged or malfunctioning, it can create excessive noise.
Understanding these causes is the first step to fix laptop fan noise. In the following sections, we will discuss how to diagnose and address these issues. Remember, regular maintenance and proper usage habits can go a long way in preventing laptop fan noise.
Diagnosing the Problem
Before you can fix laptop fan noise, you need to identify the source of the problem. Here’s a step-by-step guide to help you diagnose the issue:
1. Check the Running Software
The first step is to check the software currently running on your laptop. Some software or processes can put a high load on the CPU, causing it to heat up and the fans to create more noise. Press Ctrl + Shift + Esc to bring up the Task Manager on a Windows machine. Look at the CPU usage. If it’s high (above 80%) and your laptop is idle, a software could be causing the fan noise.
2. Inspect the Laptop’s Ventilation
The next step is to check the laptop’s ventilation. Blocked vents can cause the laptop to overheat, forcing the fans to work harder and create more noise. Make sure the vents are not blocked by dust or any other objects. Also, ensure your laptop is placed on a hard surface that doesn’t obstruct the vents.
3. Clean the Fan
Dust buildup on the fan can cause it to work harder and create more noise. Use a can of compressed air to clean the fan. Remember to turn off the laptop and disconnect it from the power source before cleaning.
4. Check for Hardware Issues
If the above steps don’t help, it could be a hardware issue. The fan itself could be damaged or malfunctioning. In such cases, you might need to seek professional laptop repair services.
5. Monitor the Laptop’s Temperature
Overheating can cause the fans to work harder and create more noise. Use software like Core Temp for Windows or Fanny for Mac to monitor your laptop’s temperature. If the temperature is consistently high, it could be the reason for the fan noise.
6. Control Fan Speed
Some laptops allow you to control the fan speed. You can enter the BIOS menu by pressing a key as your laptop boots, usually DEL or F2. Look for the hardware monitoring section and adjust the fan control settings.
Remember, diagnosing the problem correctly is crucial to fix laptop fan noise. Once you’ve identified the issue, you can proceed with the appropriate solution. In the next section, we’ll discuss common solutions to laptop fan noise.
Common Solutions to Fix Laptop Fan Noise
1. Kill Your Processes
One of the most effective ways to fix laptop fan noise is to reduce the demand on your hardware, particularly the GPU. This can be achieved by killing unnecessary processes. Both Mac and Windows users have tools to monitor and manage these processes, namely Activity Monitor and Task Manager respectively.
For Mac Users:
- Open the “Activity Monitor”: Go to the “Applications” folder, then navigate to the “Utilities” folder. Alternatively, you can use Spotlight search by pressing Command + Space and typing “Activity Monitor.”
- Identify resource-intensive processes: In the Activity Monitor window, you’ll see a list of active processes. Click on the “CPU” tab to sort the processes by CPU usage. Identify any processes consuming a significant amount of CPU resources.
- Quit unnecessary processes: Select the processes that you want to quit by clicking on them. Then, click the “X” button in the Activity Monitor toolbar, which represents the “Quit” button. Confirm the action if prompted. Be cautious not to quit essential system processes.
For Windows Users:
- Open the “Task Manager”: Press Ctrl + Shift + Esc simultaneously to open the Task Manager directly. Alternatively, you can right-click on the taskbar and select “Task Manager” from the context menu.
- Identify resource-intensive processes: In the Task Manager window, click on the “Processes” or “Details” tab. Sort the processes by CPU usage by clicking on the “CPU” column header. Look for any processes that are using a significant amount of CPU resources.
- End unnecessary processes: Right-click on the process you want to end and select “End Task” from the context menu. Confirm the action if prompted. Take care not to end essential system processes.
2. Reset SMC & PRAM (Mac Users)
Resetting the System Management Controller (SMC) on Mac computers can help resolve fan noise issues. The SMC manages functions like fan speed control. Resetting it can address abnormal behavior and restore proper fan functioning. Follow the instructions specific to your Mac model provided by Apple. Note that resetting the SMC may reset some power-related settings and further troubleshooting may be needed if the fan noise persists.
Here’s a general guide on how to reset the SMC:
- Shut down your Mac: Choose “Shut Down” from the Apple menu to turn off your Mac completely.
- Disconnect power sources: If your Mac is connected to a power adapter, unplug it. If you have any external peripherals connected (e.g., USB devices), disconnect them as well.
- Wait for a few seconds: Allow a brief period (around 15 seconds) for the SMC to fully reset.
- Reconnect power sources: Reconnect the power adapter to your Mac.
- Start your Mac: Press the power button to turn on your Mac as usual.
Note that the steps for resetting the SMC can vary depending on the specific model and type of your Mac computer. It’s recommended to consult Apple’s official support documentation or the user manual for your Mac model to ensure you follow the correct instructions.
3. Cool It Down
Laptop coolers are designed to improve the cooling performance of laptops by enhancing airflow. The metal plate acts as a heat sink, absorbing heat from the laptop’s components, while the built-in fans blow cool air onto the underside of the laptop, facilitating better heat dissipation.
By using a laptop cooler, you can reduce the temperature inside the laptop, which is particularly important during resource-intensive tasks or extended periods of use. Lower temperatures help prevent thermal throttling, maintain optimal performance, and protect the laptop’s hardware from potential damage caused by overheating.
Laptop coolers are particularly useful when the laptop is used on a desk or another static position. Placing the laptop on surfaces like beds or laps can obstruct airflow, leading to reduced cooling efficiency. The elevated design of laptop coolers ensures better air circulation and prevents the intake vents from being blocked, resulting in improved cooling performance.
In addition to reducing heat, laptop coolers can also contribute to a quieter working environment. By assisting in keeping the laptop’s internal temperature in check, the internal fans don’t have to work as hard, reducing fan noise.
4. Software Fixes
Third-party software provides an alternative to the default fan control settings, allowing users to manually adjust the fan speed and find a balance between cooling performance and noise reduction.
Some notable fan control software options for laptops include:
- SpeedFan: SpeedFan is a popular and widely used fan control utility that offers extensive customization options. It supports a wide range of laptop models and allows users to monitor temperature sensors, adjust fan speeds, and create custom fan profiles. SpeedFan can be an effective solution for reducing fan noise and managing laptop temperatures.
- HWiNFO: HWiNFO is primarily a hardware monitoring software but also offers fan control features. It provides detailed information about the laptop’s hardware components, including temperature readings, and allows users to customize fan speed settings. HWiNFO is known for its compatibility with various laptop models and can help users fine-tune their fan performance.
- NoteBook FanControl: As the name suggests, NoteBook FanControl is specifically designed for controlling laptop fans. It supports a wide range of laptop brands and models and provides a straightforward interface for adjusting fan speeds. The software allows users to create temperature-based fan profiles and provides real-time monitoring of fan speed and temperature.
- Argus Monitor: Argus Monitor is a comprehensive monitoring and fan control software that offers a range of features, including fan speed adjustment. It provides detailed information about system temperatures, fan speeds, and voltages. Users can create custom fan curves based on temperature thresholds to achieve optimal cooling while minimizing noise.
- MSI Afterburner: Although primarily known for GPU overclocking, MSI Afterburner also includes fan control functionality. It supports MSI laptops and graphics cards, offering users the ability to manually adjust fan speeds, create custom fan profiles, and monitor system performance. While limited to MSI devices, it can be a powerful solution for users with compatible laptops.
5. Change Your Fan Settings
You can reduce fan noise by adjusting your laptop’s fan settings. This can be done through physical fan controls on your keyboard, utilities installed on your laptop, or through your laptop’s BIOS/UEFI menu.
- Physical fan controls: Some laptops have dedicated physical buttons or keys on the keyboard that allow you to adjust the fan speed. Look for symbols such as a fan icon or up/down arrows on the function keys or other dedicated keys. Pressing these buttons or using the appropriate key combinations can increase or decrease the fan speed, thus affecting the noise level.
- Third-party software utilities: Many laptops come with manufacturer-provided utilities that allow you to control fan speed. These utilities may be pre-installed or available for download from the manufacturer’s support website. Install the appropriate utility for your laptop model and use it to adjust the fan speed settings. These utilities typically offer customizable fan profiles or manual control options to optimize cooling and reduce noise.
- BIOS/UEFI settings: Accessing your laptop’s BIOS (or UEFI) menu allows you to make low-level system adjustments, including fan settings. Restart your laptop and look for the key(s) to enter the BIOS/UEFI menu during startup (common keys include F2, F10, or Del). Once in the menu, navigate to the fan settings or hardware monitoring section. Depending on your laptop model and BIOS/UEFI version, you may have options to adjust fan speeds or set fan curves. Make the desired changes and save the settings before exiting the BIOS/UEFI menu.
6. Change Your Power Settings
Most operating systems allow you to customize your laptop’s power plan. By opting for a plan that generates less heat, you can reduce the need for cooling and thus reduce fan noise.
Windows:
- Open the Power Options: Go to the Control Panel or search for “Power Options” in the Start menu.
- Select a Power Plan: Choose a power plan that aligns with your preferences. The “Balanced” plan is a good starting point, as it offers a balance between performance and power savings.
- Customize Power Plan: Click on “Change plan settings” next to the selected power plan. From there, you can adjust settings like the display and sleep timers to conserve power and reduce heat generation. Additionally, click on “Change advanced power settings” to access more detailed options.
- Adjust Processor Power Management: In the advanced power settings, expand the “Processor power management” section. Here, you can modify settings such as maximum processor state, minimum processor state, and system cooling policy. Lowering the maximum processor state can reduce heat generation, and setting the cooling policy to passive can minimize fan activity.
- Save Changes: Once you’ve made the desired adjustments, click on “Apply” and then “OK” to save the changes.
Mac:
- Open Energy Saver Preferences: Go to the Apple menu and select “System Preferences.” Then, click on “Energy Saver.”
- Choose a Power Plan: You can select from the available power plans (e.g., “Better Energy Savings” or “Normal”) that suit your requirements.
- Customize Power Plan: Within the Energy Saver preferences, adjust settings such as display sleep, computer sleep, and hard disk sleep to optimize power usage and reduce heat generation. Drag the sliders to set the desired times for these settings.
- Additional Options: To further fine-tune power settings, click on “Schedule” to set specific times for your Mac to start up, wake, sleep, or shut down. This can help manage power usage efficiently.
- Close Preferences: Once you have customized the power plan settings, close the Energy Saver preferences window, and the changes will be applied.
7. Use GPU Features That Cut Fan Noise
If your laptop has a dedicated GPU, you can use the GPU’s utility software to limit its performance and reduce heat generation, which can help minimize fan noise. These software utilities often offer options to adjust power targets, select power-saving modes, or manually control fan speeds. By reducing the GPU’s power consumption, you can decrease heat output and achieve quieter fan operation. It’s important to find the right balance between performance and noise reduction while monitoring temperatures to ensure proper cooling. Refer to the GPU’s utility software documentation or support resources for specific instructions on adjusting these settings.
8. Use Frame Limiters in Games
Many modern video games allow you to set a maximum frame rate, which can significantly reduce the amount of heat and fan noise during gameplay.
Here’s how to do it:
- Launch the video game: Start the video game you want to adjust.
- Access the game settings: Look for the in-game settings menu. This is usually accessible from the main menu or an options/settings submenu within the game.
- Locate the frame rate settings: Within the game settings, search for options related to frame rate or graphics settings. Look for options like “Frame Rate Limit,” “Max FPS,” or similar terms.
- Set the maximum frame rate: Once you’ve found the frame rate settings, choose the maximum frame rate you desire. Common options include 30 FPS, 60 FPS, or 120 FPS. Select a frame rate that suits your preferences while considering the capabilities of your hardware.
- Apply the changes: Save or apply the changes in the game settings menu to enforce the maximum frame rate limit.
- Test and adjust: Launch the game and play for a while to ensure that the changes have been applied correctly. Monitor the GPU temperatures and fan noise during gameplay to evaluate the impact of the frame rate limit. If needed, adjust the frame rate limit further to find the optimal balance between performance, temperature, and fan noise.
Note: It’s important to understand that limiting the frame rate may result in a smoother gameplay experience, reduced heat generation, and consequently, quieter fan operation. However, it may also lead to a slight decrease in visual fluidity or responsiveness. Experiment with different frame rate settings to find the best compromise for your preferences and hardware capabilities.
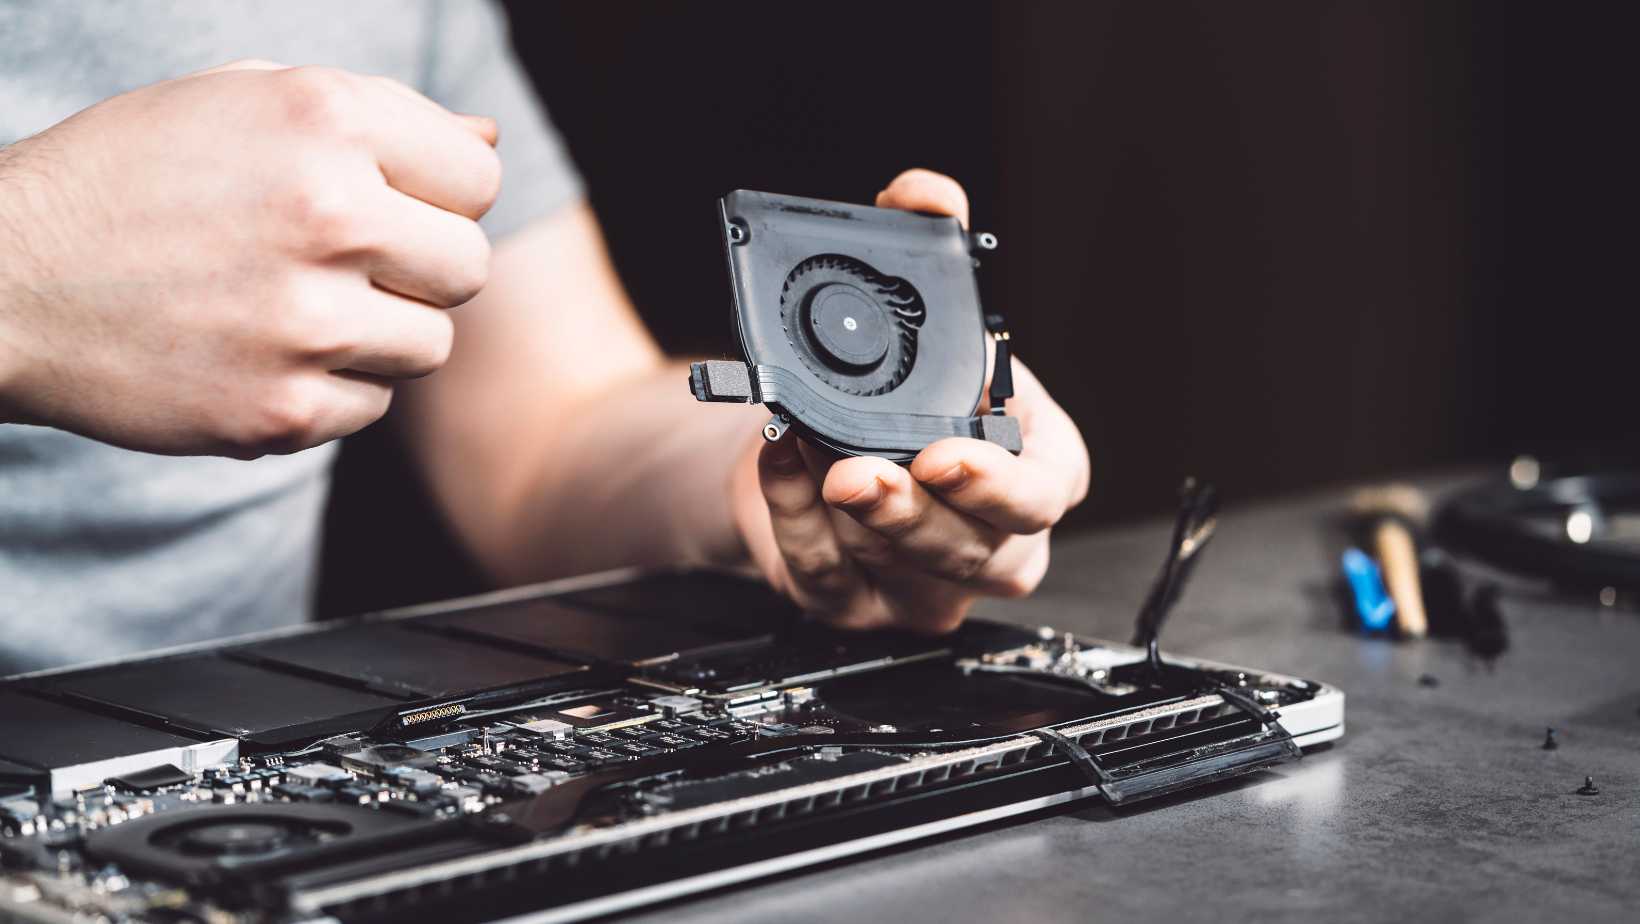
9. Clean Out the Dust

Dust accumulation is a common culprit behind fan noise in laptops. Over time, dust and debris can build up on the fans and vents, obstructing proper airflow and causing the fans to work harder, resulting in increased noise. Cleaning out the dust from your laptop can help alleviate this issue.
Here are some more details on how to clean your laptop:
- Preparation: Start by shutting down your laptop and unplugging it from any power source. It’s important to work on a clean and static-free surface.
- External Cleaning: Use a soft cloth or microfiber cloth to wipe the exterior surfaces of your laptop. This helps remove any visible dust or dirt from the casing.
- Opening the Laptop: Depending on the model of your laptop, you may need to remove the back panel or keyboard to access the internal components. Refer to the manufacturer’s instructions or search for specific disassembly guides for your laptop model.
- Cleaning the Fans and Vents: Once you have access to the internal components, locate the fans and vents. Use a can of compressed air or an air blower to blow air into the fans and vents. Hold the can or blower a few inches away from the components and use short bursts of air to dislodge the dust. Be careful not to let the fans spin freely while blowing air into them, as it can damage the fan bearings.
- Removing Stubborn Dust: If there are stubborn dust clumps or buildup, you can use a soft brush or a cotton swab lightly moistened with isopropyl alcohol to gently clean the fan blades and heat sinks. Avoid applying excessive pressure or using excessive moisture.
- Reassembling the Laptop: Once you are satisfied with the cleaning, carefully reassemble the laptop by following the disassembly steps in reverse order. Ensure all the connections are secure and the components are properly aligned.
- Powering On and Testing: Power on your laptop and observe if the fan noise has reduced. Monitor the fan activity and ensure proper airflow during usage.
It is recommended to clean your laptop every few months or whenever you notice excessive fan noise or increased temperatures.
Regular cleaning helps to prevent dust buildup and maintain proper airflow, which can improve cooling performance and reduce fan noise. If you are uncomfortable performing the cleaning yourself or if your laptop is still under warranty, consider taking it to a professional technician or an authorized service center for assistance.
Remember, it’s important to address the root cause of the fan noise. If your laptop is overheating, it’s crucial to find out why and fix the issue to prevent potential damage to your laptop’s components.
When to Seek Professional Help
There are times when the noise from your laptop fan may be a sign of a more serious issue. In such cases, it’s best to seek professional help. Here’s how to know when it’s time to consult a laptop repair expert.
- Persistent Noise: If the fan noise persists even after trying all the common solutions, it’s time to consult a professional. This could be a sign of a more serious underlying issue that needs expert attention.
- Overheating: If your laptop is consistently overheating despite your efforts to cool it down, it’s best to seek professional help. Overheating can cause significant damage to your laptop’s internal components, including the CPU and GPU.
- Physical Damage: If the fan is physically damaged or broken, it’s time to seek professional help. A damaged fan can’t effectively cool your laptop, leading to potential overheating and damage to other components.
- Software Issues: Sometimes, the fan noise could be due to software issues. If you’ve tried updating your drivers and adjusting your power settings but the noise persists, it could be a software-related issue that needs professional attention.
- Warranty: If your laptop is still under warranty, it’s best to seek professional help. Attempting to fix the issue yourself could void your warranty.
Remember, while it’s possible to fix laptop fan noise yourself, there are times when it’s best to seek professional help. A professional laptop repair service can diagnose and fix the issue, ensuring your laptop is in good working condition.
In conclusion, while a noisy laptop fan can be a nuisance, there are several ways to fix the issue. From understanding why your laptop fan is noisy, diagnosing the problem, implementing common solutions, to knowing when to seek professional help, this guide provides a comprehensive approach to fixing laptop fan noise. Whether you’re a gaming enthusiast, a professional working from home, or a student, these tips can help you enjoy a quieter, more efficient laptop experience.
Conclusion
In conclusion, a noisy laptop fan doesn’t have to disrupt your work or gaming experience. With the right knowledge and tools, you can fix laptop fan noise and enjoy a quieter, more efficient laptop. From understanding the causes of laptop fan noise, diagnosing the problem, implementing common solutions, to knowing when to seek professional help and taking preventive measures, this guide provides a comprehensive approach to fixing laptop fan noise. Remember, while it’s possible to fix the issue yourself, there are times when it’s best to seek professional help. A professional laptop repair service can diagnose and fix the issue, ensuring your laptop is in good working condition. So, don’t let a noisy fan disrupt your focus. Take control of your laptop’s fan noise today.
Where to fix laptop noise in Singapore?
If you’re in Singapore and struggling with laptop fan noise, there’s a reliable solution at your fingertips. VOLTA PC Upgrade & Repair is a trusted name in laptop repair services. They specialize in diagnosing and fixing various laptop issues, including fan noise.
Whether you’re dealing with a gaming laptop or a regular one, VOLTA PC’s team of experts can help. They understand the nuances of different laptop models and can provide tailored solutions to fix laptop fan noise. Plus, they offer free diagnostic services for devices that are out of warranty. This means you can understand the root cause of the problem without any upfront costs.
So, if your laptop fan is creating a ruckus, don’t let it disrupt your peace. Contact VOLTA PC Upgrade & Repair today and say goodbye to that annoying laptop fan noise.
Address:
- Tai Seng Branch: 8 Burn Road #01-04, Trivex, Singapore 369977
- Jurong Branch: Blk 132 #01-279C, Jurong Gateway Road, Singapore 600132