Laptop Repair: How to Fix No Bootable Device Error

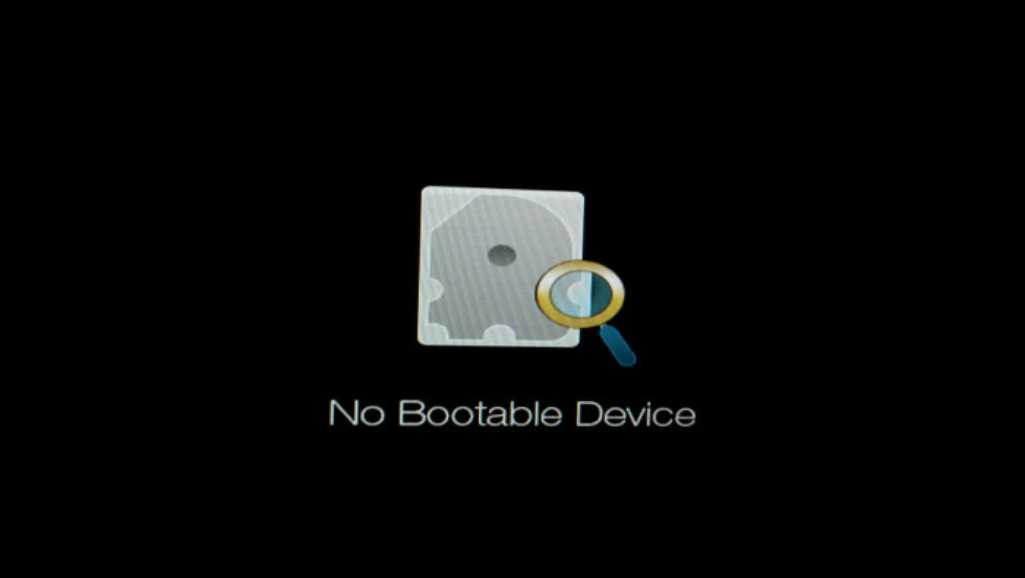
Encountering the “No Bootable Device” error on your laptop can be alarming. This issue signifies that your system cannot locate a drive with an operating system to boot from. This comprehensive guide will help you understand the error, troubleshoot it, and prevent future occurrences, ensuring your laptop repair process is smooth and effective. A laptop that fails to boot can disrupt your work, studies, or personal projects. Understanding the root causes and solutions for this error not only helps in quick resolution but also prevents recurrence. This guide is structured to provide a step-by-step approach to diagnosing and fixing the “No Bootable Device” error, with a focus on practical, easy-to-follow methods.

Understanding the “No Bootable Device” Error

The “No Bootable Device” error means your laptop cannot find an operating system to load. This problem often arises due to incorrect BIOS/UEFI settings, physical disconnections, corrupted system files, or even hardware failures. Common scenarios include after a system crash, improper shutdown, or hardware changes. Causes of the Error:
  1. BIOS/UEFI Configuration Issues:
    • Incorrect boot order settings in BIOS/UEFI can cause the system to try booting from an unbootable device.
  2. Physical Disconnections:
    • Loose or disconnected cables inside the laptop can prevent the hard drive from being detected.
  3. Corrupted System Files:
    • A corrupted Windows installation can result in the system being unable to locate the bootable files.
  4. Hardware Failures:
    • Hard drive or SSD failures can also lead to this error.
Understanding these causes is crucial for effective troubleshooting. By identifying the specific issue, you can apply the correct fix, saving time and effort.

Initial Troubleshooting Steps

Checking BIOS/UEFI Settings Your first step should be to check the BIOS/UEFI settings to ensure the correct drive is set as the primary boot device. Here’s how:
  1. Accessing BIOS/UEFI:
    • Restart your laptop.
    • Press the designated key (commonly F2, F10, DEL, or ESC) during startup to enter BIOS/UEFI.
  2. Verifying Boot Order:
    • Navigate to the Boot tab using arrow keys.
    • Ensure the drive with your operating system is at the top of the list.
    • Save changes and exit BIOS/UEFI.
Incorrect boot order settings can mislead the system to boot from an unbootable device. Adjusting these settings is often a quick fix that resolves the “No Bootable Device” error without further complications.

Hardware Checks

Inspecting Physical Connections Loose or damaged cables can cause the “No Bootable Device” error. Here’s what to do:
  1. Check SATA and Power Cables:
    • Turn off your laptop and disconnect the power supply.
    • Open the back panel and locate the hard drive.
    • Ensure the SATA and power cables are securely connected.
  2. Reseat Components:
    • Reseat the RAM by removing and reinserting it.
    • Check for any visible damage on cables or connectors.
  3. Check for Physical Damage:
    • Inspect the hard drive and cables for signs of wear or damage.
    • Replace any damaged components.
Ensuring all physical connections are secure and undamaged is a critical step. Even minor issues like a slightly loose cable can prevent your system from booting.

Software Solutions

Using Windows Repair Tools
  1. System File Checker (SFC):
    • Boot from a Windows installation USB.
    • Access the command prompt by pressing Shift + F10 at the installation screen.
    • Run sfc /scannow /offbootdir=C:\ /offwindir=D:\Windows.
  2. CHKDSK Utility:
    • In the command prompt, type chkdsk C: /f /r /x to scan and fix disk errors.
  3. Rebuild Boot Configuration Data (BCD):
    • Use the command prompt to run the following commands:
      bash
      bootrec /fixmbr bootrec /fixboot bootrec /scanos bootrec /rebuildbcd

Advanced Fixes

Repairing the Master Boot Record (MBR) Corrupted MBR can cause boot issues. To fix it:
  1. Boot from a Windows installation USB.
  2. Open the command prompt and run:
    bash
    bootrec /fixmbr bootrec /fixboot
Using Diskpart to Manage Partitions
  1. Boot from the installation media.
  2. Open the command prompt and use Diskpart:
    sql
    diskpart list disk select disk 0 list partition select partition 1 active
Advanced fixes like repairing the MBR or managing partitions using Diskpart require more technical expertise but can resolve deeper issues that basic troubleshooting cannot.

Preventive Measures

Regular Maintenance Tips
  1. Keep BIOS/UEFI Updated:
    • Regularly check for updates from your laptop manufacturer.
  2. Regular Hardware Checks:
    • Periodically check cable connections and hardware condition.
Backup Strategies
  1. Regular Backups:
    • Use external drives or cloud storage to back up important data regularly.
  2. System Images:
    • Create system images to restore your system quickly in case of failures.
Preventive measures not only help in avoiding the “No Bootable Device” error but also ensure the overall health and longevity of your laptop.

When to Seek Professional Help

If these steps do not resolve the issue, it may indicate severe hardware problems. Look for these signs:
  1. Signs of Hardware Failure:
    • Persistent error messages even after troubleshooting.
    • Physical damage to the hard drive or motherboard.
  2. Choosing a Reliable Laptop Repair Service:
    • Research and select a reputable service center with good reviews.
Recognizing when professional help is needed can save you from further complications and ensure that your laptop receives the necessary repairs.

Conclusion

The “No Bootable Device” error can be daunting, but with systematic troubleshooting and preventive measures, you can often resolve and prevent this issue. Regular maintenance and backups are crucial in maintaining your laptop’s health and avoiding data loss. If the problem persists, seeking professional help ensures your laptop receives the necessary care and repair. By following this guide, you can tackle the “No Bootable Device” error confidently and keep your laptop running smoothly.

FAQs

How do I fix no bootable device?

To fix a “No Bootable Device” error, follow these steps:
  1. Check BIOS/UEFI Settings:
    • Restart your computer and press the key to enter BIOS/UEFI (commonly F2, F10, DEL, or ESC).
    • Navigate to the Boot tab and ensure your hard drive is set as the primary boot device.
  2. Check Physical Connections:
    • Power off your computer, open the case, and check the connections to your hard drive. Ensure the SATA and power cables are securely connected.
  3. Use Windows Repair Tools:
    • Boot from a Windows installation USB or DVD.
    • Select “Repair your computer” and use tools like System File Checker (sfc /scannow) and CHKDSK (chkdsk C: /f /r /x) to fix errors.
  4. Rebuild Boot Configuration Data (BCD):
    • In the command prompt, run the following commands:
      bash
      bootrec /fixmbr bootrec /fixboot bootrec /scanos bootrec /rebuildbcd
  5. Repair the Master Boot Record (MBR):
    • Use the command prompt and run bootrec /fixmbr and bootrec /fixboot.
If these steps don’t work, consider seeking professional help from a repair service like Volta PC Upgrade Repair.

How do I skip a no bootable device?

Skipping a “No Bootable Device” error generally means bypassing the current boot attempt and troubleshooting the root cause:
  1. Access BIOS/UEFI:
    • Restart your computer and press the BIOS/UEFI entry key (usually F2, F10, DEL, or ESC).
    • Check and set the correct boot order to ensure your hard drive is prioritized.
  2. Use a Bootable USB or DVD:
    • Create a bootable USB drive with a Windows installation tool.
    • Boot from this USB drive by changing the boot order in BIOS/UEFI, then use the repair tools provided to diagnose and fix the issue.
Skipping the error doesn’t resolve the underlying problem but can allow you to boot from an alternative device temporarily.

How to fix no bootable device on Acer?

To fix the “No Bootable Device” error on an Acer laptop:
  1. Access BIOS/UEFI:
    • Restart your Acer laptop and press F2 to enter the BIOS/UEFI setup.
    • Navigate to the Boot tab and ensure your hard drive is set as the first boot device.
  2. Reset BIOS to Default Settings:
    • In the BIOS setup, find the option to reset to default settings and apply it. Save and exit BIOS.
  3. Check Physical Connections:
    • Ensure the hard drive is securely connected to the motherboard. Check for any loose or damaged cables.
  4. Use Windows Repair Tools:
    • Boot from a Windows installation USB.
    • Choose “Repair your computer” and use tools like System File Checker (sfc /scannow) and CHKDSK (chkdsk C: /f /r /x) to fix system errors.
  5. Rebuild Boot Configuration Data (BCD):
    • Open command prompt from the installation media and run:
      bash
      bootrec /fixmbr bootrec /fixboot bootrec /scanos bootrec /rebuildbcd
If these steps fail, it may be a hardware issue requiring professional repair.

How do I escape a no bootable device?

To escape the “No Bootable Device” error and boot your computer successfully:
  1. Check BIOS/UEFI Settings:
    • Restart your computer, press the BIOS/UEFI entry key (F2, F10, DEL, ESC).
    • Verify the correct boot order, making sure your hard drive is prioritized.
  2. Use a Bootable USB or DVD:
    • Create a bootable USB with a Windows installation tool.
    • Boot from the USB by adjusting the boot order in BIOS/UEFI. Use the provided repair options to fix any detected issues.
  3. Repair Boot Configuration:
    • In the command prompt, run:
      bash
      bootrec /fixmbr bootrec /fixboot bootrec /scanos bootrec /rebuildbcd
  4. Check Hardware Connections:
    • Turn off your computer, open the case, and check for securely connected SATA and power cables.
Escaping the error often involves troubleshooting and repairing the root cause, whether it’s a software issue or a hardware fault.
Is your laptop showing a “No Bootable Device” error? Don’t let this issue disrupt your day. While our guide provides comprehensive steps to troubleshoot and fix this error, some problems require expert attention. For professional and reliable laptop repair services, visit Volta PC Upgrade & Repair. Our experienced technicians specialize in diagnosing and resolving boot issues, ensuring your laptop is up and running quickly. Whether it’s a hardware fault or a more complex software problem, Volta PC Upgrade & Repair has you covered. Stop by today to get your laptop repaired efficiently and effectively, and avoid the hassle of dealing with persistent errors on your own. Visit us at Volta PC Upgrade Repair for all your laptop repair needs!
  • Address:
    • Tai Seng Branch: 8 Burn Road #01-04, Trivex, Singapore 369977
    • Jurong Branch: Blk 132 #01-279C, Jurong Gateway Road, Singapore 6001324
  • ContactWhatsapp us | Call 69500453 | Telegram us
X