Laptop LCD repair can seem daunting, but with the right guide, it’s manageable. In this comprehensive blog post, we’ll walk you through diagnosing and repairing lines on your laptop screen. We’ll also share real-world insights from industry experts at VOLTA PC Upgrade & Repair. Let’s dive in!
1. Precautionary Steps Before Repairing
Let’s get down to business. Before you venture into the world of laptop repair, there are a few precautionary steps you need to take. After all, safety should always come first, right?
A. Disconnecting the power source
First things first, disconnect your laptop from any power source. This step is not only for your safety. It also protects your laptop’s internal components from any electrical damage.
Your laptop’s battery is a power source too. So, remember to remove it. Also, push the power button after removing the battery. This step ensures there’s no residual power left in your laptop.
B. Handling the laptop with care
Your laptop is a delicate piece of machinery. Handle it with care. Especially when you’re about to open it up.
Ensure you have a clean, flat surface to work on. You don’t want to lose any tiny screws, do you? Also, avoid any static electricity. It can damage your laptop’s internal components. A simple way to do this? Just touch any metal object around you before starting your repair work.
C. Gathering necessary tools and equipment
Now, on to your tools. For most laptop repairs, you’ll need a set of small screwdrivers. A pair of tweezers might come in handy too. And don’t forget a soft cloth or an air duster. You’ll need it to clean off any dust from the internal parts of your laptop.
In a nutshell, preparation is key to a successful LCD repair. It ensures your safety and protects your laptop. Also, it sets you up for a smooth repair process. So, take these precautionary steps seriously. Your laptop repair mission will thank you for it!
In the next section, we’ll dive into troubleshooting the line issue. Stay tuned!
2. Troubleshooting the Issue
Troubleshooting is the heartbeat of any laptop repair process. It helps you pinpoint the exact cause of the problem. From there, you can tailor a solution that hits the mark. Now, let’s dive into the main areas you should focus on.
A. Assessing the connection between the LCD and the motherboard
The first area to inspect is the connection between your LCD and the motherboard. It’s where the display cable comes in. A loose or damaged cable can cause lines on your screen.
To check this, you’ll need to open up your laptop. But remember, take your time. Gently remove the screws holding the back panel. Once you’re in, locate the display cable.
Does it look loose or damaged? If it’s loose, reattach it securely. If it’s damaged, you might need to replace it.
B. Inspecting the graphics card and drivers
Next up, let’s talk about the graphics card and drivers. They play a key role in your laptop’s display. Any issues here can result in lines on your screen.
Start by checking your graphics drivers. Outdated drivers can sometimes cause display issues. To fix this, simply update your graphics drivers to the latest version.
Reinstalling the graphics drivers can help too. This step can resolve any bugs or glitches that might be causing the lines.
C. Examining the LCD panel itself
Lastly, inspect the LCD panel itself. Dead pixels or a faulty ribbon cable can cause lines on the screen.
Unfortunately, you can’t fix dead pixels. If you find any, you might need to replace the LCD panel. As for the ribbon cable, check if it’s loose or damaged. If it is, secure it or replace it as needed.
In conclusion, troubleshooting is a crucial part of LCD repair. It narrows down the cause of the lines on your screen. From there, you can devise a targeted solution. So, take your time with it. It might seem tedious, but your PC repair efforts will bear fruit in the end!
3. Laptop LCD Repair Methods
Now that you’ve pinpointed the culprit, let’s get into the action. This part of your laptop repair journey involves fixing the issue. Here’s how to go about it.
A. Replacing the display cable
If the display cable was the problem, you’ll need to replace it. Start by purchasing a new cable that fits your laptop model. You can usually find this online or at your local pc repair service store.
Once you have the new cable, carefully remove the faulty one. Then, install the new cable. Ensure it’s securely connected to both the motherboard and the LCD panel.
B. Fixing the graphics card (if necessary)
On to the graphics card. If updating or reinstalling the drivers didn’t work, the card itself might be the issue. In this case, you might need professional assistance.
You see, replacing a graphics card is no small task. Especially in laptops, where the card is often integrated into the motherboard. So, consider taking your laptop to a reliable repair service.
C. Replacing the LCD panel (if necessary)
Finally, let’s talk about the LCD panel. If you found dead pixels, or if the ribbon cable was damaged beyond repair, you’ll need a new panel.
Replacing an LCD panel is quite an intricate task. But with patience and careful handling, you can manage it. Start by ordering a new panel that fits your laptop model.
Once you have the new panel, remove the old one gently. Then, install the new panel. Make sure to connect the ribbon cable securely.
In summary, repairing the LCD involves replacing faulty components. It might sound like a daunting task. But with a bit of patience and the right guide, it’s manageable. After all, there’s a certain satisfaction in DIY laptop repair, isn’t there? Just remember, if things get too complicated, don’t hesitate to seek professional help.
4. Testing and Finalizing the LCD Repair
Congratulations! You’ve made it through the most challenging part of your laptop repair journey. But, before you celebrate, let’s run some tests. This step ensures that your repair work is a success.
A. Reassembling the laptop
Start by reassembling your laptop. Place the back panel and secure it with the screws. Be careful not to over-tighten them. You don’t want to damage your laptop’s casing.
Next, reinsert the battery. Remember, handle it with care. Batteries can be sensitive. They need gentle handling.
B. Reconnecting the power source
Once your laptop is back in one piece, reconnect the power source. Plug in the charger and switch on your laptop. Keep your fingers crossed!
C. Testing the screen for any remaining issues
As your laptop powers up, keep a close eye on the screen. Do you see any lines? If not, you’ve hit the bullseye with your LCD repair!
But, if the lines are still there, don’t lose hope. It might be a minor issue you overlooked. Double-check your work. If all else fails, consider seeking help from a professional pc repair service.
In conclusion, testing is a crucial step in laptop repair. It confirms whether your repair work was a success. So, don’t skip it. You’ve worked hard on your LCD repair. It’s only fair that you see the fruits of your labor!
Stay tuned for the final part of our guide. We’ll wrap up everything we’ve learned so far. Plus, we’ll discuss when to seek professional assistance.
5. Real Case LCD Repair Experience from VOLTA PC Upgrade & Repair
Before we wrap up, let’s delve into a real-world case. It’s a great way to see how the theory applies in practice. Plus, we have some valuable insights to share from our friends at VOLTA PC Upgrade & Repair.
A. Introduction to VOLTA PC Upgrade & Repair (FKA Budget PC)
VOLTA PC Upgrade & Repair is a well-known name in the computer and laptop repair service industry in Singapore. They’ve been providing quality service for years. Their expertise spans from simple laptop repairs to complex hardware upgrades.
VOLTA’s team believes in transparency. They guide their customers through the repair process. And they make sure the customer understands what they’re doing and why. Now, let’s take a look at one of their recent LCD repair cases.
B. Sharing a Recent LCD Repair Case
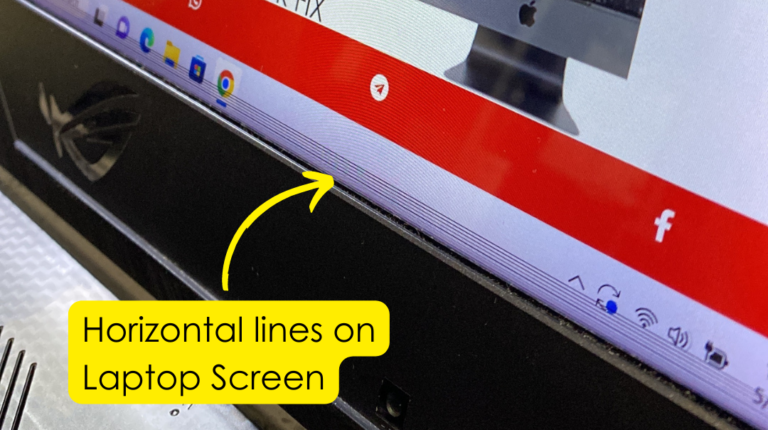
This case involved an ASUS ROG showing horizontal lines on the screen. The lines were constant. They did not disappear or change when moving the screen.
VOLTA’s team started with the standard troubleshooting steps. They checked the connection between the LCD and the motherboard. The display cable seemed fine. So, they moved on to the graphics card. The drivers were up to date, ruling out that possibility.
Finally, they inspected the LCD panel itself. It turned out to be a case of dead pixels. The team explained the issue to the customer. They offered a solution – replacing the LCD panel.
The customer agreed, and the team got to work. They ordered a new LCD panel that fit the laptop model. Then, they carefully replaced the old panel with the new one.
After reassembling the laptop, they tested the screen. The vertical lines were gone. The customer was delighted with the result. And the team was happy to have provided a successful LCD repair.
C. Takeaway from the Laptop LCD Repair Case
This case from VOLTA PC Upgrade & Repair highlights the importance of methodical troubleshooting. It shows how understanding the issue can lead to a successful repair. And it underlines the value of professional pc repair services.
In conclusion, whether it’s a DIY task or a job for the professionals, laptop repair doesn’t have to be daunting. With the right knowledge and a patient approach, you can resolve many common issues. And remember, when in doubt, don’t hesitate to seek professional help!
Conclusion
DIY laptop repair can be rewarding. But, it’s not always the best route. Complex issues like a faulty graphics card might need professional attention. So, don’t hesitate to seek help from a reliable pc repair service. They have the expertise and the tools to resolve the issue efficiently.
In a nutshell, repairing lines on your laptop LCD screen can be a DIY task. It requires patience, careful handling, and a good understanding of your device. With this guide, we hope we’ve made the process a bit easier for you. Happy repairing!
Throughout this process, one thing stands out. Regular maintenance is essential. It can prevent issues like lines on the screen. So, don’t overlook it. Keep your laptop clean, update your software regularly, and handle your device with care.
FAQs about LCD Repair
Why is my laptop screen having lines?
Lines on a laptop screen can be caused by physical damage, loose/faulty cable connections, graphics card issues, or aging/defective LCD panels.How do you fix lines on an LCD screen?
To fix lines on an LCD screen, check cable connections, update graphics card drivers, adjust screen resolution/refresh rate, run diagnostics, or seek professional repair if needed.Can LCD lines be repaired?
LCD lines can sometimes be repaired by addressing loose connections, updating drivers, or adjusting settings. If caused by physical damage or a defective panel, replacement may be necessary.What causes lines on an LCD screen?
Lines on an LCD screen can be caused by faulty connections, overheating, physical damage, aging/defects in the panel, or electrical interference. Identifying the specific cause is important for appropriate troubleshooting or repairs.
Contact Us for Computer and Laptop Repair in Singapore
X
|
Budget PC upgrade & Repair is now known as Volta PC Upgrade & Repair |