How To Fix Disk Boot Failure: The Ultimate Guide To Computer Repair In Singapore
We’ve all been there—staring at the screen in disbelief as the dreaded “Disk Boot Failure” message appears. It’s a situation that can induce panic, especially if you have important files and data stored on your computer. But fear not! This comprehensive guide is designed to walk you through the maze of troubleshooting steps, recovery options, and preventive measures to tackle disk boot failure head-on.
In this blog post, we’ll start by demystifying what “Disk Boot Failure” actually means and what causes it. Then, we’ll delve into a step-by-step guide on diagnosing the issue, followed by actionable solutions to fix it. We’ll also explore software tools that can assist in data recovery and regular maintenance tips to prevent future occurrences.
Whether you’re a tech-savvy individual or a complete beginner, this guide aims to provide you with the knowledge and tools you need to resolve disk boot failure. So, let’s get started and turn that error message into a thing of the past!
Feel free to incorporate this introduction into your larger blog post on how to fix disk boot failure.
What is Disk Boot Failure?
So, you’ve encountered a disk boot failure. This issue can be both confusing and alarming. But what exactly does it mean? In this section, we’ll delve into the nitty-gritty of disk boot failure. We’ll explore its definition, symptoms, and the error messages you might see.
Definition
Firstly, let’s define disk boot failure. It’s an error message that pops up when your computer can’t start from its hard drive. In simpler terms, your computer is unable to find an operating system to boot from. Consequently, you’re left staring at a black screen or an error message.
Symptoms
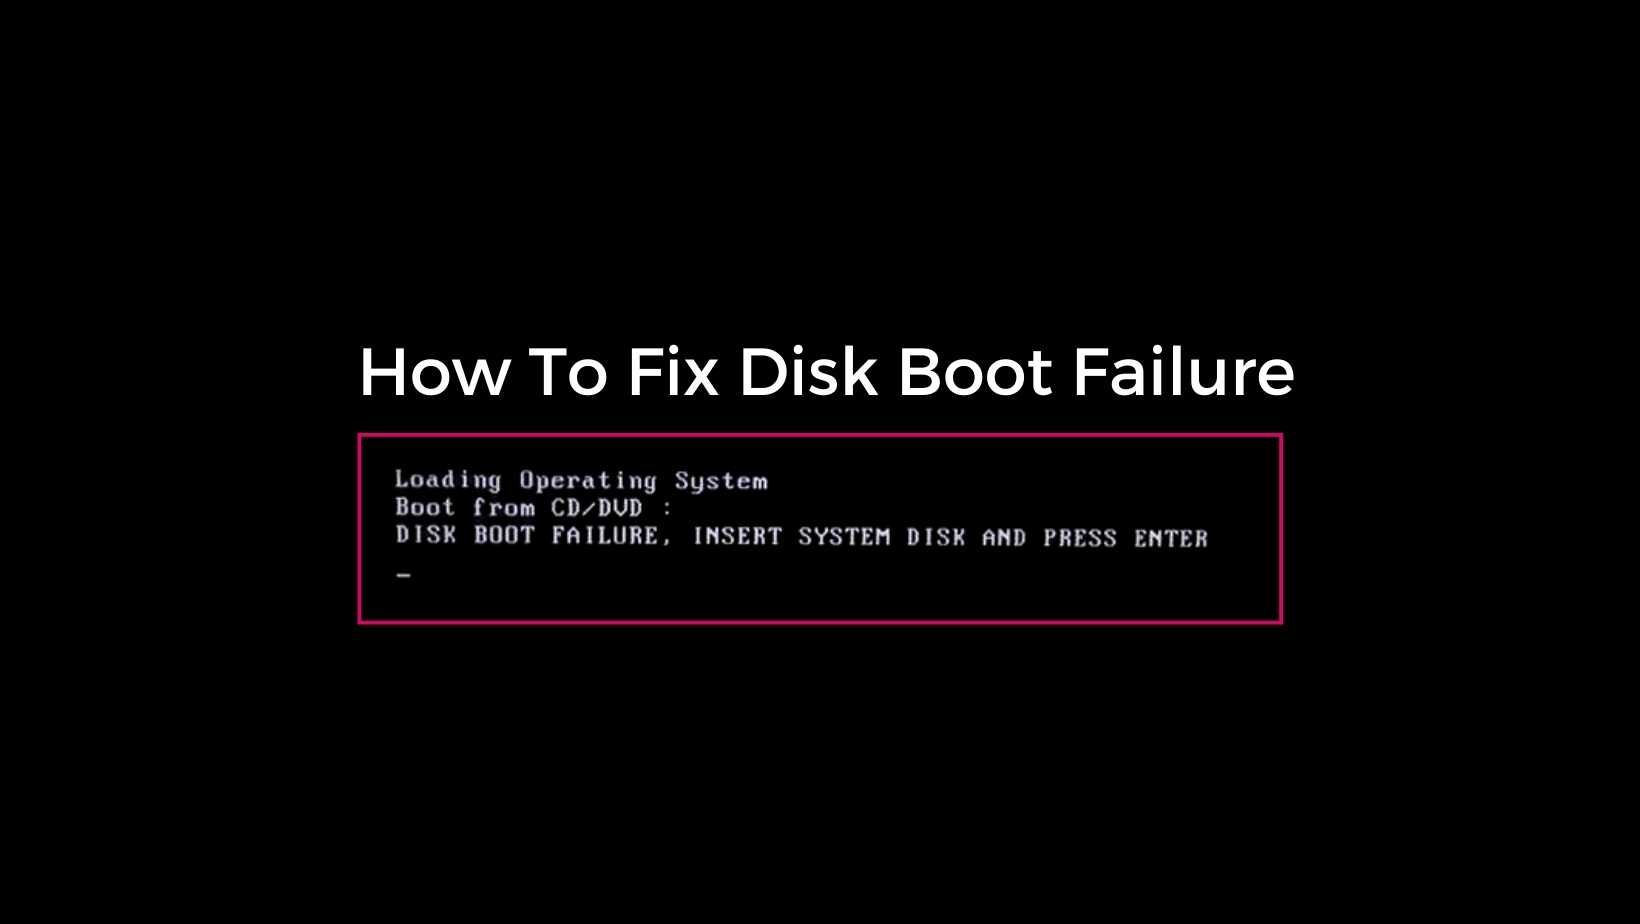
Now, let’s talk about the symptoms. When a disk boot failure occurs, your computer won’t start as usual. Instead, you’ll see an error message. Commonly, the message reads, “Disk Boot Failure, Insert System Disk, and Press Enter.” Sometimes, the screen may just go black. Either way, these signs indicate a problem with the boot sector of your hard drive.
Types of Error Messages
Moreover, the error messages can vary. Some are straightforward, like “No Bootable Device Found.” Others might be more cryptic, such as “Error Loading Operating System.” Regardless of the wording, the essence remains the same. Your computer can’t find a suitable operating system to boot from.
Severity of the Issue
So, how serious is a disk boot failure? Well, it’s a grave issue that can lead to data loss or even a complete system crash. Therefore, addressing it promptly is crucial. Ignoring it can result in permanent data loss or hardware damage.
Underlying Causes
Additionally, it’s essential to understand that disk boot failure is often a symptom of a larger issue. It could be due to a damaged data cable, incorrect BIOS settings, or even a failing hard drive. Understanding the root cause can help you fix the problem more effectively.
In summary, disk boot failure is an error that occurs when your computer can’t find an operating system to boot from. The symptoms include error messages or a black screen. The issue is severe and requires immediate attention. Furthermore, it’s often indicative of a larger problem that needs to be addressed.
By understanding what disk boot failure is, you’re better equipped to tackle the issue head-on. So, don’t ignore it. Take the necessary steps to diagnose and fix the problem as soon as possible.
Causes of Disk Boot Failure
Understanding the root causes of disk boot failure is crucial. Why? Because knowing the “why” helps you find the right solution. In this section, we’ll explore the common culprits behind this vexing issue.
Incorrect Boot Order
Firstly, an incorrect boot order can wreak havoc. Your computer may try to boot from a non-bootable device like a USB drive. Consequently, it overlooks the primary hard drive that contains the operating system. To fix this, you’ll need to access the BIOS settings and adjust the boot order.
Damaged Data Cable
Secondly, a damaged data cable can be the culprit. This cable connects your hard drive to the motherboard. If it’s damaged, data transmission becomes faulty. As a result, your computer may fail to boot properly. Replacing the damaged cable usually solves this issue.
Hard Drive Failures
Moreover, hard drive failures are a common cause. Over time, hard drives can degrade. They may develop bad sectors or even completely fail. When this happens, your computer can’t read the operating system files. Therefore, you’ll need to replace the hard drive and reinstall the operating system.
Operating System Corruption
Additionally, corruption in the operating system can lead to disk boot failure. Missing or damaged system files prevent the computer from booting. Often, this corruption occurs due to malware attacks or incomplete software updates. Running a system repair or reinstalling the operating system can fix this.
BIOS Issues
Furthermore, issues with the BIOS settings can also cause problems. Sometimes, a recent update or change in the BIOS settings can disrupt the boot process. Restoring the BIOS to default settings often resolves this issue.
Power Supply Problems
Unstable or inadequate power supply can also be a cause. If your computer isn’t receiving enough power, the hard drive won’t function correctly. Hence, the system fails to boot. Ensuring a stable power supply can prevent this issue.
Loose Connections
Lastly, loose hardware connections can cause disk boot failure. For instance, if the hard drive isn’t securely connected to the motherboard, the system can’t access it. Tightening all internal connections can often resolve the problem.
In summary, disk boot failure can occur for various reasons. These range from incorrect boot orders and damaged data cables to hard drive failures and operating system corruption. Additionally, BIOS issues, power supply problems, and loose connections can also be culprits. Understanding these causes equips you with the knowledge to find the right solution.
By identifying the root cause, you can take targeted action. So, don’t waste time. Diagnose the issue and apply the appropriate fix to get your system up and running again.
How to Diagnose Disk Boot Failure
So, you’re facing a disk boot failure. Naturally, you want to fix it. But before diving into solutions, diagnosing the issue is crucial. In this section, we’ll guide you through the steps to accurately diagnose disk boot failure.
Listen for Sounds
Firstly, listen carefully when you start your computer. Unusual sounds like clicking or grinding can indicate a failing hard drive. If you hear such noises, a hardware replacement may be necessary.
Check for Error Messages
Secondly, pay attention to any error messages. These messages can provide valuable clues. For example, “No Bootable Device Found” suggests an issue with the boot order or hard drive.
Access BIOS Settings
Moreover, accessing the BIOS settings can offer insights. Here, you can check if the system recognizes your hard drive. If it doesn’t, you may have a hardware issue. Conversely, if it does, the problem likely lies in the software or settings.
Use Diagnostic Tools
Additionally, built-in diagnostic tools can be helpful. Most computers have a pre-boot diagnostic tool. You can access this by pressing a specific key during startup. Follow the on-screen instructions to run the tests.
Boot into Safe Mode
Furthermore, try booting into Safe Mode. This mode loads only essential drivers. If your computer boots successfully in Safe Mode, software issues are probably the cause. You can then focus on fixing those specific problems.
Check Connections
Lastly, don’t forget to check internal connections. Sometimes, a loose cable can disrupt the boot process. Open the computer case and ensure all cables are securely connected.
In summary, diagnosing disk boot failure involves multiple steps. Firstly, listen for unusual sounds that indicate hardware issues. Secondly, note any error messages that appear. Moreover, access the BIOS settings to check hardware recognition. Additionally, use built-in diagnostic tools for a thorough check. Furthermore, booting into Safe Mode can isolate software issues. Lastly, ensure all internal connections are secure.
By following these steps, you’ll pinpoint the root cause of your disk boot failure. Once you’ve diagnosed the issue, you can proceed to fix it effectively.
How to Fix Disk Boot Failure
1. Replace Damaged Data Cable: Steps to Identify and Replace
So, you’ve diagnosed the issue and suspect a damaged data cable. What’s next? Replacing it, of course. In this section, we’ll walk you through the steps to identify and replace a damaged data cable.
Signs of a Damaged Data Cable
Firstly, let’s identify the signs. Slow data transfer rates are a red flag. Additionally, intermittent disconnections can also indicate a faulty cable. If you experience these issues, it’s time to inspect the cable.
Inspection
Secondly, turn off your computer and unplug it. Open the computer case to access the data cables. Look for visible signs of wear and tear. Frayed edges, exposed wires, or kinks are clear indicators of damage.
Disconnect the Old Cable
Moreover, once you’ve identified a damaged cable, disconnect it. To do this, gently unplug the cable from the hard drive and motherboard. Make sure to remember or note down which port each end was connected to.
Purchase a New Cable
Furthermore, you’ll need a new data cable. Make sure to buy one that’s compatible with your hard drive and motherboard. You can usually find this information in your computer’s manual or online.
Connect the New Cable
Now, connect the new cable. Plug one end into the hard drive and the other into the motherboard. Ensure the connections are secure. A loose connection can lead to further issues.
Test the Connection
Lastly, it’s time to test. Turn on your computer and check if it boots successfully. If it does, you’ve solved the problem. If not, you may need to explore other potential issues.
In summary, replacing a damaged data cable involves several steps. Firstly, identify the signs of a damaged cable. Secondly, inspect it for visible damage. Moreover, disconnect the old cable and purchase a new one. Furthermore, connect the new cable securely. Lastly, test the connection to ensure the issue is resolved.
By following these steps, you can effectively identify and replace a damaged data cable. This simple fix can often resolve disk boot failure and get your system back up and running.
2. Modify BIOS Boot Order: How to Access BIOS Settings and Change the Boot Order
So, you’ve ruled out hardware issues like a damaged data cable. What’s next? It’s time to look at the BIOS settings. Specifically, the boot order. In this section, we’ll guide you through accessing BIOS settings and modifying the boot order.
Accessing BIOS Settings
Firstly, let’s talk about accessing the BIOS. To do this, restart your computer. As it boots up, you’ll need to press a specific key. This key varies by manufacturer but is often F2, F10, or the Delete key. A prompt usually appears on-screen during startup, indicating which key to press.
Navigating to the Boot Menu
Once you’re in the BIOS, navigate to the Boot menu. You can use the arrow keys to move around. The Boot menu lists all bootable devices in a specific order. This order determines which device your computer tries to boot from first.
Identifying the Current Boot Order
Moreover, take note of the current boot order. It’s essential to know the initial settings in case you need to revert changes. Typically, the list will include your hard drive or any connected USB drives.
Changing the Boot Order
Now, let’s change the boot order. Use the arrow keys to highlight the hard drive. Then, follow the on-screen instructions to move it to the top of the list. Usually, you’ll press the “+” key to move it upwards.
Saving Changes
Furthermore, after changing the boot order, you must save the changes. Look for the “Save and Exit” option, usually found at the bottom or top of the screen. Select it and confirm when prompted.
Testing the New Settings
Lastly, restart your computer to test the new settings. If done correctly, your computer should boot from the hard drive, resolving the disk boot failure issue.
In summary, modifying the BIOS boot order is a straightforward process. Firstly, access the BIOS settings by pressing the designated key during startup. Then, navigate to the Boot menu. Moreover, identify the current boot order before making any changes. Furthermore, change the boot order so that the hard drive is first. Lastly, save the changes and restart your computer to test.
By following these steps, you can effectively modify the BIOS boot order. This simple change can often resolve disk boot failure and get your system back on track.
3. Run CHKDSK Command: Steps to Run CHKDSK and What It Does
So, you’ve tried modifying the BIOS settings and replacing cables, but the issue persists. What’s next? Running the CHKDSK command might be your answer. In this section, we’ll explain how to run CHKDSK and what it does for your system.

Photo via AVG Antivirus
What is CHKDSK?
Firstly, let’s understand what CHKDSK is. It stands for “Check Disk,” a built-in Windows utility. This tool scans your hard drive for errors and attempts to fix them. It can resolve issues like bad sectors, file system errors, and disk corruption.
How to Access Command Prompt
Secondly, you’ll need to open the Command Prompt. To do this, type “cmd” into the Windows search bar. Right-click on the Command Prompt app and select “Run as administrator.”
Running CHKDSK
Now, to run CHKDSK, type chkdsk /f into the Command Prompt and hit Enter. The “/f” parameter tells CHKDSK to fix any errors it finds. If the drive is in use, you’ll be prompted to schedule the scan for the next restart.
What CHKDSK Does
Moreover, let’s delve into what CHKDSK actually does. It scans the entire hard drive, looking for various types of errors. These include bad sectors, lost clusters, and directory errors. Once identified, it attempts to fix these issues automatically.
Optional Parameters
Additionally, CHKDSK has optional parameters for a more thorough scan. For instance, using chkdsk /r will locate bad sectors and recover readable information. However, this option takes longer to complete.
Completing the Process
Furthermore, after running CHKDSK, you’ll see a report. This report outlines what the scan found and what actions were taken. Review this information to understand the health of your hard drive.
In summary, running the CHKDSK command is a valuable step in diagnosing disk boot failure. Firstly, access the Command Prompt as an administrator. Secondly, run the CHKDSK command with the appropriate parameters. Moreover, understand that CHKDSK scans for and fixes various disk errors. Additionally, you can use optional parameters for a more detailed scan. Lastly, review the report to gauge the health of your hard drive.
By following these steps, you can effectively use CHKDSK to diagnose and potentially fix disk boot failure issues.
4. Repair Corrupt Operating Systems: How to Repair and Tools That Can Help
So, you’ve tried various fixes, but the disk boot failure persists. What now? A corrupt operating system could be the culprit. In this section, we’ll guide you through repairing a corrupt operating system and introduce some helpful tools.
Signs of a Corrupt Operating System
Firstly, let’s identify the symptoms. Frequent crashes, error messages, and slow performance can indicate a corrupt OS. If you’re experiencing these issues, repairing the operating system should be your next step.
How to Access Recovery Options
For Windows 10:
- Click on the “Start” menu button in the bottom-left corner of the screen.
- Click on the “Settings” gear icon to open Windows Settings.
- In the Settings window, select the “Update & Security” option.
- In the left sidebar, click on “Recovery.”
- On the right side, under the “Advanced startup” section, click on the “Restart now” button.
- Your computer will restart, and the Advanced Startup Options menu will appear. From this menu, you can choose various recovery options such as “Reset this PC,” “System Restore,” “Startup Repair,” and more.
For Windows 11:
- Press Win + I key to open Windows Settings page and select System > Recovery.
- In the Recovery window, scroll down to Recovery options and select Advanced startup > Restart now.
- Alternatively, you can use the Shift + Restart key combination from the Start Menu or the login screen to access the recovery environment.
Running Startup Repair
Now, choose “Startup Repair” from the list of recovery options. This built-in tool scans for issues and attempts to fix them automatically. It’s a good first step for repairing a corrupt operating system.
Photo via AOMEI Backupper
What Startup Repair Does
Moreover, Startup Repair focuses on essential system files. It checks for missing or corrupt files and replaces them. This action often resolves boot issues caused by a corrupt operating system.
Using SFC Scan
Additionally, the System File Checker (SFC) is another useful tool. Open Command Prompt as an administrator and type sfc /scannow. This command scans and repairs corrupt system files.
Third-Party Tools
Furthermore, third-party tools can also be helpful. Programs like “Reimage” or “Restoro” offer more comprehensive scans and repairs. However, always ensure you’re using reputable software to avoid further issues.
Reinstallation as a Last Resort
Lastly, if all else fails, reinstalling the operating system is an option. Keep in mind that this will erase all data on your system drive. Therefore, back up important files before proceeding.
In summary, repairing a corrupt operating system involves several steps. Firstly, identify the symptoms that suggest a corrupt OS. Secondly, access the recovery options and run Startup Repair. Moreover, consider using the System File Checker for additional repairs. Furthermore, third-party tools can offer more extensive solutions. Lastly, as a last resort, you may need to reinstall the operating system.
By following these steps, you can effectively repair a corrupt operating system and resolve disk boot failure issues.
5. Perform a System Restore: When and How to Do It
So, you’ve tried multiple fixes, but the disk boot failure issue remains unresolved. What’s your next move? Performing a system restore could be the answer. In this section, we’ll discuss when and how to execute this crucial step.
When to Perform a System Restore
Firstly, let’s tackle the “when.” A system restore is advisable if you’ve recently installed new software or updates that caused issues. It’s also a good option if your computer was working fine a few days or weeks ago but is now experiencing problems.
Accessing System Restore
Secondly, you’ll need to access the System Restore feature. To do this, type “Create a restore point” into the Windows search bar. Click on the result to open the System Properties window. From there, click on the “System Restore” button.
How System Restore Works
Moreover, it’s essential to understand how System Restore works. This feature rolls back your system files and settings to an earlier point in time. However, it won’t affect your personal files like documents or photos.
Choosing a Restore Point
Now, you’ll need to choose a restore point. The system will present you with available restore points. Pick one that predates the issues you’re experiencing. If you’re unsure, choose the most recent one.
Initiating the Restore
Furthermore, after selecting a restore point, click “Next” and then “Finish.” Your computer will restart and begin the restore process. This action can take some time, so be patient.
Post-Restore Steps
Lastly, once the system restore is complete, your computer will restart. Log in and check if the disk boot failure issue has been resolved. If not, you may need to try a different restore point or explore other solutions.
In sum, a system restore is a valuable tool for resolving disk boot failure. Firstly, determine if a system restore is appropriate for your situation. Secondly, access the feature through the System Properties window. Moreover, choose an appropriate restore point. Furthermore, initiate the restore and wait for the process to complete. Lastly, check if the issue has been resolved.
By following these steps, you can effectively perform a system restore and potentially resolve disk boot failure issues.
How to Prevent Disk Boot Failure: Regular Maintenance Tips and Software to Monitor Hard Drive Health
So, you’ve managed to fix the disk boot failure issue. What’s next? Prevention is better than cure. In this section, we’ll discuss regular maintenance tips and software that can help you prevent disk boot failure.
Regular Maintenance Tips
Firstly, let’s talk about regular maintenance. Keeping your computer clean is essential. Dust and debris can cause overheating, leading to hardware failure. Therefore, clean your computer’s interior every few months.
Disk Cleanup
Moreover, use built-in utilities like Disk Cleanup to remove unnecessary files. This tool frees up space and improves system performance. To access it, type “Disk Cleanup” into the Windows search bar and follow the prompts.
Defragmentation
Additionally, defragmenting your hard drive can be beneficial. This process reorganizes data, making it easier for the system to access files. However, note that SSDs should not be defragmented, as it can reduce their lifespan.
Software Updates
Furthermore, always keep your software up to date. Software updates often include patches for security vulnerabilities and performance improvements. Ignoring updates can make your system more susceptible to issues.
Software to Monitor Hard Drive Health
Now, let’s discuss software solutions. Tools like “CrystalDiskInfo” and “Hard Disk Sentinel” can monitor your hard drive’s health. These programs provide real-time statistics and alert you to potential problems.
How to Use Monitoring Software
Using these tools is straightforward. After installation, launch the program. You’ll see various metrics like temperature, disk speed, and overall health. Pay attention to these indicators and take action if you notice irregularities.
Backup Routine
Lastly, establish a backup routine. Regular backups can save you from data loss in case of disk boot failure. Use cloud storage or an external hard drive for this purpose.
In summary, preventing disk boot failure involves both regular maintenance and monitoring. Firstly, keep your computer clean and use built-in utilities like Disk Cleanup. Moreover, consider defragmenting your hard drive and always update your software. Additionally, use specialized software to monitor hard drive health. Lastly, don’t forget to back up your data regularly.
By following these steps, you can significantly reduce the risk of experiencing disk boot failure in the future.
FAQs about Fix Disk Boot Failure
How do I fix boot drive failure?
Fixing boot drive failure involves a series of troubleshooting steps. You can start by checking the BIOS settings to ensure the correct boot order. If that doesn’t work, consider running diagnostic tools like CHKDSK to scan for disk errors. For more complex issues, you may need to repair or reinstall the operating system. In extreme cases, hardware replacement might be necessary.
What causes disk boot failure?
Disk boot failure can be caused by a variety of factors. These include hardware issues like a faulty data cable, software corruption, or incorrect BIOS settings. Other factors could be a damaged hard drive, missing system files, or even malware infections.
What is a common cause for the system error of invalid boot disk?
The system error of “Invalid Boot Disk” often occurs when the computer tries to boot from a non-bootable disk or device. This could be due to incorrect BIOS settings where the boot order is not set to start from the hard drive where the operating system is installed. It can also happen if the Master Boot Record (MBR) is corrupted.
What causes hard drive failure in Windows 10?
Hard drive failure in Windows 10 can be attributed to multiple factors. These include physical damage, overheating, bad sectors, or file system corruption. Software conflicts and malware can also contribute to hard drive failure.
How can I fix repairing disk errors?
To fix disk errors, you can use built-in Windows utilities like CHKDSK. Open the Command Prompt as an administrator and type chkdsk /f to scan and fix disk errors. For more severe issues, you may need to use third-party software or even consider hardware replacement.
Why is my PC suddenly repairing disk errors?
If your PC is suddenly repairing disk errors, it’s likely that the system has detected an issue with your hard drive or file system. This is often a preventive measure to avoid data loss or further damage. It could be triggered by improper shutdowns, power failures, or software conflicts.
When to Seek Professional Help to Fix Disk Boot Failure
Prevention and self-help are excellent first steps, but sometimes professional intervention is necessary. In this section, we’ll discuss when it’s time to seek professional help and introduce you to VOLTA PC Upgrade & Repair in Singapore, a reliable service for all your computer needs.
Complex Hardware Issues
Firstly, if you’re facing complex hardware issues that go beyond simple cable replacements or BIOS adjustments, it’s time to consult an expert. Problems like motherboard failures or intricate data recovery require specialized skills and equipment.
Persistent Software Issues
Moreover, if software issues persist despite your best efforts, professional help is advisable. This includes recurring operating system corruption or unresolvable boot failures.
Data Recovery
Additionally, if you’ve tried software solutions for data recovery but haven’t had success, experts can help. They have advanced tools and techniques to recover your valuable data.
VOLTA PC Upgrade & Repair in Singapore (FKA Budget PC Upgrade & Repair)
Now, let’s talk about VOLTA PC Upgrade & Repair. Located in Singapore, this service specializes in PC upgrades, repairs, and maintenance. They offer a comprehensive range of services, from hardware fixes to software troubleshooting. If you’re in the area and facing persistent issues, VOLTA PC Upgrade & Repair is a reliable choice for laptop, desktop and Apple repair services.
In conclusion, while preventive measures and self-help can resolve many issues, some situations require professional expertise. Complex hardware problems, persistent software issues, and unsuccessful data recovery attempts are all signs that it’s time to seek professional help. For those in Singapore, VOLTA PC Upgrade & Repair offers a trustworthy and comprehensive service for all your computer needs.
Address:
- Tai Seng Branch: 8 Burn Road #01-04, Trivex, Singapore 369977
- Jurong Branch: Blk 132 #01-279C, Jurong Gateway Road, Singapore 600132
Contact:
Whatsapp us | Call 69500453 | Telegram us