How To Fix Acer Desktop Boot Loop Issue: The Ultimate Computer REpair Singapore

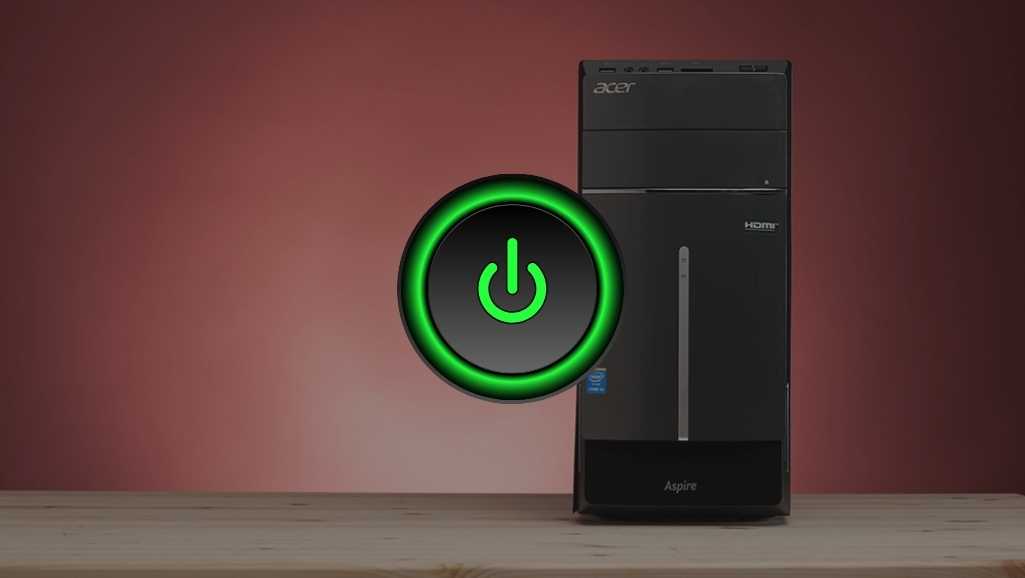
The Acer Desktop boot loop issue can be a frustrating problem for users, causing their computers to restart continuously without reaching the operating system. This troubleshooting guide provides a detailed approach to diagnose and resolve the boot loop problem on Acer Desktops. By following these steps, users can identify the underlying causes and apply specific solutions to get their systems up and running smoothly once again.

Key Takeaways

  • Performing a hard reset and accessing BIOS/UEFI settings can resolve initial boot loop issues.
  • Advanced recovery options include navigating to Windows Recovery Mode and utilizing Automatic/Startup Repair.
  • Booting in Safe Mode with Networking or Command Prompt can help troubleshoot and fix the problem.
  • Resolving power and battery issues, as well as resetting BIOS to default settings, are critical steps in the process.
  • If all else fails, using external boot repair tools or contacting Acer Customer Support may be necessary.

Understanding the Acer Desktop Boot Loop Issue

Identifying the Symptoms

The first step in troubleshooting an Acer desktop boot loop is to recognize the signs that indicate a problem. Users may experience a variety of symptoms, each pointing to the underlying issue causing the loop. Here are some common symptoms to look out for:
  • The system repeatedly restarts and never reaches the operating system.
  • Acer logo or loading screen appears but the system fails to progress beyond this point.
  • Unusual beeping sounds during startup, which could indicate hardware failures.
  • Error messages displayed on-screen, providing clues about the boot failure.
It’s crucial to observe the behavior of your desktop during the boot process. Any deviation from the normal startup sequence can be a symptom of a boot loop issue.
By identifying these symptoms early, you can take timely action to prevent further damage and begin the process of resolving the boot loop.

Common Causes of Boot Loops

Boot loops on Acer desktops can be a perplexing issue, often stemming from a variety of sources. Hardware malfunctions are a primary culprit, where issues with the motherboard, RAM, or hard drive can prevent the system from successfully booting. Software conflicts or corrupted system files can also trigger a boot loop, as the system struggles to load essential operating system components.
  • Corrupted Boot Files: Essential files required for booting may become corrupted due to improper shutdowns, virus attacks, or system updates gone awry.
  • BIOS/UEFI Misconfigurations: Incorrect settings in the BIOS or UEFI, such as a disabled boot device or an improper boot order, can lead to boot failures.
  • Faulty Hardware: Defective components like RAM, hard drive, or even the power supply can cause the system to reboot continuously.
Preventing boot loops involves regular system maintenance and being cautious with any changes to the system’s hardware or software. Ensuring that all connections are secure and that BIOS/UEFI settings are correctly configured can save a great deal of frustration.

Preventive Measures to Avoid Future Boot Loops

To safeguard your Acer desktop against future boot loops, it’s essential to take proactive steps. Regularly updating your system’s BIOS and drivers can prevent many issues that lead to boot loops. Ensure that your hardware components, such as RAM and hard drives, are properly seated and connected.
It’s also advisable to periodically check for system updates and install them to maintain software compatibility and system stability.
Here are some additional measures you can implement:
  • Disable Secure Boot to improve boot device recognition.
  • Enable Compatibility Support Module (CSM) to enhance legacy system support.
  • Adjust the boot order to prioritize the correct boot device.
By adhering to these practices, you can minimize the risk of encountering boot-related problems in the future.

Initial Troubleshooting Steps

Performing a Hard Reset

A hard reset can often resolve the Acer desktop boot loop issue by clearing any temporary glitches. To perform a hard reset, follow these steps:
  1. Turn off your Acer desktop completely.
  2. Unplug the power cord and any connected peripherals.
  3. Press and hold the power button for about 20 seconds to discharge residual electrical charge.
  4. Reconnect the power cord and peripherals, then turn on the desktop.
Performing a hard reset is a quick way to attempt to resolve boot issues without affecting your personal data. However, if the boot loop persists, you may need to consider more advanced recovery options.
Note that a hard reset does not delete any personal files or change system settings. It’s a safe first step in troubleshooting that can be performed without risk of data loss.

Accessing the BIOS/UEFI Settings

Accessing the BIOS/UEFI settings is a critical step in troubleshooting the boot loop issue on your Acer desktop. To enter the BIOS/UEFI setup, restart your computer and press the F2, F10, or Delete key when the initial screen appears. This key combination may vary depending on your system’s motherboard. Once inside the BIOS/UEFI interface, you can perform several actions to diagnose and potentially resolve boot issues:
  • Disable Secure Boot to allow the system to boot from non-UEFI devices.
  • Enable Compatibility Support Module (CSM) to support legacy booting.
  • Adjust the boot order to prioritize the correct bootable device, such as HDD, SSD, or USB.
It’s important to navigate through the BIOS/UEFI settings carefully. Making incorrect changes can lead to further system instability. If you’re unsure about any setting, consult your motherboard’s manual or seek professional assistance.
Remember to save your changes before exiting the BIOS/UEFI setup. Failing to do so will result in your adjustments not being applied, and the boot loop issue may persist.

Setting BIOS to Default Configuration

Source: Youtube – furulevi

Restoring the BIOS to its default configuration is a critical step in troubleshooting the boot loop issue. This action can resolve conflicts and misconfigurations that may be preventing your Acer desktop from booting properly. To reset the BIOS, follow these general steps:
  • Restart your computer and enter the BIOS/UEFI setup (commonly by pressing keys like F2, F10, or Delete).
  • Look for an option that says ‘Load Default’ or ‘Factory Default’ and select it.
  • Confirm the action and exit the BIOS, ensuring to save the changes.
After setting the BIOS to default, it’s important to verify that the boot sequence is correct and that no essential settings have been overlooked. This may involve re-enabling certain features like AHCI for SATA drives or adjusting the boot order to prioritize the correct boot device.
Remember, while resetting the BIOS can be a powerful solution, it should be done with caution. If you’re unsure about any step, consult your Acer desktop’s manual or seek professional assistance.

Advanced Recovery Options

Navigating to Windows Recovery Mode

Accessing Windows Recovery Mode is a critical step in resolving the boot loop issue on your Acer desktop. To initiate the process, restart your computer and watch for the Windows logo; as soon as it appears, interrupt the boot process by shutting down the system. Repeat this step a couple of times until the recovery screen is prompted. Once you’ve reached the recovery screen, navigate through the options as follows:
  • Select ‘Troubleshoot’.
  • Choose ‘Advanced options’.
  • Proceed to ‘Startup Settings’.
In the Startup Settings, you will have the option to enable Safe Mode with various functions, such as Networking or Command Prompt, by pressing F4, F5, or F6. This environment can be instrumental in diagnosing and fixing boot-related problems without the interference of non-essential applications and drivers.
It’s important to note that the steps to access the recovery mode may vary slightly depending on the specific model of your Acer desktop and the version of Windows installed.

Utilizing Automatic/Startup Repair

When your Acer desktop encounters a boot loop, Automatic/Startup Repair is a built-in Windows tool designed to diagnose and fix common startup problems. To initiate this repair, you’ll need to force restart your Acer desktop multiple times until the Automatic Repair screen appears. From there, select ‘Advanced options’ to access the Windows Recovery Environment.
Automatic Repair doesn’t require a Windows installation media and can be a quick solution to boot loop issues. However, if this method fails to resolve the problem, further steps may be necessary.
Here’s a simple guide to using Automatic/Startup Repair:
  1. Power off your Acer desktop by holding the Power button.
  2. Turn on the device and repeat the process until the Automatic Repair screen is displayed.
  3. Choose ‘Advanced options’ to proceed to the Windows Recovery Environment.
  4. Follow the on-screen instructions to complete the repair process.
Remember, while Automatic Repair can fix many boot-related issues, it’s not a guaranteed solution for all problems. If the boot loop persists, consider exploring advanced recovery options or seeking professional support.

Resetting the PC from the Advanced Options Menu

If your Acer desktop is stuck in a boot loop, resetting the PC can be a viable solution. To initiate a reset, you’ll need to access the Advanced Options Menu. Follow these steps to reset your PC:
  1. Power on your Acer desktop and immediately press the Alt key and F10 key simultaneously when the Acer logo appears.
  2. On the ‘Choose an option’ screen, select ‘Troubleshoot’.
  3. Choose ‘Reset this PC’ and decide between ‘Keep my files’ or ‘Remove everything’.
  4. Select your preferred option and proceed with the reset.
Resetting your PC will reinstall Windows and may fix the boot loop issue. However, selecting ‘Remove everything’ will delete all your personal files, so ensure you have backups if necessary.
Remember, the ‘Keep my files’ option will preserve your personal files but remove installed applications and settings. After the reset, your PC should restart and allow you to set it up as if it were new. If the issue persists, further troubleshooting may be required.

Booting in Safe Mode

Screenshot illustrating the steps to enter Safe Mode: Restarting the computer, pressing the appropriate key during startup to access the advanced boot options, selecting Safe Mode from the menu, and confirming the selection to boot into Safe Mode.

Screenshot illustrating the steps to enter Safe Mode. Image credit: GCFGlobal

Steps to Enter Safe Mode

Entering Safe Mode is a critical step in diagnosing and resolving issues on your Acer desktop. To initiate Safe Mode, restart your computer and repeatedly press the F8 key (or Shift + F8) before the Windows logo appears, then select Safe Mode from the options presented. If you’re using Windows 10, you may need to interrupt the normal boot process three times in a row to enter the Windows Recovery Environment. Once in the Windows Recovery Environment, follow these steps:
  1. Choose ‘Troubleshoot’ from the options.
  2. Select ‘Advanced options’ and then ‘Startup Settings’.
  3. On the Startup Settings screen, you can press F4 to enable Safe Mode, F5 for Safe Mode with Networking, or F6 for Safe Mode with Command Prompt, depending on your troubleshooting needs.
Safe Mode starts Windows with a minimal set of drivers and services. If the desktop functions correctly in Safe Mode, the issue is likely related to software or drivers installed on the system.

Troubleshooting in Safe Mode

Safe Mode is a diagnostic environment that loads Windows with a minimal set of drivers and services. This mode can be particularly useful when troubleshooting the Acer Desktop Boot Loop Issue. If your desktop successfully boots in Safe Mode, it indicates that the problem may be related to software or drivers rather than hardware. To activate Safe Mode, restart your computer and repeatedly press the F8 key (or Shift + F8) before the Windows logo appears. Choose ‘Safe Mode’ from the options presented. Once in Safe Mode, you can take the following steps:
  • Update Drivers: If the monitor works in Safe Mode, update your display and graphics drivers to the latest versions.
  • Uninstall Recent Software: Remove any programs that were installed just before the boot loop issue began.
Remember, Safe Mode is more stable for troubleshooting as it runs the system with only the essential files and drivers. This stability can be crucial when attempting to resolve complex issues like a boot loop.

Safe Mode with Networking and Command Prompt

Safe Mode with Networking and Command Prompt are specialized boot options that can help diagnose and resolve issues that prevent a normal boot sequence. The Safe Mode with Networking loads Windows with a minimal set of drivers and services, but includes those necessary to enable networking. This can be crucial for downloading drivers or updates that may resolve the boot loop issue. To activate Safe Mode with Networking, restart your computer and press the F8 key (or Shift + F8) before the Windows logo appears, then select the option from the startup settings. In contrast, Safe Mode with Command Prompt is intended for more advanced troubleshooting. It loads Windows with a command line interface, bypassing the graphical user interface. This mode is essential when you need to execute system repair commands or perform administrative tasks. Accessing this mode typically involves the same steps as Safe Mode with Networking, but requires pressing F6 at the startup settings.
It’s important to note that not all problems can be solved in Safe Mode. However, it provides a controlled environment to perform critical updates and changes without the interference of non-essential applications or services.
If you encounter difficulties with networking in Safe Mode, ensure that your system time and date are correctly set, as these can cause network-related issues. Additionally, after troubleshooting in Safe Mode, remember to update drivers and uninstall any recent software that may have contributed to the boot loop.

Resolving Power and Battery Issues

Checking the Power Supply

When your Acer desktop is caught in a boot loop, one of the first things to check is the power supply. Ensure all cables are securely plugged in after the power cycle. A common oversight is not double-checking each end of the power cables, which can lead to intermittent or no power at all.
If your monitor suddenly goes into sleep mode, this solution should be the first one to try.
It’s also crucial to inspect the power cables for any signs of damage. Here’s a quick checklist to help you assess your power supply connections:
  • Try a different cable to see if the issue persists.
  • Look for physical damage along the cable’s length and at the connectors.
  • Remember that high-quality cables are less likely to suffer from signal degradation.
Power cycling your monitor and system can also be an effective troubleshooting step. This involves turning off the device and then turning it back on, which can help clear any temporary glitches.

Assessing Battery Health

To ensure your Acer desktop’s longevity, assessing the battery health is crucial. Check the official battery ratings to determine if your battery’s performance aligns with the manufacturer’s specifications. For instance, a three-cell battery should last up to 3 hours, while a six-cell can last up to 8 hours. However, these durations can be shorter with certain configurations and usage patterns. Battery health can be influenced by various factors, including charging habits and the operating system’s power management. For example, the Adaptive Charging feature on some Acer ChromeOS devices helps prolong battery life by preventing it from staying at full charge for too long. Similarly, Windows systems may have battery conservation features that can be managed through the Acer Care Center.
It’s important to note that lithium-ion batteries degrade over time. Regularly checking your battery’s capacity and comparing it to its original specifications can help you identify when it’s time for a replacement.
If you’re experiencing issues with battery life on a dual-boot system, ensure that power management settings are correctly configured for both operating systems. Aftermarket batteries with varying capacities are available, but it’s essential to choose a compatible and reliable option to avoid further issues.

Charging and Testing the Battery

To ensure your Acer desktop’s battery is functioning correctly, it’s crucial to perform regular charging and testing. Charge the battery fully and then use the device until it is completely discharged to get an accurate assessment of battery health. This process can help identify if the battery is holding a charge as expected or if it’s time to replace it. For Acer notebooks, you can utilize features like Acer AI Smart Charging to optimize battery life. Navigate to the ‘Battery & Charge’ settings to check if AI Smart Charging is selected, which can help prolong battery longevity by adapting the charging based on usage patterns. If you suspect a battery issue, follow these steps:
  1. Remove the battery from the laptop compartment.
  2. Press and hold the Power button for 15 seconds to discharge residual power.
  3. Reinsert the battery and power on the device to test if the issue persists.
In cases where the battery is non-removable or you’re using a desktop, ensure that the power supply is adequate and that the battery, if present, is not showing signs of swelling or damage. Insufficient power supply can lead to boot loop issues, so it’s important to use the correct charger and check for any signs of wear or damage.

Resetting BIOS or UEFI Settings

Accessing BIOS/UEFI

To resolve the boot loop issue on your Acer desktop, accessing the BIOS/UEFI settings is a critical step. Immediately after powering on your system, press the setup hotkey repeatedly until you enter the BIOS/UEFI interface. The common keys used are F2, F10, or the Delete key, depending on your specific model. Once inside the BIOS/UEFI settings, you can perform several actions to troubleshoot the boot loop:
  • Disable “Secure Boot” to allow for more compatibility with different operating systems and bootable devices.
  • Enable “CSM Support” if you’re using legacy devices or experiencing boot device detection issues.
  • Adjust the boot order to prioritize the correct bootable device, such as your HDD, SSD, or USB drive.
Remember, changes in BIOS/UEFI settings can significantly affect your system’s boot process. Proceed with caution and only make changes if you understand their impact.

Restoring Default Settings

Restoring the BIOS to its default settings can resolve a variety of boot and performance issues. To restore the default settings, you typically need to enter the BIOS setup during the boot process. Once inside the BIOS setup, you can often find an option to reset to defaults, which might be labeled as ‘Load Default Options’, ‘Factory Default’, ‘Setup Defaults’, or similar.
After selecting the default option, remember to save the changes before exiting the BIOS. This is usually done by pressing the ‘Save & Exit’ option, often associated with the F10 key.
Following the reset, your system will restart with the default BIOS settings. It’s important to then review the settings to ensure they meet your system’s requirements. If the boot loop persists, further troubleshooting may be necessary.

Saving Changes and Exiting BIOS/UEFI

Once you have restored the default settings in your Acer desktop’s BIOS/UEFI, it’s crucial to save these changes properly to ensure that your system can attempt a fresh boot with the new configuration. Follow the prompts to save and exit, usually by selecting ‘Save & Exit’ or pressing the ‘F10’ key. Confirm any dialogues that appear to prevent accidental changes. After saving, your computer will restart. If the boot loop persists, consider revisiting the BIOS/UEFI settings to verify that all changes have been applied correctly. It’s also a good time to review the boot order and ensure that the correct boot device is prioritized.
Remember, exiting the BIOS/UEFI without saving will discard all the changes you’ve made. Always double-check before exiting to avoid repeating the process unnecessarily.

Using External Tools for Boot Repair

Selecting a Boot Repair Tool

When faced with an Acer desktop boot loop, selecting the right boot repair tool is crucial. EaseUS Partition Master is a highly recommended option due to its advanced boot-repairing capabilities. This tool is designed to quickly identify and resolve boot issues without the need for Windows reinstallation, offering a seamless recovery experience. To effectively use EaseUS Partition Master:
  • Download and install the tool on a functioning computer.
  • Create a bootable media by connecting an external drive or USB.
  • Follow the guided process to repair the boot sector or rebuild the MBR (Master Boot Record).
Remember, while EaseUS Partition Master can handle many boot-related problems, it’s important to ensure that the issue at hand falls within the scope of what the tool can fix. For more complex problems, professional assistance may be necessary.

Running the Boot Repair Process

Once you have selected the appropriate boot repair tool, such as EaseUS Partition Master, the process to resolve the Acer desktop boot loop issue can begin. Insert the bootable media into your computer and restart it to boot from the media. Follow the on-screen instructions to select your language preferences and proceed to the next steps.
The steps are as follows: Select your system for repair and click “Repair.” After a brief wait, you should receive a notification indicating the system has been successfully repaired. Click “OK” to finalize the boot repair process.
It’s important to note that while this method can resolve many boot-related errors, it may not be effective for all situations. In some cases, a fresh installation of Windows might be necessary to completely eliminate persistent boot issues and provide a clean slate for your system.

Evaluating the Effectiveness of the Tool

After running the boot repair process, it’s crucial to evaluate the effectiveness of the tool used. Start by checking if the Acer desktop can now complete the boot sequence without entering a loop. If the issue persists, consider the following steps:
  • Review the repair tool’s log files for any errors or unsuccessful operations.
  • Compare the current boot behavior with the symptoms identified before the repair.
  • Consult online forums or the tool’s support resources for additional troubleshooting tips.
It’s important to remember that not all tools will resolve every boot loop scenario. Some issues may require a more targeted approach or professional assistance.
If the tool has successfully resolved the boot loop, monitor the system’s stability over the next few reboots. This will help ensure that the fix is not just a temporary solution but a stable one. Documenting the process and outcome can be beneficial for future reference or if further support is needed.

Performing a System Reset

Preparing for a System Reset

Before initiating a system reset on your Acer desktop, it’s crucial to understand the implications and prepare accordingly. A system reset will revert your computer to its original factory settings, which means all personal files, applications, and settings will be erased. To ensure you don’t lose important data, follow these preparatory steps:
  • Backup all important files to an external drive or cloud storage.
  • Make a list of the applications you need to reinstall after the reset.
  • Gather any software licenses or product keys you may need for reinstallation.
  • Ensure your computer is plugged into a power source to prevent interruption during the reset process.
Note that if you choose to ‘Keep my files’ during the reset, your personal files will remain intact, but applications will be lost. If you select ‘Remove everything’, you are performing a factory reset, which will wipe out everything and return your computer to its original state, as if it were new.
Once you have backed up your data and are ready to proceed, you can initiate the reset by navigating to the Acer Care Center. Select ‘Get started’ under the ‘Recovery Management’ section to begin the ‘Reset your PC‘ process.

Choosing Between Keeping Files or Removing Everything

When you’re ready to reset your Acer desktop, you’ll be faced with a critical decision: whether to keep your files or to remove everything. This choice will determine the extent to which your system is restored to its original state.
  • Keep my files: This option reinstalls Windows but preserves your personal files, as well as any settings and apps that came with your PC. It’s a suitable choice if you’re experiencing issues but don’t want to lose your documents and photos.
  • Remove everything: If you’re looking for a fresh start or if your PC is being transferred to a new owner, this option will restore your computer to its factory settings. It removes all personal files, user accounts, apps, and settings. Before choosing this, ensure you have backups of any important data.
Note: After selecting an option, the system will guide you through the process. If you encounter issues with the ‘keep my files’ option not working, you can troubleshoot by resetting the PC and choosing ‘remove everything’ followed by ‘local reinstall’.

Completing the Reset Process

Once you have chosen to keep your files or remove everything, the reset process will begin. It’s crucial to ensure that your Acer desktop remains powered during this time to prevent any interruptions that could corrupt the installation.
After the reset, your computer will restart and you may see a blue Windows Recovery Management screen. From here, you can follow the on-screen instructions to finalize the setup of your system.
If you selected to remove everything, remember that this will restore your computer to its original factory settings, effectively making it like a new device. All personal files, applications, and settings will be erased. Conversely, if you chose to keep your files, your personal data will be preserved, but you will need to reinstall any applications that were not originally included with your system. Once the reset is complete, it’s advisable to check for any pending updates and install them to ensure your system is up to date. This can help prevent future boot loop issues and improve the overall performance of your desktop.

Testing with an External Monitor

Connecting to an External Monitor

When your Acer desktop is stuck in a boot loop, it’s crucial to determine if the issue is related to the display. Connecting an external monitor can help isolate the problem. If the external monitor displays your desktop correctly, the issue may lie with your Acer’s built-in monitor or graphics card. To connect an external monitor, follow these steps:
  1. Power off your Acer desktop.
  2. Connect the external monitor to the appropriate port on your desktop (usually HDMI, DisplayPort, or VGA).
  3. Power on both your desktop and the external monitor.
  4. If necessary, use the monitor’s input selection feature to choose the correct input source.
If the external monitor also fails to display anything, this could indicate a more serious hardware issue, potentially with the graphics card or motherboard.
Remember to check your desktop model’s specifications for supported monitor connections and resolutions. For instance, some models may support dual monitors or specific features like G-sync, which can enhance your visual experience if you’re using compatible monitors.

Diagnosing Display-Related Issues

When faced with display-related issues on your Acer desktop, it’s crucial to methodically pinpoint the cause. Check the display cables first; these are vital for connecting your monitor to the PC. A loose or damaged cable can often be the culprit of display errors. If the monitor enters sleep mode unexpectedly, this is the first thing to check for proper connection. If the monitor remains blank, consider booting into Safe Mode. This diagnostic mode starts Windows with a minimal set of drivers, which can help determine if the problem is software-related. If the display works in Safe Mode, you may need to update or reinstall your graphics driver. In some cases, the issue could be hardware-related, such as faulty RAM. Reseating or replacing the RAM modules might resolve the issue. Additionally, if you’re experiencing no HDMI signal, try different HDMI ports or cables, and ensure your drivers are up to date.
Remember, if the display issues persist after trying these steps, it could indicate a more serious hardware problem that might require professional repair.

Determining the Need for Professional Repair

When you’ve exhausted all troubleshooting steps and your Acer desktop still faces boot loop issues, it may be time to consider professional repair. If your system is still under warranty, this could be the most cost-effective solution. Professional technicians offer expert diagnosis and troubleshooting, which is essential when software solutions fail to resolve the problem. They can handle a range of issues from motherboard repairs to data recovery. If you’re experiencing persistent problems such as your Acer laptop being stuck in a loop of “repairing” and “diagnosing”, it’s a strong indication that a deeper issue exists, possibly requiring a clean install or hardware intervention. Here’s a list of common services provided by professional repair centers:
  • Expert diagnosis and troubleshooting
  • Precise repairs and solutions
  • Timely and efficient service
  • Motherboard repair and replacement
  • Power issue repairs
  • Wireless troubleshooting
  • Virus removal
  • Data recovery
Before deciding on professional repair, ensure you’ve backed up all important data. This precaution will safeguard your information in case of data loss during the repair process.

Seeking Professional Support

When to Contact Acer Customer Support/ Local Computer Repair Shop

If you’ve exhausted all the troubleshooting steps and your Acer desktop still experiences a boot loop, it’s time to reach out to Acer Customer Support. They are equipped to handle complex issues that may not be resolvable through standard troubleshooting methods. Before contacting support, ensure you have your device’s model number and any error messages you’ve encountered readily available.
In cases where your desktop is still under warranty, Acer’s customer support can provide repair or replacement services as per the terms. If the warranty has expired, they can still assist, but be aware that there may be charges for the repair.
For immediate assistance, you can use the following resources:
  • Visit the official support website: support.acer.com and select your country.
  • Click on “Repair My Acer” to request a repair service.
  • For additional support, navigate to the Acer Community or use the Acer Answers resource for guidance.
Remember, professional support is crucial when dealing with hardware failures or complex software issues that are beyond basic troubleshooting.

Preparing Information for Support

Before reaching out to Acer Customer Support, it’s crucial to gather all necessary information to expedite the troubleshooting process. Ensure you have a detailed description of the issue, including any error messages and the steps you’ve already taken to resolve the problem. This will help the support team understand your situation better and provide more accurate assistance.
Having your system’s serial number, model number, and purchase date at hand will streamline the support process. Additionally, document any recent changes to your system, such as hardware upgrades or new software installations.
Here’s a checklist of information to prepare:
  • Detailed problem description
  • Steps taken to troubleshoot
  • System serial number
  • Model number
  • Purchase date
  • Recent system changes
By being prepared with this information, you can ensure a more efficient and effective support experience.

Understanding Warranty and Service Options

When dealing with an Acer desktop boot loop issue, understanding your warranty and service options is crucial. Acer provides a range of support services that can help you resolve technical problems, including the boot loop issue. If your product is still under warranty, you can contact the Acer Call Center to raise a Service Request. It’s important to have your product details, such as the Serial Number (SN), Purchase Date, and Warranty Expiry Date, readily available. For those with products out of warranty, Acer offers paid repair services. You can visit the support website, choose your country, and click on “Repair My Acer” to request a repair. Charges will apply for these services. Additionally, Acer’s International Travelers Warranty (ITW) may provide coverage with certain limitations, so it’s advisable to check the terms if you’ve purchased your product abroad.
Friendly and professional support is a cornerstone of Acer’s customer service. Whether you need help with the repair process or have other computer-related concerns, Acer’s team is ready to assist.
Remember to inquire about extended warranty services if you’re interested in long-term protection for your Acer desktop. This can be especially beneficial for international customers who may face different warranty terms.

Conclusion

In conclusion, the Acer desktop boot loop issue can be a frustrating problem, but with the right troubleshooting steps, it can often be resolved. From resetting BIOS or UEFI settings to booting in Safe Mode, and even using advanced tools like EaseUS Partition Master, there are multiple solutions to try. It’s important to follow each step carefully and consider all options, including contacting Acer Customer Support if necessary. Remember to back up your data before attempting fixes that involve data loss. With patience and persistence, you can overcome the boot loop challenge and get your Acer desktop running smoothly again.

Frequently Asked Questions

What are the symptoms of an Acer desktop boot loop issue?

Symptoms include the computer continually restarting and never fully booting to the operating system, seeing the Acer logo repeatedly, or getting stuck on a loading screen.

What causes an Acer desktop to enter a boot loop?

Common causes include software glitches, corrupted system files, failed updates, hardware malfunctions, and incorrect BIOS/UEFI settings.

How can I perform a hard reset on my Acer desktop?

To perform a hard reset, shut down the computer, unplug all peripherals and power sources, then hold down the power button for 15 seconds. Reconnect the power and restart the computer.

How do I access the BIOS/UEFI settings on an Acer desktop?

Restart your Acer desktop and immediately press the F2 key when the Acer logo appears to enter the BIOS/UEFI settings.

What should I do if my Acer desktop is stuck on the loading screen?

You can try booting into Safe Mode, performing a system reset, using a boot repair tool like EaseUS Partition Master, or checking for hardware issues such as battery health.

How do I reset my Acer desktop to its default BIOS settings?

Enter the BIOS setup by pressing F2 at startup, then press F9 to load default settings, and F10 to save and exit.

Can I fix an Acer desktop boot loop without losing my data?

Yes, you can attempt fixes like booting into Safe Mode, performing a hard reset, or using the ‘Keep my files’ option when resetting your PC to preserve your data.

When should I contact Acer customer support for boot loop issues?

If you have tried all troubleshooting steps without success, or if you suspect a hardware failure, it’s time to contact Acer customer support for professional assistance.

Acer Desktop Refusing to Start? Volta PC Upgrade & Repair Has the Fix!

Boot issues with your Acer desktop can be a major headache, leaving you frustrated and unable to get things done. Don’t lose hope – Volta PC Upgrade & Repair specializes in solving these exact problems.

Our expert technicians can:

  • Diagnose the root cause of the boot failure (hardware, software, or something else).
  • Repair or replace faulty components as needed.
  • Fix corrupted system files preventing startup.
  • Optimize your system for smooth boot-up and performance.
  • Offer preventative advice to minimize future issues.

We understand how important a reliable desktop is. With Volta PC Upgrade & Repair, you get:

  • Fast and efficient troubleshooting
  • Affordable pricing with no hidden costs
  • Friendly service from experienced professionals

Stop battling a stubborn Acer desktop. Contact Volta PC Upgrade & Repair today and get your machine back up and running!

Contact Volta PC Upgrade & Repair Today!

  • Address:
    • Tai Seng Branch: 8 Burn Road #01-04, Trivex, Singapore 369977
    • Jurong Branch: Blk 132 #01-279C, Jurong Gateway Road, Singapore 6001324
  • ContactWhatsapp us | Call 69500453 | Telegram us

MORE ON COMPUTER REPAIR SINGAPORE

X