How To Fix A Laptop That Water Spilled On: Ultimate Laptop Repair Singapore
We’ve all been there—working diligently on our laptop when suddenly, disaster strikes. A cup of coffee tips over, a water bottle leaks, or a child’s enthusiastic gesture sends a glass of juice flying across the table. In that moment, panic sets in as you realize your laptop is at risk of water damage. If you’ve found yourself in this unfortunate situation, you’re probably frantically searching for information on how to fix a laptop that water spilled on.
Don’t worry; you’ve come to the right place. This comprehensive guide is designed to walk you through the crucial steps you need to take immediately after a spill, as well as advanced techniques for more severe cases. We’ll also discuss when it’s best to seek professional help and offer preventive measures to protect your laptop in the future.
From immediate actions to long-term solutions, this blog post aims to be your one-stop resource for dealing with a water-damaged laptop. Whether you’re a DIY enthusiast or someone who prefers professional services, we’ve got you covered. So, let’s dive in and explore the ins and outs of how to fix a laptop that water spilled on.
How To Fix A Laptop That Water Spilled On
Step #1: Immediate Actions to Take
Power Off the Laptop
First and foremost, turn off your laptop. The moment water spills on it, time becomes your enemy. Electricity and water are a dangerous mix. Therefore, you must act quickly to minimize laptop water damage. Hold down the power button until the screen goes dark. This action breaks the electrical circuit, reducing the risk of a short circuit.
Unplug All Accessories
Next, unplug all connected devices. These include your mouse, keyboard, and any USB drives. Also, remove the power cable. Unplugging these accessories minimizes the areas where water can seep in. It also makes the next steps in your DIY laptop repair easier.
Remove the Battery
Now, let’s focus on the battery. If your laptop has a removable battery, take it out immediately. By doing so, you further break the electrical circuit. This step is crucial for laptop recovery after a water spill. For laptops with non-removable batteries, some experts in laptop repair in Singapore suggest disabling the internal battery through the BIOS settings. However, proceed with caution and only if you’re comfortable navigating the BIOS.
Drain the Water
After that, you’ll want to drain any remaining water. Turn the laptop upside down to let the water flow out. You can also shake it gently to remove more water. This position helps to prevent water from reaching sensitive internal components. It’s a simple yet effective step in learning how to fix a water-damaged laptop.
Use an Absorbent Towel
Finally, use an absorbent towel to dry off the laptop’s surface. Opt for a lint-free cloth or towel for this purpose. Gently dab the wet areas; don’t wipe. Wiping may push the water deeper into the laptop, worsening the damage.
→ By following these immediate actions, you set the stage for a successful laptop recovery. Each step is designed to minimize the extent of laptop water damage. Moreover, these are essential skills for anyone interested in DIY laptop repair.
In Singapore, where humidity levels are generally high, the risk of water damage to electronics is even greater. That’s why knowing these immediate actions is not just beneficial; it’s crucial.
Remember, the faster you act, the better your chances of saving your laptop. Time is of the essence. So, the next time water spills on your laptop, you’ll know exactly what to do.
Step #2: Assessing the Type of Liquid Spilled
Water
Firstly, let’s talk about water. It’s the least harmful liquid when it comes to laptop water damage. However, that doesn’t mean you’re in the clear. Water can still cause short circuits and corrode metal parts over time. Therefore, even if it’s “just water,” you shouldn’t take the situation lightly. Quick action remains crucial for effective laptop recovery.
Sugary Drinks
Secondly, sugary liquids like soda or juice pose a different set of challenges. These liquids are not only conductive but also sticky. Consequently, they can leave a residue that’s hard to clean. This residue can cause long-term damage, complicating your DIY laptop repair efforts. In such cases, you might need to consult professionals for laptop repair in Singapore or wherever you’re located.
Alcoholic Beverages
Thirdly, what if you’ve spilled beer or wine? Alcoholic beverages often contain sugars and other additives. These substances can be corrosive. Moreover, alcohol can have a rapid drying effect, which might seem like a good thing. However, it can also speed up the corrosion process. Therefore, alcoholic spills require immediate and specialized attention.
Coffee and Tea
Next, let’s consider hot beverages like coffee and tea. These drinks often contain sugars and creams, making them a double threat. The heat can also accelerate some of the damaging effects. If you’ve spilled coffee or tea, you’ll need to act even more quickly. Time is of the essence in preventing laptop water damage.
Acidic Liquids
Additionally, acidic liquids like citrus juices pose a unique risk. They can be highly corrosive and can cause rapid deterioration of metal components. If you’ve spilled an acidic liquid, you’ll need to clean your laptop more thoroughly. This might involve taking apart the laptop, a step often best left to professionals in laptop repair.
Oily Liquids
Lastly, oily liquids like cooking oils can be particularly challenging. They can seep into small crevices and are difficult to clean. In such cases, a simple wipe-down won’t suffice. You’ll likely need to disassemble the laptop for a thorough cleaning. This is a complex task and may require expert laptop repair services.
→ By understanding the type of liquid you’ve spilled, you can tailor your laptop recovery efforts more effectively. For instance, water spills might allow for a more DIY approach. However, spills involving sugary or alcoholic beverages often require professional laptop repair.
Step #3: Drying Methods
Natural Drying
Firstly, let’s discuss natural drying. This method is the most straightforward one. Simply place your laptop in a dry, warm area. Make sure to open the laptop lid and remove any removable panels. This setup allows air to circulate, aiding in the drying process. While this method is slow, it’s often effective for water spills.
Use of Fans
Secondly, consider using fans to expedite the drying. Position a fan so that it blows air into the open laptop. The fan helps to evaporate the moisture more quickly. However, make sure the fan isn’t too powerful. A strong gust can push water deeper into the laptop, complicating your DIY laptop repair efforts.
Dehumidifiers
Thirdly, a dehumidifier can be a valuable tool. Place the laptop in a room with a dehumidifier running. This device pulls moisture out of the air, aiding in laptop recovery. It’s particularly useful in humid climates like Singapore, where natural drying can take longer.
Silica Gel Packets
Next, silica gel packets can also be helpful. These packets absorb moisture effectively. Place them around the laptop in a sealed bag. Leave the setup for at least 24-48 hours. This method is especially useful for minor laptop water spills.
Vacuum Method
Additionally, some people recommend using a vacuum to suck out the moisture. If you choose this method, exercise extreme caution. Make sure the vacuum’s nozzle never touches the laptop. Also, keep the vacuum moving to avoid static buildup. This method is risky and generally not recommended for those unfamiliar with laptop repair.
What Not to Use
Lastly, let’s talk about what not to use. Avoid using heat guns. These devices can generate static electricity. They can also melt internal components, causing irreversible laptop water damage.
If you are thinking about using a hair dryer, remember to use the “cool” setting.
→ By understanding the various drying methods, you can choose the most effective one for your situation. For instance, natural drying might suffice for a minor water spill. However, for more severe laptop water damage, you might need to employ multiple methods.
Step #4: Taking Apart the Laptop (Advanced)
∗Important: This section covers advanced topics and is recommended only for users who possess substantial expertise in DIY laptop repair. If you are not comfortable with DIY laptop repair, please proceed to the section on when to seek expert help.∗
Precautions and Tools Needed
Firstly, let’s discuss the precautions. Before you start, make sure you’re working on a clean, static-free surface. Use an anti-static wristband to prevent static electricity from damaging your laptop. Now, gather your tools. You’ll need a set of precision screwdrivers, plastic pry tools, and a container for screws.
Removing Components
Secondly, start by removing the battery. This step is crucial for preventing electrical damage. Next, look for screws on the laptop’s underside. Unscrew them and keep them organized. Some laptops have screws under rubber feet or stickers, so check thoroughly.
Opening the Case
Thirdly, once all screws are out, use a plastic pry tool to open the case. Gently insert the tool between the case and the body. Work your way around the laptop, prying the case open. Be cautious not to break any plastic clips that might hold the case together.
Disconnecting Internal Components
Next, you’ll see various internal components. These could include the hard drive, RAM, and cooling fan. Carefully disconnect these parts. Most will have ribbon cables attached to the motherboard. Gently pull these cables out of their sockets.
Cleaning with Isopropyl Alcohol
Additionally, if you’ve spilled sugary or alcoholic liquids, you’ll need to clean the components. Use a soft brush and isopropyl alcohol for this. Gently scrub away any residue. Isopropyl alcohol evaporates quickly and doesn’t leave a residue, making it ideal for this task.
Drying the Components
After cleaning, it’s time to dry the components. Use the drying method best suited for your situation. Whether it’s natural drying or using a dehumidifier, make sure the components are completely dry before reassembly.
Reassembling the Laptop
Lastly, once everything is dry and clean, you can start reassembling your laptop. Follow the disassembly steps in reverse order. Make sure to reconnect all cables and screws. Power up the laptop to see if your DIY laptop repair efforts have been successful.
→ By following these advanced steps, you significantly increase your chances of successful laptop recovery. However, this process is not without risks. If you’re not comfortable with these steps, it’s better to seek professional laptop repair services.
Prevention Tips
Use of Laptop Stands
Firstly, consider using a laptop stand. Elevating your laptop provides a physical barrier against spills. It also improves airflow, which is a bonus for your laptop’s longevity. Various types of stands are available, from simple risers to ones with built-in cooling fans.
Keeping Liquids Away
Secondly, keep liquids away from your workspace. It sounds simple, but it’s effective. If you must have a drink while working, use a bottle with a secure lid. This reduces the risk of a laptop water spill significantly.
Waterproof Keyboard Covers
Thirdly, invest in a waterproof keyboard cover. These covers are made from silicone or plastic. They fit over your keyboard, providing a first line of defense against spills. Moreover, they are easy to clean and replace.
Use of Trays or Mats
Next, consider using a tray or mat under your laptop. This creates an additional barrier between your laptop and any potential spills. Some mats even come with raised edges to contain liquids effectively.
Cable Management
Additionally, proper cable management can prevent accidents. Tangled cables are tripping hazards. They can pull down drinks and cause a laptop water spill. Use cable organizers to keep your workspace neat and safe.
Regular Backups
Moreover, always back up your data. While this won’t prevent a spill, it will make laptop recovery easier. Use cloud storage or an external hard drive for this purpose. Regular backups can save you from significant data loss.
Protective Cases
Furthermore, consider using a protective case for your laptop. These cases offer an extra layer of protection against physical damage. While they may not be 100% waterproof, they can minimize the impact of a minor spill.
Awareness and Training
Lastly, be aware of your surroundings. Train yourself to be cautious when eating or drinking near your laptop. A moment of carelessness can lead to costly laptop repair or data loss.
When to Seek Professional Help
Warranty Considerations
Firstly, check your laptop’s warranty. Some warranties cover accidental damage, including water spills. If your laptop is under such a warranty, take advantage of it. However, read the terms carefully. Some warranties become void if you attempt DIY laptop repair.
Costs Involved
Secondly, consider the costs. Professional laptop repair services can be expensive. They often involve diagnostic fees, labor costs, and parts replacement. Therefore, weigh these costs against the value of your laptop. If your device is older, the repair costs might exceed its current value.
Severity of the Damage
Thirdly, assess the severity of the laptop water damage. Minor spills affecting only the keyboard may be manageable at home. However, if the liquid has reached the motherboard, professional help is advisable. Advanced diagnostic tools are often needed to assess such damage accurately.
Data Recovery
Next, think about data recovery. If your laptop won’t power up, you risk losing valuable data. Professional laptop repair services often offer data recovery as part of their package. This service can be invaluable, especially for business users or students.
Specialized Cleaning
Additionally, some spills require specialized cleaning. Spills involving sugary or acidic liquids fall into this category. These substances can corrode internal components rapidly. Professional cleaning can mitigate this risk and improve your chances of successful laptop recovery.

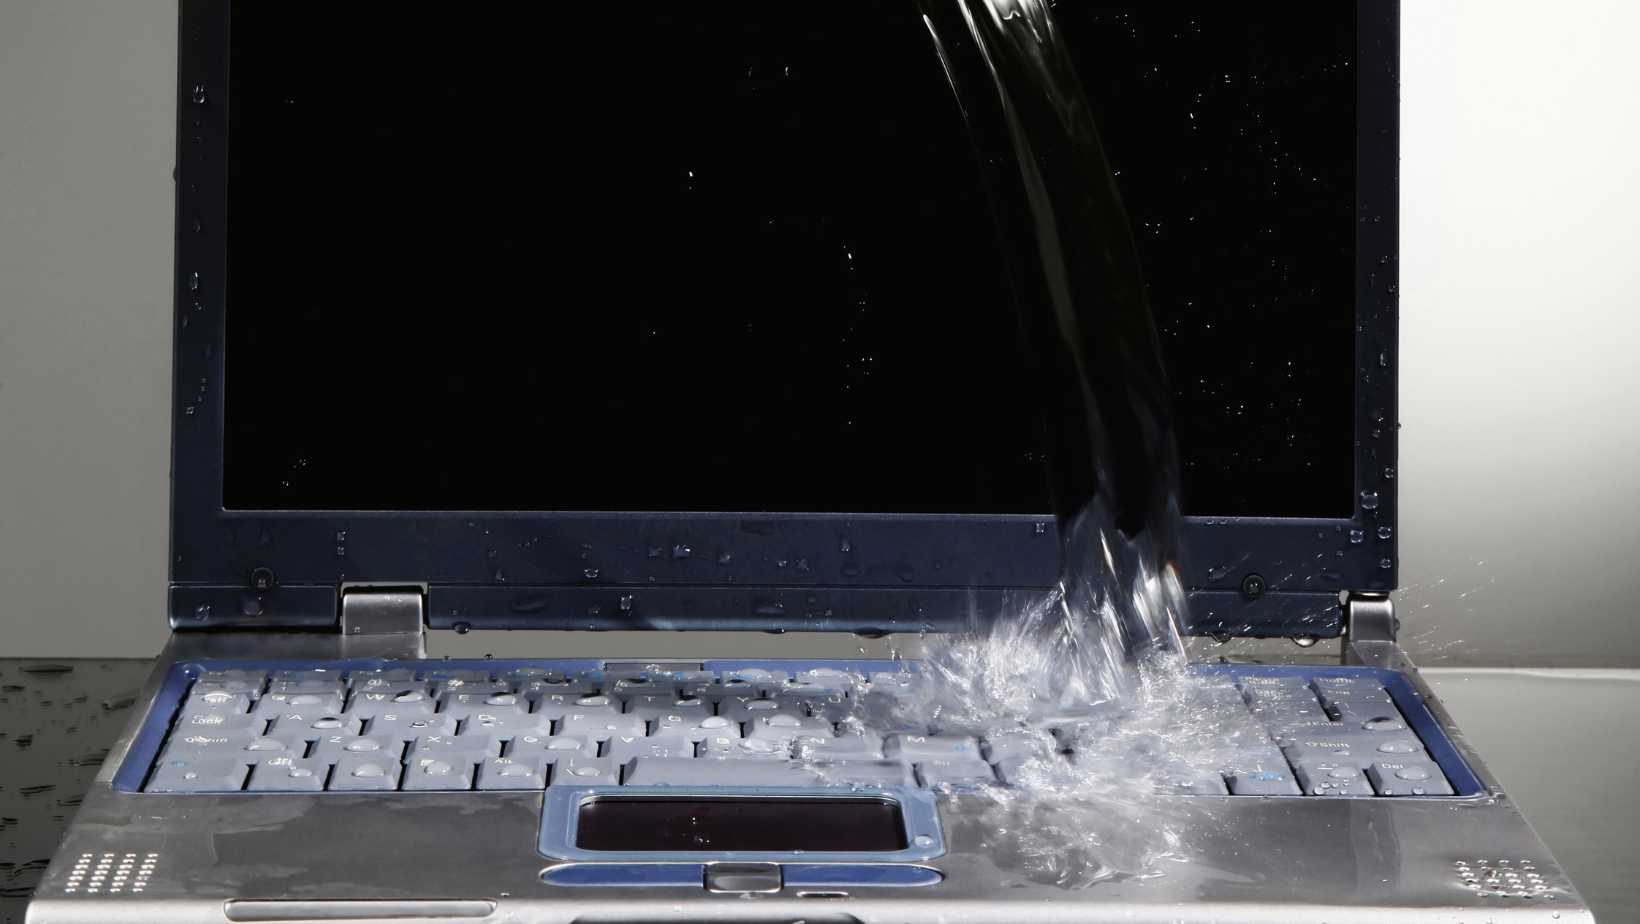
The image depicts a laptop that has incurred damage and corrosion as a result of a water spill.
Expertise Level
Moreover, consider your level of expertise. If you’re not comfortable taking apart your laptop, don’t risk it. One wrong move can cause irreversible damage. In such cases, it’s better to seek professional laptop repair services.
Time Constraints
Lastly, time is of the essence when dealing with a laptop water spill. If you can’t afford the time for a DIY approach, professional help is the quicker option. Many repair services offer expedited options for an additional fee.
FAQs about How To Fix a Laptop That Water Spilled On
Can a laptop with water damage be repaired?
Yes, a laptop with water damage can often be repaired, but the success largely depends on the extent of the damage and how quickly you act. Immediate steps like powering off the laptop and removing the battery can minimize damage. For severe cases, professional laptop repair services are recommended.
What to do if you spill water on your laptop but it still works?
If you spill water on your laptop and it still works, don’t assume you’re in the clear. Immediately power it off and unplug all connected devices. Remove the battery if possible and let it dry thoroughly before turning it back on. This reduces the risk of delayed damage due to short circuits or corrosion.
How long should you leave a laptop in rice?
The rice method is a popular DIY drying technique. If you opt for this, leave your laptop in a bag of rice for at least 24 to 48 hours. The rice acts as a desiccant, helping to absorb moisture. However, this method is generally less effective than using silica gel or a dehumidifier.
Can I dry my laptop with a hair dryer?
Using a hair dryer to dry your laptop is not recommended. The intense heat can melt internal components, and the airflow can push moisture deeper into the laptop. Additionally, hair dryers can generate static electricity, which can further damage electronic components.
How long can water stay in a laptop?
Water can remain in a laptop for an extended period, depending on various factors like the laptop’s design and the climate. However, the longer the water stays, the higher the risk of corrosion and other damage. Immediate action is crucial for effective laptop recovery.
How much does it cost to repair a water damaged laptop?
The cost to repair a water-damaged laptop can vary widely based on the extent of the damage and the service provider. Minor repairs may cost as little as $100, while severe damage requiring component replacement can run into several hundred dollars. Always get a detailed quote before proceeding with any repair services.
Where to Fix a Laptop That Water Spilled On in Singapore
Accidents happen, and sometimes those accidents involve spilling water or other liquids on your laptop. While there are DIY methods to address this issue, there are times when professional help is not just advisable but necessary. If you’re in Singapore and find yourself in such a predicament, you’re in luck. One of the most reliable places to get your water-damaged laptop repaired is VOLTA PC Upgrade & Repair.
Why Choose VOLTA PC Upgrade & Repair?
Expertise
Firstly, VOLTA PC Upgrade & Repair boasts a team of highly skilled technicians. They are well-versed in laptop repair, including complex issues like laptop water damage. Their expertise ensures that your device is in capable hands.
Comprehensive Services
Secondly, VOLTA PC Upgrade & Repair offers a wide range of services. From basic troubleshooting to advanced laptop recovery, they’ve got you covered. They can handle various types of damage, whether it’s a simple water spill or a more complicated issue involving sugary or acidic liquids.
Quick Turnaround Time
Next, if you’re pressed for time, VOLTA PC Upgrade & Repair is an excellent choice. They understand that your laptop is essential for work or school, so they aim to provide quick yet effective solutions. Expedited services are also available for those in a hurry.
Transparent Pricing
Moreover, VOLTA PC Upgrade & Repair offers transparent pricing. There are no hidden fees, and they provide a detailed quote before starting any repair work. This transparency allows you to make an informed decision without any surprises.
Customer Reviews
Additionally, VOLTA PC Upgrade & Repair has garnered numerous positive reviews from satisfied customers. These testimonials speak volumes about their quality of service and customer satisfaction. It’s always reassuring to know that others have had a positive experience with the service you’re considering.
Data Recovery Services
Furthermore, they also specialize in data recovery. If you’re worried about losing important files due to laptop water damage, their experts can help retrieve your valuable data.
Convenient Location
Lastly, VOLTA PC Upgrade & Repair is conveniently located, making it easily accessible for residents and visitors alike. Their central location means you won’t have to go out of your way to get top-notch laptop repair in Singapore.
So, if you’ve experienced a laptop water spill and are looking for professional laptop repair service, look no further than VOLTA PC Upgrade & Repair.
Address:
- Tai Seng Branch: 8 Burn Road #01-04, Trivex, Singapore 369977
- Jurong Branch: Blk 132 #01-279C, Jurong Gateway Road, Singapore 600132