
Upgrading Your Mac Hard Drive Versus Buying A New Model
In the ever-evolving world of technology, Mac users are often faced with the decision of whether to upgrade their current system or invest in a
There comes a time when every Mac user finds themselves needing more storage. Perhaps you have filled up your hard drive with photos, videos, work files, or games. Or maybe your drive has simply failed or is showing signs of age. Whatever the reason, replacing your Mac’s hard drive provides an affordable way to improve performance and extend the usable life of your machine.
You may want to replace your Mac hard drive if:
Upgrading a Mac hard drive seems complicated, but breaks down into straightforward steps:
While anyone can perform this upgrade on their Mac, you need:
If those requirements fit your skill level, then you can absolutely replace your aging or overloaded hard drive.
The rest of this article walks through the complete hard drive replacement process step-by-step. It covers:
Follow along to breathe new life into your Mac with a fresh, spacious hard drive.
Before getting started, gather the proper tools and components that you’ll need for safely replacing your Mac’s hard drive. Having these materials prepared ahead of time ensures the process goes smoothly.
You will need:
Photo via powerbookmedic
To properly back up your original hard drive, have:
Additionally, the upgrade process goes more smoothly with:
With all those materials prepped and on hand, you have everything needed to safely and efficiently replace your aging Mac hard drive. Don’t be overwhelmed by the list – most are common components and tools.
Up next, we’ll cover the critical step of backing up your data before swapping drives. Having a solid backup prevents any possibility of data loss during the replacement process.
Before swapping out your original Mac hard drive, it is absolutely vital that you properly back up all of your files and folders. Losing family photos, important documents, or creative work would be catastrophic.
The preferred method is using Time Machine – Apple’s built-in backup software for macOS. Time Machine incrementally backs up the entire contents of your computer to an external hard drive.
Here are the steps to leverage Time Machine before replacing your boot drive:
Once complete, your entire Mac content is mirrored on the external drive. If any files vanish during the drive swap, you can restore them.
An alternative backup option is creating a complete bootable clone of your existing Mac hard drive using cloning software such as Carbon Copy Cloner or SuperDuper.
The steps involve:
This gives you a full external copy of your original drive that can also boot your Mac. Having an extra bootable backup is wise in case issues crop up with the new drive.
While it may be tempting to jump straight into the drive replacement process, properly backing up the existing data is too critical of a step to ignore. Protect yourself fully with Time Machine or a cloned drive before the swap.
Moving ahead, I’ll cover how to safely open up your Mac and complete the physical drive replacement.
With your Mac powered down and backups completed, it’s time to physically open up the computer to access and replace the hard drive. Having the proper tools and following best practices ensures you don’t damage internal components during this critical stage.
Before cracking open the case, be sure to use an antistatic wrist strap. This grounds your body relative to the Mac and prevents any static electrical discharge from damaging the logic board or other sensitive components. Simply:
Wear the strap whenever handling internal parts. Also remember not to work on carpet and try to frequently touch metal inside the Mac to discharge any latent static buildup.
The exact steps to open a Mac and access the hard drive vary by model. Consult Apple’s official manuals to see the recommended method for your specific Mac.
In general, the process involves:
Go slowly during this stage and place any removed components in an organized manner. Be extremely gentle when having to disconnect any delicate ribbon cables.
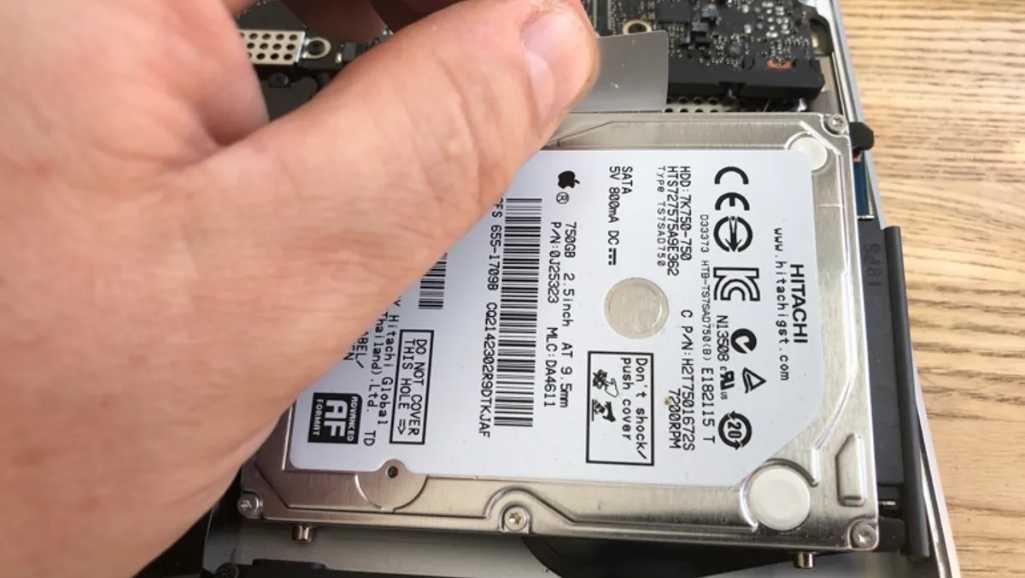
Once you have a clear view of the hard drive inside your Mac:
With cares taken to avoid static and no damage caused, you now have successfully accessed and removed the factory Mac hard drive!
Next up, we’ll install the fresh replacement drive into the vacant hard drive bay.
With the original hard drive removed, it’s time to install the fresh replacement drive into the emptied drive bay within your Mac. Take care to properly insert and connect the new drive so it functions optimally once powered on.
To install the replacement hard drive:
Avoid touching the connectors on the drive and handle only by the sides. You don’t want to mistakenly damage components that could lead to data loss down the line.
Depending on your Mac model and the type of drive, reattach any loose cable connections to the back of the new drive, including:
Consult Apple’s service manual for your specific Mac if unsure of which cabling needs reattachment. Use spudgers as needed to gently guide and seat the cables.
Before beginning the reassembly process, use your phone or camera to take photos of the internal layout from a couple angles. This gives you a visual reference should you need to reopen the Mac for maintenance later.
With care taken on the physical installation, you now have a fresh hard drive mounted within your Mac, ready for the data migration and OS configuration process next. Just be sure to give the new drive the same volume name to make the transition smoother.
With the physical hard drive replacement completed, it’s time to transfer your files, settings, and operating system over to the fresh drive and button up your Mac. Take things slow and steady.
If you followed earlier advice and created a complete Time Machine or cloned drive backup, the migration process involves:
This ensures your new drive has the factory fresh OS before overwriting it with your data.
If you don’t have a full-system backup, Apple’s Migration Assistant copies over accounts, applications, and specific files from either:
To use Migration Assistant:
Expect the migration process to take upwards of several hours depending on data amounts.
Once file transfer completes, finish by:
With care taken, your Mac now has fresh life with a new high-capacity hard drive!
While this guide aims to empower you to upgrade your own Mac’s hard drive, it’s natural to have some reservations about potential downsides of a DIY approach. Let’s discuss a few of the risks.
If proper backup precautions aren’t taken before swapping hard drives, irrecoverable data loss can occur if anything goes wrong. For example, if you accidentally damage a connector pin on the new drive during installation, your files may vanish.
Always capture a full Time Machine or drive clone backup ahead of time. Also consider paying for professional data recovery as a last resort if backups fail.
Inside a Mac are many delicate components like ribbon cables, small connectors, and thin thermal sensors. If you aren’t extremely gentle when opening the case or disconnecting parts, you may break something.
Repairing logic board, display, or port damage from a botched amateur repair job will run far above the cost of hard drive replacement itself.
Finally, be aware that Apple and many authorized service centers may refuse future hardware repair coverage if they detect you’ve tampered with or upgraded internal components yourself. Violating warranties is never ideal.
Weigh all these risk factors carefully before deciding on a DIY storage upgrade. For some, trusting Mac experts may indeed be the smarter and less stressful route.
After following the steps in this guide, now you have successfully swapped out the old factory hard drive in your Mac for a new, higher-capacity replacement drive. Great job!
Be sure to open Disk Utility after your initial boot onto the new drive in order to properly format or partition it before restoring backups or migrating data. This structures the drive properly for macOS.
Common partition map schemes are:
Use partition schemes that match what you had before. Segment into multiple partitions if preferred.
Now is an excellent time to develop better long-term Mac backup habits as well. Configure Time Machine on an external drive if you haven’t already. Also implement an offline backup scheme, like:
Protect your efforts if this replacement drive fails down the road.
With your Mac reassembled and data secured, get ready for like-new performance, especially if you opted for a speedy new solid-state drive (SSD) model. Apps will bounce open, file transfers will surge, and boot ups will drastically shorten.
Here’s to extracting more years of reliable use out of your Mac thanks to a well-executed DIY hard drive replacement!
Still have some lingering questions about replacing your Mac’s hard drive? Check this comprehensive FAQ.
While opening a Mac and swapping physical drives sounds intimidating, it’s actually quite approachable if you carefully follow visual guides and have the proper tools. Just work slowly and gently.
Absolutely. Connect your old drive to a USB hard drive enclosure to turn it into portable external storage for backups, file archives, or media libraries. Just be sure to completely migrate data off before reformatting for secondary usage.
As emphasized multiple times, creating a complete Time Machine or clone drive backup before replacement prevents any chance of data loss when installing the blank new drive. Restore from this backup after OS installation.
You just need basic components like antistatic equipment, precision Philips and Torx screwdrivers, and external enclosures. Specialty pry tools help but aren’t essential. Don’t attempt repairs with improper tools.
Match the physical size (2.5 inch) and connector type (SATA) of your old hard drive first. From there, select a drive with enough storage space for your needs and high reliability ratings. An SSD provides the best performance.
Expect hard drive swaps to take 2-3 hours for an amateur, less for a seasoned technician. More time is needed for proper backups, data migration, and reassembly. Schedule a good 4-6 free hours for your first attempt.
While we’ve covered how to self-upgrade your Mac’s hard drive, not everyone feels technically confident cracking open their computer. Thankfully, there are professional Mac repair shops in Singapore that can complete the hard drive swap for you: Volta PC Upgrade & Repair
We recommend bringing your Mac to Volta PC Upgrade & Repair for all storage upgrade needs.Volta PC Upgrade & Repair also offer pickup and delivery options if you can’t visit their shop.
In the ever-evolving world of technology, Mac users are often faced with the decision of whether to upgrade their current system or invest in a
Introduction There comes a time when every Mac user finds themselves needing more storage. Perhaps you have filled up your hard drive with photos, videos,
Your computer’s hard drive stores all of your files, programs, and operating system. So when it stops working properly, it can bring your whole system