An Ultimate Guide: Cleaning Desktop Like A Pro

In today’s digital age, our desktops are more than just machines—they’re essential companions, aiding us in work, play, and everything in between. But like any frequently used item, they accumulate dust, grime, and unnecessary files over time. Whether you’re a seasoned tech enthusiast or a casual user, maintaining the cleanliness of your desktop, both inside and out, is crucial. Not only does it ensure smooth performance, but it also extends the lifespan of your device. If you’ve ever wondered about the right way to keep your desktop in top-notch condition, you’re in the right place. Welcome to our comprehensive “How-to Guide on Desktop Cleaning.” In this article, we’ll delve deep into expert-approved tips and techniques, breaking down the essentials of desktop cleaning, one step at a time. Let’s embark on this journey to achieve a cleaner, more efficient desktop!

Understanding the Importance of Desktop Maintenance

Have you ever wondered why your desktop slows down over time? Well, neglecting maintenance is often the culprit. Regular upkeep of your machine is crucial. Here’s why.

Enhancing Performance Firstly, a well-maintained desktop runs faster. Over time, dust accumulates inside. This can clog fans and overheat components. By cleaning regularly, you prevent this. Hence, your system remains speedy. Moreover, software updates play a part too. They fix bugs and improve system performance. Keeping your software updated is, therefore, a must.

Prolonging Hardware Lifespan Secondly, consider the lifespan of your hardware. A desktop isn’t a small investment. Naturally, you’d want it to last. Regular maintenance ensures this. By preventing dust buildup, you avoid potential damage. Furthermore, cleaning keeps components in top shape. In turn, your machine enjoys a longer life.

Ensuring Data Safety Lastly, think about your data. It’s invaluable, right? Without proper maintenance, risks increase. Malware can infiltrate outdated systems. Hard drives can fail due to overheating. Luckily, regular check-ups combat these issues. By maintaining your desktop, you safeguard your precious data.

1. Dusting: The Silent Threat to Your Desktop

A dusty desktop computer with sunlight illuminating the floating dust particles and an overlay text highlighting the silent threat.

Photo via Dall-E 3

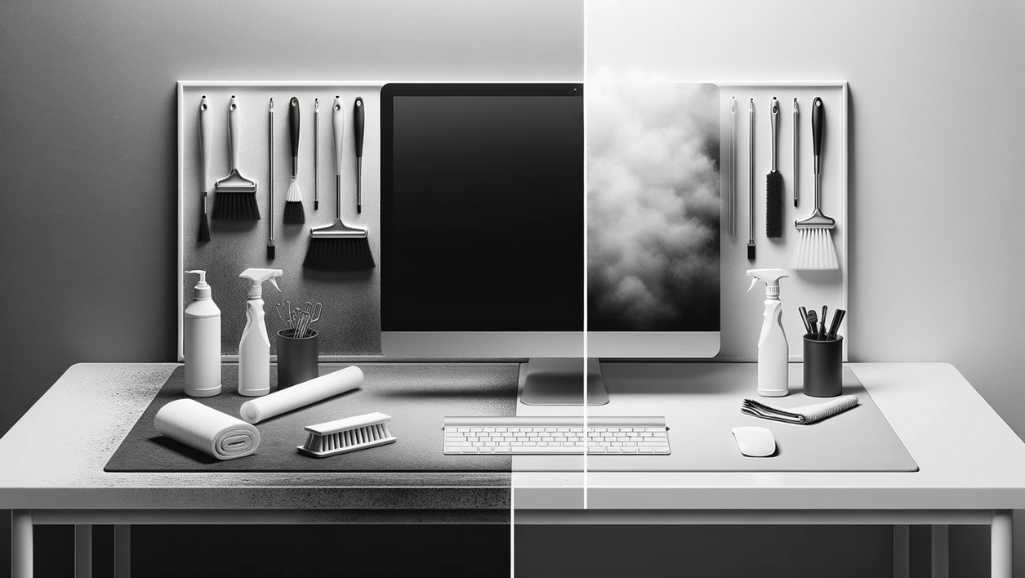
Dust may seem harmless. However, for desktops, it’s a silent enemy. Let’s delve into why.

The Dangers of Dust Accumulation First and foremost, dust isn’t just dirt. It’s a mix of particles. These include human skin, hair, and fabric fibers. Over time, dust accumulates inside your desktop. It then begins to wreak havoc. Fans get clogged. Components overheat. The result? Reduced performance and potential damage.

Recommended Tools So, how do you combat this menace? With the right tools. Compressed air is a favorite. It’s powerful yet gentle. It can dislodge stubborn dust without harm. Microfiber cloths are another go-to. They attract and trap dust effectively. No smears, no residue. Just a clean machine.

Step-by-step Guide to Dusting Your Desktop

Ready to start? Great! Here’s a simple guide:

  1. Unplug Everything: Safety first! Turn off your desktop. Unplug all cables.
  2. Open the Casing: Remove the side panel. For most models, it’s a straightforward process.
  3. Use Compressed Air: Hold the can upright. Avoid tilting. Short bursts work best. Aim away from fans initially. This prevents pushing dust further in.
  4. Wipe Surfaces: Use a microfiber cloth. Gently wipe down surfaces. Reach into corners and crevices.
  5. Clean the Fans: Hold the fan blades steady. Use compressed air again. Ensure all dust is gone.
  6. Reassemble: Once satisfied, put the casing back. Plug in cables. Power up.

In essence, dusting isn’t a herculean task. However, it’s vital. Regular dusting ensures your desktop remains in peak condition. Moreover, it guarantees a smoother, faster user experience.

So, next time you spot dust, don’t ignore it. Remember, it’s the silent threat. But with regular care, it’s a threat you can easily vanquish!

2. Cleaning Desktop Keyboard and Mouse: Your Primary Interfaces

A white desk featuring a keyboard and mouse in the process of being cleaned, with cleaning supplies spread out.

Photo via Dall-E 3

Your keyboard and mouse? They’re more than tools. They’re your desktop’s primary interfaces. Let’s keep them pristine.

Why Regular Cleaning Matters Firstly, think about daily usage. Hands touch keyboards and mice constantly. Over time, dirt, oils, and grime build up. This can affect performance. Sticky keys? Erratic mouse movements? Dirt is often the culprit. Moreover, they can harbor germs. Regular cleaning promotes hygiene.

Tools You’ll Need So, ready to start? Gather some tools. Isopropyl alcohol is a must. It cleans and disinfects. Cotton swabs are handy for tight spots. A soft cloth is also essential. It’s great for wiping surfaces. Compressed air can dislodge debris between keys.

Cleaning the Keyboard: Step-by-step

Onto the keyboard:

  1. Unplug or Turn Off: Safety first. Ensure no electricity.
  2. Shake Gently: Dislodge loose debris. Turn the keyboard upside down. Give it a gentle shake.
  3. Use Compressed Air: Aim between keys. Use short bursts.
  4. Dampen Cloth: Use isopropyl alcohol. Wipe the surface.
  5. Detailing: Use cotton swabs for edges and tight spots.

Voila! A clean keyboard awaits.

Mouse Cleaning Tips

Next, the mouse. Optical or ball, the process is similar:

  1. Unplug or Turn Off: Always start safe.
  2. Wipe Down: Use the dampened cloth. Wipe the top and sides.
  3. Bottom Cleaning: For ball mice, remove the ball. Clean inside. For optical mice, wipe the LED area.
  4. Detailing: Cotton swabs are great for scroll wheels.

In essence, cleaning your keyboard and mouse is simple. Yet, it’s transformative. Your devices will respond better. Plus, they’ll look and feel brand new.

Remember, these are your primary interfaces. Treat them with care. Regular cleaning ensures they serve you well!

3. Desktop Screen Cleaning: For Clear, Uninterrupted Views

A desktop monitor displaying a nature wallpaper, half clean and half smudged, with a hand cleaning the smudged side.

Photo via Dall-E 3

Ever noticed smudges on your screen? They’re annoying, right? Let’s change that.

Why Regular Screen Cleaning is Essential Firstly, a dirty screen isn’t just an eyesore. It can strain your eyes. Over time, dust and fingerprints accumulate. This dims the display and affects clarity. Plus, dirt can scratch the screen’s surface. Hence, regular cleaning is crucial.

Safe Methods and Materials So, what should you use? Water alone won’t cut it. In fact, it might cause streaks. Instead, opt for screen-specific cleaners. They remove dirt without harming the screen. Next, consider the cloth. Regular rags can scratch. Microfiber cloths are the best bet. They’re soft, effective, and won’t cause damage.

Routine Screen Cleaning Tips

Now, onto the cleaning process. It’s simple, really. Follow these steps:

  1. Power Down: Turn off your desktop. It’s safer and easier to spot smudges.
  2. Wipe Gently: Using a dry microfiber cloth, wipe the screen. Use circular motions. This removes loose dust particles.
  3. Apply Cleaner: Don’t spray directly onto the screen. Instead, dampen the cloth slightly. Wipe again.
  4. Dry Off: Ensure no moisture remains. Use a dry section of the cloth. Buff out any streaks.

In summary, screen cleaning is easy. Yet, it makes a significant difference. A clean screen means clearer views. It also means fewer distractions and less eye strain.

Remember, your screen is delicate. Treat it with care. Regular cleaning ensures it remains in top-notch condition. So, make it a habit. Your eyes and desktop will thank you!

4. Cable Management: Aesthetic and Functional

Ever tripped over a stray cable? Or spent ages untangling wires? We’ve all been there. Let’s find a solution.

Drawbacks of Messy Cables First off, chaotic cables aren’t just unsightly. They pose risks. Cables on the floor can be tripping hazards. Plus, tangled wires can strain connectors. Over time, this damages your devices. Hence, managing cables is more than just aesthetics. It’s about safety and longevity.

Tools for Effective Cable Management So, where to start? With the right tools. Velcro ties are versatile and reusable. They’re great for bundling cables together. Cable sleeves offer another solution. They group wires into a single, neat tube. For those wanting a cleaner look, consider cable trays. These sit under your desk. They keep cables elevated and out of sight.

Steps to Organize and Manage Cables

Ready to tackle the mess? Here’s a straightforward guide:

  1. Unplug and Lay Out: Start fresh. Unplug all cables. Lay them out. This lets you see what you’re working with.
  2. Group by Use: Bundle cables by device. For example, group all PC-related wires together.
  3. Use Velcro Ties: Secure each bundle with a tie. Ensure it’s snug, but not too tight.
  4. Label: It’s a simple step, but vital. Label each cable. This makes future troubleshooting easier.
  5. Elevate: Use cable trays or clips. Keep cables off the floor. This reduces tripping risks.
  6. Regularly Check: Over time, you’ll add or remove devices. Periodically reassess your cable management.

In essence, cable management takes a bit of time upfront. However, the benefits are manifold. You’ll enjoy a tidier workspace. Tripping hazards decrease. Devices last longer. And let’s be honest, there’s a certain satisfaction in seeing organized cables!

So, don’t delay. Dive into cable management today. Your future self will be grateful!

5. Software Maintenance: Not Just About the Hardware

We often focus on hardware. Yet, software is equally crucial. Let’s delve into its maintenance.

The Value of Regular Software Updates

Firstly, updates aren’t just annoying pop-ups. They’re essential. Think of them as tune-ups for your desktop. They patch vulnerabilities, making your system safer. They also enhance performance. Over time, developers identify bugs. Updates fix these, ensuring smoother operation.

Cleaning and Defragmenting Hard Drives

So, what about hard drives? They need care too. Over time, temporary files accumulate. These eat up valuable space. Regularly cleaning these boosts speed. Similarly, defragmenting rearranges data. This makes data access quicker. Tools like ‘Disk Cleanup’ and ‘Defragment and Optimize Drives’ can help. They come built-in with most operating systems.

Malware Scans and Reliable Antivirus Software

Now, let’s talk security. The internet is vast. Unfortunately, it’s not always safe. Malware poses a real threat. It can steal data or damage systems. Regular malware scans are, therefore, crucial. Moreover, don’t just rely on free antivirus solutions. Consider investing in reputable software. It offers better protection. Regular updates for these tools are also vital. New threats emerge daily. Stay one step ahead.

The Consequences of Neglecting Software Maintenance

You might think, “Can I skip a few updates?” In short, it’s risky. Outdated software is more vulnerable. Hackers exploit known vulnerabilities. Your personal data could be at risk. Additionally, you miss out on improved features. These can enhance user experience.

Creating a Maintenance Schedule

Lastly, consistency is key. Don’t leave maintenance to chance. Set a schedule. Monthly check-ups are a good start. Update software. Run malware scans. Clean and defrag hard drives. Stay proactive. It’s easier to prevent problems than to fix them.

In summary, software maintenance is paramount. It ensures security and efficiency. While hardware care is vital, don’t neglect the software. Both work hand in hand. A well-maintained desktop offers a seamless, worry-free experience.

6. Internal Components: Deep Desktop Cleaning for Advanced Users

Diving into your desktop’s innards? It’s a task for the brave. But fear not, we’ve got you covered.

Safety Precautions Before Starting

Firstly, safety is paramount. Before you start, turn off your desktop. Unplug it from the mains. Static electricity is a concern. Always ground yourself. A simple touch of a metal object will do. This prevents potential damage to sensitive components.

Cleaning the RAM Slots

Moving on, RAM slots can get dusty. This affects performance. To clean, remove the RAM sticks. Use compressed air. Short bursts work best. Aim directly into the slots. This dislodges accumulated dust. Once done, reinsert the RAM sticks. Ensure they click into place.

Cleaning the Graphics Card and Other Components

Next, the graphics card. Dust can hamper its cooling. First, remove the card. Use compressed air again. Pay attention to the fans and heatsinks. For stubborn dirt, a soft brush helps. Similarly, clean other components. This includes the motherboard and hard drive. Gentle is the keyword here.

Reapplying Thermal Paste: When and How

Over time, thermal paste degrades. This affects cooling. So, when to reapply? If your CPU temperatures seem high, it’s a sign. Or, if the paste looks dry and cracked. To reapply, clean off the old paste. Use isopropyl alcohol. Apply a pea-sized amount of new paste. Spread evenly. Then, reattach the cooler.

Final Touches and Reassembly

Lastly, once satisfied, it’s reassembly time. Place components back. Double-check connections. Ensure everything fits snugly. Power up your desktop. Monitor temperatures and performance. A noticeable improvement? Congratulations! You did well.

In essence, deep cleaning is intricate. But, it’s rewarding. Improved performance and longevity await. With patience and care, it’s a task well within reach.

So, next time your desktop feels sluggish, consider a deep desktop cleaning. It might just be the boost it needs!

7. The Environment: Setting Up Your Desktop's Home

Your desktop’s environment matters. Think of it as its home. Let’s make it comfortable and functional.

Importance of Placement

Firstly, where you place your desktop is key. Avoid direct sunlight. It can cause overheating. Also, ensure stability. A sturdy table is a must. Vibrations and wobbles? They’re bad news. They can damage internal components.

Maintaining Optimal Temperature and Humidity

Next, consider the room’s climate. Computers prefer cooler environments. Aim for temperatures between 20-24°C (68-75°F). Humidity is crucial too. Too dry? Static electricity risks increase. Too humid? Potential for moisture damage. Aim for 40-60% humidity. Investing in a room thermometer and hygrometer helps. They monitor conditions.

Role of Computer Stands and Cooling Pads

So, what about elevation? Computer stands are beneficial. They improve airflow. This aids cooling. For laptops, cooling pads are a boon. They have built-in fans. These keep your machine’s temperature down. Plus, they angle your laptop. This offers a better typing experience.

Avoiding External Disturbances

External factors also play a role. Firstly, keep your desktop away from liquids. Spills can be disastrous. Next, avoid placing it near heaters or radiators. Excessive heat harms performance. Also, avoid cramped spaces. Your desktop needs to breathe. Ensure adequate ventilation.

Regular Environment Checks

Lastly, routine checks are vital. Conditions change. Seasons vary. Ensure your desktop’s environment remains optimal. Adjust as needed. Maybe add a fan in the summer. Or, move it away from a drafty window in winter.

In conclusion, your desktop’s environment is crucial. It affects performance, lifespan, and user experience. By ensuring optimal conditions, you guarantee a happier, healthier machine.

So, take a look around. Is your desktop’s home up to par? If not, a few tweaks can make all the difference!

8. Periodic Maintenance: Creating a Desktop Cleaning Routine

Periodic Maintenance: Creating a Routine

Maintaining a desktop? It’s like servicing a car. Regular check-ups keep it running smoothly. Let’s set a routine.

Setting Reminders for Regular Cleanups

Firstly, reminders are your best friend. Use calendar alerts. Or, set phone alarms. Monthly checks are a good baseline. Adjust based on usage. Heavy users might need bi-weekly checks.

Quarterly Tasks

Every three months, deep clean. Dust accumulates in nooks and crannies. Address this. Also, check software updates. Are they all installed? Ensure your antivirus is current. Outdated software is a security risk.

Half-Yearly Tasks

Moving on, every six months, assess storage. Delete unnecessary files. Archive old data. It’s also a good time for a physical cleanup. Wipe down external surfaces. Clean keyboards and mice. Ensure cables are tidy.

Yearly Maintenance

Lastly, once a year, it’s overhaul time. Consider reapplying thermal paste. Deep clean internal components. Defragment hard drives. Also, review your software. Remove unused applications. Update drivers.

In essence, periodic maintenance isn’t tedious. It’s about small, consistent efforts. These ensure optimal performance. Plus, they extend your desktop’s lifespan.

9. The Don'ts of Desktop Cleaning and Maintenance

Maintenance is essential, but it’s easy to make mistakes. Here are some pitfalls to avoid.

Avoiding Random Cleaning Solutions

Firstly, not all cleaners are safe. Household sprays might seem tempting. However, they can harm your desktop. Stick to recommended solutions. For screens, avoid ammonia-based cleaners. They can strip anti-glare coatings.

Not Overdoing Compressed Air

Compressed air is handy. Yet, using it wrongly can cause damage. Always hold cans upright. Spraying at angles releases liquid. This can harm components. Also, avoid spinning fans with air. It can damage bearings.

Steering Clear of Vacuum Cleaners

You might think, “Why not vacuum?” It seems efficient. However, vacuums generate static electricity. This poses a risk to sensitive parts. Instead, opt for soft brushes or compressed air.

Not Forcing Connections

Next, be gentle with cables. Forcing them damages ports. Always check orientations. Connectors have specific shapes for a reason. Don’t force square pegs into round holes.

Skipping Software Updates

It’s easy to dismiss update notifications. They seem pesky. But, they’re crucial. Updates patch vulnerabilities. They also enhance performance. Always keep software up-to-date. This includes operating systems and drivers.

Not Overlooking Physical Environment

Lastly, where your desktop sits matters. Avoid placing it near heaters. Excessive heat affects performance. Also, steer clear of direct sunlight. It can cause overheating. Ensure ample ventilation. Desktops need to breathe.

In conclusion, while maintenance is vital, it’s essential to do it right. Avoiding common pitfalls ensures your desktop’s longevity. It also guarantees optimal performance.

Remember, sometimes what you don’t do is as important as what you do. Keep these don’ts in mind. Your desktop will thank you!

10. Where to Get Professional Desktop Cleaning Service in Singapore

Looking for top-notch desktop cleaning in Singapore? Your search ends here. We recommend Volta PC Upgrade & Repair. Located in the heart of Singapore, they specialize in desktop repair, upgrade and maintenance. From thorough internal cleaning to software optimization, their experts handle it all.

Choosing a professional ensures your desktop gets the care it deserves. Volta PC Upgrade & Repair’s team uses state-of-the-art tools and techniques. Plus, their in-depth knowledge ensures safe and efficient cleaning. Beyond desktop cleaning, if you’re considering an upgrade or need any repairs, they’ve got you covered.

With Volta PC Upgrade & Repair, you’re not just getting a service; you’re investing in your desktop’s longevity. So, next time your desktop needs some TLC, you know where to go!

Address:

  • Tai Seng Branch: 8 Burn Road #01-04, Trivex, Singapore 369977
  • Jurong Branch: Blk 132 #01-279C, Jurong Gateway Road, Singapore 600132

Contact:

Whatsapp us | Call 69500453 | Telegram us

X