Should I upgrade my old laptop HDD to SSD?

Welcome to the transformative world of laptop upgrades! Are you contemplating an upgrade from an HDD to an SSD in your laptop? You’re making a smart move. This simple change can revolutionize your device’s performance. In this guide, we’ll walk you through every step of the process. Let’s dive into the world of SSDs and discover how they can breathe new life into your laptop. Firstly, let’s address the elephant in the room: Why upgrade your laptop’s HDD to an SSD? The answer lies in the superior speed, reliability, and efficiency of SSDs. Unlike the older HDD technology, SSDs don’t rely on moving parts. Therefore, they offer quicker access to your data and a noticeable boost in your laptop’s speed. In addition, SSDs consume less power, which can lead to longer battery life. However, upgrading from an HDD to an SSD might seem daunting. But worry not! We’ve simplified the process into manageable steps. This guide ensures that even those less tech-savvy can confidently make the switch. Our focus here is not just on the ‘how’ but also on the ‘why’. We aim to provide you with all the knowledge you need to make an informed decision. So, are you ready to take the leap and upgrade your laptop HDD to SSD? Let’s get started on this journey together. By the end of this guide, you’ll be equipped with all the information you need to upgrade your laptop successfully. Stay tuned for a seamless, step-by-step walkthrough of the entire process.

Should I upgrade my old laptop HDD to SSD?

  In the ever-evolving world of technology, keeping your laptop at its peak performance is crucial. Upgrading your laptop HDD to SSD stands as a game-changer in this pursuit. But why should you consider this upgrade?

The reasons are compelling and multifaceted.

Firstly, speed is a significant factor. SSDs, known for their lightning-fast performance, drastically reduce boot times and accelerate data access. This speed boost not only improves your overall computing experience but also enhances productivity. For instance, an SSD can load programs and files in a fraction of the time it takes an HDD. Secondly, SSDs offer unmatched reliability. The absence of moving parts in SSDs reduces the risk of mechanical failures. Consequently, your data remains safer compared to traditional HDDs. This reliability is crucial, especially when you rely heavily on your laptop for work or personal use. Thirdly, durability plays a key role. SSDs are more resistant to physical shock, making them less prone to damage. This trait is particularly beneficial for those who travel frequently or use their laptops in various environments. Energy efficiency is another compelling reason to upgrade. SSDs consume less power than HDDs, leading to longer battery life for your laptop. This efficiency is not only beneficial for your device’s lifespan but also for the environment. Lastly, the upgrade process itself has become more accessible and user-friendly. With a plethora of tools and guides available, switching from HDD to SSD is no longer a task reserved for tech experts. In summary, upgrading your laptop’s HDD to an SSD offers a multitude of benefits: speed, reliability, durability, and energy efficiency. This upgrade is a smart investment in your laptop’s future, ensuring it stays relevant and efficient in a fast-paced digital world. Stay tuned for the next sections where we delve into the preparation and execution of this transformative upgrade.

Preparing for the SSD Upgrade

Embarking on the journey to upgrade your laptop HDD to SSD requires preparation. This preparation is key to a smooth and successful upgrade process. Let’s explore the steps you need to take before making the switch.

First and foremost, safeguarding your data is crucial.

Begin by creating a comprehensive backup of your laptop’s hard drive. This backup will serve as a safety net, ensuring that no valuable data is lost during the upgrade. You can use Windows’ built-in backup utilities or opt for reliable third-party software. The aim here is to create a system image backup, a complete snapshot of your current hard drive.

Next, focus on organizing your data.

This step involves transferring larger files, such as photos and videos, to an external storage device. Doing so not only frees up space but also simplifies the data migration process. Remember, the less data you have to clone, the quicker and smoother the transition will be.

Another crucial step is cleaning up your current hard drive.

This clean-up can involve uninstalling unused programs and deleting temporary files. Tools like Disk Cleanup are invaluable in this process. A cleaner drive not only facilitates a more efficient cloning process but also ensures that your new SSD isn’t cluttered with unnecessary data from the start.

Additionally, familiarizing yourself with the SSD you’ve chosen is important.

Ensure you understand its specifications and compatibility with your laptop. This understanding will help you during the installation process and ensure that the SSD functions optimally in your device.

Lastly, gather all the necessary tools and equipment for the upgrade.

This includes a USB-SATA adapter for connecting the SSD to your laptop and the appropriate screwdrivers for opening your laptop’s casing. Being well-prepared with the right tools will make the physical installation of the SSD a breeze. In conclusion, preparing for an SSD upgrade involves thorough data backup, data organization, drive cleanup, understanding your SSD, and assembling the right tools. By following these steps, you set the stage for a seamless transition from HDD to SSD, paving the way for enhanced laptop performance and efficiency. Stay tuned for the upcoming sections where we will guide you through the cloning and installation processes.

Choosing the Right SSD

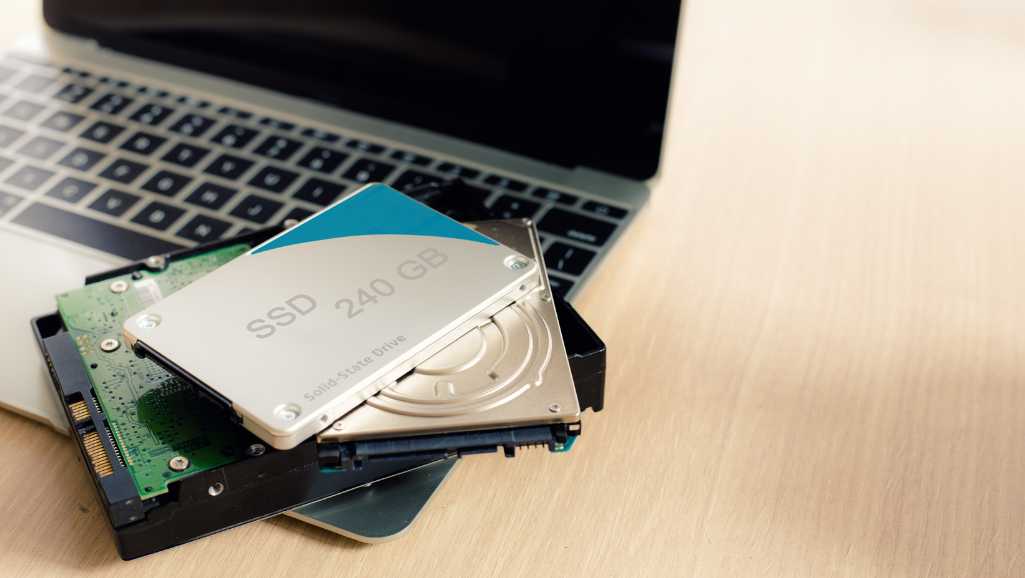
Photo via Windows Central

As you prepare to upgrade your laptop HDD to SSD, selecting the right SSD is a crucial step. This choice can significantly impact your laptop’s performance and compatibility. Let’s break down the factors to consider in making an informed decision.

Firstly, consider the size and storage capacity of the SSD.

SSDs come in various sizes, and it’s essential to choose one that fits your laptop. Additionally, think about how much storage you need. If you store a lot of large files or applications, opting for a larger capacity SSD makes sense. However, for basic computing needs, a smaller SSD may suffice.

Secondly, the type of SSD matters.

There are different types of SSDs, such as SATA and NVMe, each with its own set of advantages. SATA SSDs are common and compatible with most laptops, making them a safe choice. NVMe SSDs, on the other hand, offer faster performance but require a compatible slot. Ensure your laptop supports the type of SSD you choose.

Thirdly, the brand of the SSD can influence its reliability and performance.

Well-known brands generally offer more dependable SSDs with better warranties. Researching and reading reviews can guide you in selecting a reputable brand.

Moreover, consider the price of the SSD.

While you don’t want to compromise on quality, it’s important to find an SSD that fits your budget. Sometimes, a mid-range SSD can offer the best balance between cost and performance.

Finally, check the compatibility of the SSD with your laptop model.

Not all SSDs work with all laptops. Verify that the SSD you choose is compatible with your specific laptop model. This compatibility ensures a smooth upgrade process without any hardware conflicts. In summary, choosing the right SSD involves considering its size, type, brand, price, and compatibility with your laptop. By paying attention to these factors, you can select an SSD that enhances your laptop’s performance and fits your needs. With the right SSD in hand, you’re one step closer to a successful upgrade from HDD to SSD. Stay tuned for the next sections, where we’ll guide you through the cloning and installation processes.

Cloning Your Old HDD to the New SSD

Photo via reneelab

The next critical step in your journey to upgrade your laptop HDD to SSD is cloning the old hard drive to the new SSD. Cloning is a straightforward process that copies everything from your current HDD to your new SSD. This includes your operating system, applications, settings, and personal files. Let’s dive into how you can accomplish this seamlessly.

To start, you’ll need cloning software.

There are many reliable options available, such as AOMEI Backupper Professional or MiniTool Partition Wizard. These tools are designed to make the cloning process as easy as possible, even for those who are not tech-savvy. Choose software that’s compatible with your laptop and easy for you to navigate.

Once you have your cloning software, the first step is to connect the SSD to your laptop.

This is typically done using a USB-to-SATA adapter. Ensure the connection is secure and that your laptop recognizes the new SSD. Next, open your chosen cloning software and select the ‘Clone’ option. This will initiate the process of copying your current HDD to your new SSD. In the software, select your old HDD as the ‘source’ and the new SSD as the ‘destination’. The software will then guide you through the cloning process. It’s important to follow these steps carefully to ensure a successful clone. During the cloning process, you may have options such as resizing partitions on the new SSD. If you’re cloning to a larger SSD, you can expand the partitions to use all the available space. Conversely, if your SSD is smaller, you’ll need to ensure the data from the HDD can fit within the smaller capacity.

After the cloning process is complete, it’s crucial to verify that everything has been copied correctly.

Check that all files, applications, and system settings are present and functioning. Finally, keep in mind that cloning is a critical step in ensuring a smooth transition from HDD to SSD. It not only saves you the hassle of reinstalling your operating system and applications but also keeps your personal settings and files intact. With your old HDD successfully cloned to your new SSD, you’re almost ready to experience the enhanced performance of your upgraded laptop. In summary, cloning your HDD to your new SSD is a pivotal step in the upgrade process. It requires the right software, careful connection of your SSD, and diligent following of the cloning steps. By doing so, you ensure a hassle-free transition to a faster and more reliable SSD in your laptop.

Installing the SSD

Now that you have successfully cloned your old HDD to the new SSD, it’s time to physically install the SSD in your laptop. This step is crucial in your journey to upgrade your laptop HDD to SSD. Let’s walk through the process step by step, ensuring a smooth installation.

First, ensure your laptop is turned off and disconnected from any power source.

Safety first! If your laptop has a removable battery, take it out. This precaution prevents any potential electrical hazards. Next, locate the hard drive compartment on your laptop. This is usually on the underside of the laptop, often marked by a small hard drive symbol. You’ll need a screwdriver to remove the panel covering this compartment. Remember to keep all screws in a safe place; you’ll need them to reattach the panel later. Carefully remove the old HDD. It’s typically secured with a few more screws or a holding bracket. Handle the HDD gently to avoid damaging it, especially if you plan to use it as a backup or external storage.

Now, it’s time to install the new SSD.

Place the SSD in the same slot where the HDD was. If your SSD came with a frame or adapter, use it to ensure the SSD fits securely in the slot. Reattach any screws or brackets to secure the SSD in place. Once the SSD is securely installed, reattach the hard drive compartment panel. Use the screws you set aside earlier to close the compartment. Finally, turn on your laptop. Enter the BIOS settings to ensure the laptop recognizes the new SSD as the primary boot device. This step is crucial for your laptop to start up correctly with the new SSD.

Congratulations! You’ve successfully installed the SSD in your laptop.

This upgrade not only boosts your laptop’s performance but also marks a significant milestone in your tech-savvy journey. With the SSD installed, you’re now set to enjoy faster boot times, quicker file access, and overall improved laptop efficiency. In summary, installing the SSD in your laptop involves several key steps: preparing your laptop, removing the old HDD, installing the new SSD, and ensuring it’s recognized as the primary boot device. By following these steps, you complete a crucial phase in upgrading your laptop HDD to SSD, paving the way for an enhanced computing experience.

Post-Installation Setup

After successfully installing your new SSD in the laptop – a major step in upgrading your laptop HDD to SSD – it’s time to focus on the post-installation setup. This stage is crucial to ensure your laptop runs smoothly with the new SSD.

First, power on your laptop and access the BIOS or UEFI settings.

This step is usually done by pressing a specific key (like F2, F10, or Del) during startup. In the BIOS menu, check to make sure the system recognizes the new SSD. It should appear in the list of storage devices. If it doesn’t, recheck the physical connections to ensure the SSD is properly installed. Next, set the SSD as the primary boot device. This change directs your laptop to boot from the SSD instead of any other drive. Look for a section in the BIOS named ‘Boot Order’ or ‘Boot Priority.’ Here, select your new SSD as the first option. This setting is essential for the laptop to start up correctly from the SSD. After adjusting the boot order, save your changes and exit the BIOS. Your laptop will then reboot. If you’ve cloned your old HDD to the SSD, your laptop should start up as usual, but noticeably faster. It’s a moment to savor – the first boot from your new SSD!

Now, it’s time to check the health and performance of your SSD.

Windows has built-in tools to do this, like the ‘Optimize Drives’ tool. This tool can help you analyze and optimize your SSD for better performance. Regular checks will ensure your SSD continues to run efficiently. Lastly, update your operating system and drivers. An updated system will support the new SSD better and improve overall performance. Check for updates in your operating system’s settings and install any available updates for your SSD’s firmware. In conclusion, the post-installation setup involves checking the BIOS settings, setting the SSD as the primary boot device, ensuring the SSD’s health, and updating your system. These steps are vital to maximize the benefits of your new SSD, marking the successful completion of your laptop HDD to SSD upgrade. With everything set up correctly, you’re now ready to enjoy a faster, more responsive laptop.

Troubleshooting Common Issues

After upgrading your laptop HDD to SSD, you might encounter some issues. Don’t worry; most of these are common and easily solvable. In this section, we’ll cover some typical problems and how to fix them, ensuring your upgrade process is smooth and trouble-free.

Issue 1: Laptop Doesn’t Recognize the New SSD

If your laptop doesn’t recognize the new SSD after installation, first check the physical connections. Ensure the SSD is properly seated in the slot and the connections are secure. If the issue persists, access your laptop’s BIOS and check if the SSD is listed there. If it’s not, you might need to revisit the installation steps or consult with the SSD manufacturer for further guidance.

Issue 2: Laptop Fails to Boot from SSD

If your laptop doesn’t boot from the new SSD, the problem might be the boot order in the BIOS. Enter the BIOS setup and ensure the SSD is set as the primary boot device. If it’s already set and the problem continues, consider checking the SSD for errors using disk management tools or consider re-cloning the drive if necessary.

Issue 3: Slow Performance After Upgrade

Experiencing slow performance post-upgrade is rare, but it can happen. To resolve this, first, check if the SSD firmware is up to date. Manufacturers often release firmware updates that improve performance and compatibility. Additionally, ensure that the SSD is correctly aligned and optimized for use, which can be done using the optimization tools provided by your operating system.

Issue 4: Data Loss or Corruption

To prevent data loss, it’s crucial to back up your data before starting the upgrade process. If you encounter data corruption after the upgrade, use data recovery tools to try and salvage the corrupted files. Moving forward, regularly back up your data to prevent such issues.

Issue 5: SSD Not Showing Full Capacity

If your new SSD shows less capacity than expected, it might be due to partition issues. Use a disk management tool to check and adjust the partitions on your SSD. Sometimes, a portion of the SSD’s storage might be unallocated, which can be resolved through proper partitioning. In conclusion, while upgrading your laptop HDD to SSD is generally a smooth process, being prepared to troubleshoot common issues is essential. Most problems have straightforward solutions, and with a bit of patience and the right approach, you can easily overcome them. This proactive troubleshooting ensures that you enjoy the full benefits of your new SSD without significant hurdles.

Conclusion

As we wrap up this comprehensive guide on upgrading your laptop HDD to SSD, let’s revisit the key points and reflect on the journey. This upgrade, though seemingly daunting at first, can significantly boost your laptop’s performance and extend its usable life. You’ve learned the compelling reasons to make the switch to SSD – from speed and reliability to energy efficiency. We navigated through the essential preparatory steps, ensuring your data’s safety and the readiness of your system for the upgrade. Choosing the right SSD was crucial, and you now know what factors to consider to make the best decision for your needs. The cloning process was a pivotal step, enabling a seamless transition of your data from the old HDD to the new SSD. Installing the SSD was more than a technical task; it marked a significant upgrade in your laptop’s life. The post-installation setup was crucial in ensuring your system recognized and optimized the new SSD, making your laptop ready for use. We also covered troubleshooting common issues, equipping you with the knowledge to handle any bumps along the way. Now, your laptop is not just upgraded; it’s transformed, with enhanced speed, efficiency, and performance. Remember, upgrading your laptop HDD to SSD is an investment in your device’s future. It’s a step towards keeping pace with advancing technology and ensuring your laptop remains a reliable and efficient tool in your daily life. Thank you for following this guide. Whether you’re a tech enthusiast or someone simply looking to improve your laptop’s performance, we hope you found this journey enlightening and empowering. Here’s to a smoother, faster, and more efficient computing experience with your newly upgraded laptop!

Where to Upgrade Laptop HDD to SSD in Singapore?

In Singapore, if you’re considering an upgrade from an HDD to an SSD for your laptop, Volta PC Upgrade & Repair presents itself as an excellent service provider. Known for their expertise in laptop upgrades and repairs, they offer a range of services to enhance your laptop’s performance. At Volta PC Upgrade & Repair, they specialize in identifying the most suitable SSD for your laptop’s model and requirements. Whether you need a standard SATA SSD or a faster NVMe SSD, their team can provide you with the best options for your device. Their skilled technicians ensure that the upgrade process is smooth, safeguarding your data during the transition. What sets Volta apart is their commitment to customer satisfaction. They provide a comprehensive service, including data cloning, which involves transferring your existing data from the old HDD to the new SSD seamlessly. This attention to detail means you won’t have to worry about losing any important files or dealing with data migration hassles. Their service is also user-friendly, especially beneficial for those who are not very tech-oriented. The team at Volta PC Upgrade & Repair takes the time to explain the process and offers support even after the upgrade, ensuring you get the most out of your enhanced laptop. For more information about their services and to schedule an appointment, you can visit their website: Volta PC Upgrade & Repair. This is your go-to place for a reliable, efficient, and customer-oriented HDD to SSD upgrade service in Singapore.

Contact Volta PC Upgrade & Repair Today!

  • Address:
    • Tai Seng Branch: 8 Burn Road #01-04, Trivex, Singapore 369977
    • Jurong Branch: Blk 132 #01-279C, Jurong Gateway Road, Singapore 6001324
  • ContactWhatsapp us | Call 69500453 | Telegram us

MORE ON LAPTOP SSD UPGRADE

X